Software Engineering for Self-Directed Learners CS2113/T edition - 2022 Aug-Nov
This is a printer-friendly version. It omits exercises, optional topics (i.e., four-star topics), and other extra content such as learning outcomes.
SECTION: SOFTWARE ENGINEERING
Pros and Cons
The following description of the Joys of the Programming Craft was taken from Chapter 1 of the famous book The Mythical Man-Month, by Frederick P. Brooks.
Why is programming fun? What delights may its practitioner expect as his reward?
First is the sheer joy of making things. As the child delights in his mud pie, so the adult enjoys building things, especially things of his own design. I think this delight must be an image of God's delight in making things, a delight shown in the distinctness and newness of each leaf and each snowflake.
Second is the pleasure of making things that are useful to other people. Deep within, you want others to use your work and to find it helpful. In this respect the programming system is not essentially different from the child's first clay pencil holder "for Daddy's office."
Third is the fascination of fashioning complex puzzle-like objects of interlocking moving parts and watching them work in subtle cycles, playing out the consequences of principles built in from the beginning. The programmed computer has all the fascination of the pinball machine or the jukebox mechanism, carried to the ultimate.
Fourth is the joy of always learning, which springs from the nonrepeating nature of the task. In one way or another the problem is ever new, and its solver learns something: sometimes practical, sometimes theoretical, and sometimes both.
Finally, there is the delight of working in such a tractable medium. The programmer, like the poet, works only slightly removed from pure thought-stuff. He builds his castles in the air, from air, creating by the exertion of the imagination. Few media of creation are so flexible, so easy to polish and rework, so readily capable of realizing grand conceptual structures....
Yet the program construct, unlike the poet's words, is real in the sense that it moves and works, producing visible outputs separate from the construct itself. It prints results, draws pictures, produces sounds, moves arms. The magic of myth and legend has come true in our time. One types the correct incantation on a keyboard, and a display screen comes to life, showing things that never were nor could be.
Programming then is fun because it gratifies creative longings built deep within us and delights sensibilities you have in common with all men.
Not all is delight, however, and knowing the inherent woes makes it easier to bear them when they appear.
First, one must perform perfectly. The computer resembles the magic of legend in this respect, too. If one character, one pause, of the incantation is not strictly in proper form, the magic doesn't work. Human beings are not accustomed to being perfect, and few areas of human activity demand it. Adjusting to the requirement for perfection is, I think, the most difficult part of learning to program.
Next, other people set one's objectives, provide one's resources, and furnish one's information. One rarely controls the circumstances of his work, or even its goal. In management terms, one's authority is not sufficient for his responsibility. It seems that in all fields, however, the jobs where things get done never have formal authority commensurate with responsibility. In practice, actual (as opposed to formal) authority is acquired from the very momentum of accomplishment.
The dependence upon others has a particular case that is especially painful for the system programmer. He depends upon other people's programs. These are often maldesigned, poorly implemented, incompletely delivered (no source code or test cases), and poorly documented. So he must spend hours studying and fixing things that in an ideal world would be complete, available, and usable.
The next woe is that designing grand concepts is fun; finding nitty little bugs is just work. With any creative activity come dreary hours of tedious, painstaking labor, and programming is no exception.
Next, one finds that debugging has a linear convergence, or worse, where one somehow expects a quadratic sort of approach to the end. So testing drags on and on, the last difficult bugs taking more time to find than the first.
The last woe, and sometimes the last straw, is that the product over which one has labored so long appears to be obsolete upon (or before) completion. Already colleagues and competitors are in hot pursuit of new and better ideas. Already the displacement of one's thought-child is not only conceived, but scheduled.
This always seems worse than it really is. The new and better product is generally not available when one completes his own; it is only talked about. It, too, will require months of development. The real tiger is never a match for the paper one, unless actual use is wanted. Then the virtues of reality have a satisfaction all their own.
Of course the technological base on which one builds is always advancing. As soon as one freezes a design, it becomes obsolete in terms of its concepts. But implementation of real products demands phasing and quantizing. The obsolescence of an implementation must be measured against other existing implementations, not against unrealized concepts. The challenge and the mission are to find real solutions to real problems on actual schedules with available resources.
This then is programming, both a tar pit in which many efforts have floundered and a creative activity with joys and woes all its own. For many, the joys far outweigh the woes....
SECTION: PROGRAMMING PARADIGMS
What
Object-Oriented Programming (OOP) is a programming paradigm. A programming paradigm guides programmers to analyze programming problems, and structure programming solutions, in a specific way.
Programming languages have traditionally divided the world into two parts—data and operations on data. Data is static and immutable, except as the operations may change it. The procedures and functions that operate on data have no lasting state of their own; they’re useful only in their ability to affect data.
This division is, of course, grounded in the way computers work, so it’s not one that you can easily ignore or push aside. Like the equally pervasive distinctions between matter and energy and between nouns and verbs, it forms the background against which you work. At some point, all programmers—even object-oriented programmers—must lay out the data structures that their programs will use and define the functions that will act on the data.
With a procedural programming language like C, that’s about all there is to it. The language may offer various kinds of support for organizing data and functions, but it won’t divide the world any differently. Functions and data structures are the basic elements of design.
Object-oriented programming doesn’t so much dispute this view of the world as restructure it at a higher level. It groups operations and data into modular units called objects and lets you combine objects into structured networks to form a complete program. In an object-oriented programming language, objects and object interactions are the basic elements of design.
Some other examples of programming paradigms are:
| Paradigm | Programming Languages |
|---|---|
| Procedural Programming paradigm | C |
| Functional Programming paradigm | F#, Haskell, Scala |
| Logic Programming paradigm | Prolog |
Some programming languages support multiple paradigms.
Java is primarily an OOP language but it supports limited forms of functional programming and it can be used to (although not recommended) write procedural code. e.g. se-edu/addressbook-level1
JavaScript and Python support functional, procedural, and OOP programming.
What
Every object has both state (data) and behavior (operations on data). In that, they’re not much different from ordinary physical objects. It’s easy to see how a mechanical device, such as a pocket watch or a piano, embodies both state and behavior. But almost anything that’s designed to do a job does, too. Even simple things with no moving parts such as an ordinary bottle combine state (how full the bottle is, whether or not it’s open, how warm its contents are) with behavior (the ability to dispense its contents at various flow rates, to be opened or closed, to withstand high or low temperatures).
It’s this resemblance to real things that gives objects much of their power and appeal. They can not only model components of real systems, but equally as well fulfill assigned roles as components in software systems.
Object Oriented Programming (OOP) views the world as a network of interacting objects.
A real world scenario viewed as a network of interacting objects:
You are asked to find out the average age of a group of people Adam, Beth, Charlie, and Daisy. You take a piece of paper and pen, go to each person, ask for their age, and note it down. After collecting the age of all four, you enter it into a calculator to find the total. And then, use the same calculator to divide the total by four, to get the average age. This can be viewed as the objects You, Pen, Paper, Calculator, Adam, Beth, Charlie, and Daisy interacting to accomplish the end result of calculating the average age of the four persons. These objects can be considered as connected in a certain network of certain structure.
OOP solutions try to create a similar object network inside the computer’s memory – a sort of virtual simulation of the corresponding real world scenario – so that a similar result can be achieved programmatically.
OOP does not demand that the virtual world object network follow the real world exactly.
Our previous example can be tweaked a bit as follows:
- Use an object called
Mainto represent your role in the scenario. - As there is no physical writing involved, you can replace the
PenandPaperwith an object calledAgeListthat is able to keep a list of ages.
Every object has both state (data) and behavior (operations on data).
| Object | Real World? | Virtual World? | Example of State (i.e. Data) | Examples of Behavior (i.e. Operations) |
|---|---|---|---|---|
| Adam | Name, Date of Birth | Calculate age based on birthday | ||
| Pen | - | Ink color, Amount of ink remaining | Write | |
| AgeList | - | Recorded ages | Give the number of entries, Accept an entry to record | |
| Calculator | Numbers already entered | Calculate the sum, divide | ||
| You/Main | Average age, Sum of ages | Use other objects to calculate |
Every object has an interface and an implementation.
Every real world object has:
- an interface through which other objects can interact with it
- an implementation that supports the interface but may not be accessible to the other object
The interface and implementation of some real-world objects in our example:
- Calculator: the buttons and the display are part of the interface; circuits are part of the implementation.
- Adam: In the context of our 'calculate average age' example, the interface of Adam consists of requests that Adam will respond to, e.g. "Give age to the nearest year, as at Jan 1st of this year" "State your name"; the implementation includes the mental calculation Adam uses to calculate the age which is not visible to other objects.
Similarly, every object in the virtual world has an interface and an implementation.
The interface and implementation of some virtual-world objects in our example:
Adam: the interface might have a methodgetAge(Date asAt); the implementation of that method is not visible to other objects.
Objects interact by sending messages. Both real world and virtual world object interactions can be viewed as objects sending messages to each other. The message can result in the sender object receiving a response and/or the receiver object’s state being changed. Furthermore, the result can vary based on which object received the message, even if the message is identical (see rows 1 and 2 in the example below).
Examples:
| World | Sender | Receiver | Message | Response | State Change |
|---|---|---|---|---|---|
| Real | You | Adam | "What is your name?" | "Adam" | - |
| Real | as above | Beth | as above | "Beth" | - |
| Real | You | Pen | Put nib on paper and apply pressure | Makes a mark on your paper | Ink level goes down |
| Virtual | Main | Calculator (current total is 50) | add(int i): int i = 23 | 73 | total = total + 23 |
Objects as Abstractions
The concept of Objects in OOP is an abstraction mechanism because it allows us to abstract away the lower level details and work with bigger granularity entities i.e. ignore details of data formats and the method implementation details and work at the level of objects.
You can deal with a Person object that represents the person Adam and query the object for Adam's age instead of dealing with details such as Adam’s date of birth (DoB), in what format the DoB is stored, the algorithm used to calculate the age from the DoB, etc.
Encapsulation Of Objects
Encapsulation protects an implementation from unintended actions and from inadvertent access.
-- Object-Oriented Programming with Objective-C, Apple
An object is an encapsulation of some data and related behavior in terms of two aspects:
1. The packaging aspect: An object packages data and related behavior together into one self-contained unit.
2. The information hiding aspect: The data in an object is hidden from the outside world and are only accessible using the object's interface.
What
Writing an OOP program is essentially writing instructions that the computer will use to,
- create the virtual world of the object network, and
- provide it the inputs to produce the outcome you want.
A class contains instructions for creating a specific kind of objects. It turns out sometimes multiple objects keep the same type of data and have the same behavior because they are of the same kind. Instructions for creating a 'kind' (or ‘class’) of objects can be done once and those same instructions can be used to objects of that kind. You call such instructions a Class.
Classes and objects in an example scenario
Consider the example of writing an OOP program to calculate the average age of Adam, Beth, Charlie, and Daisy.
Instructions for creating objects Adam, Beth, Charlie, and Daisy will be very similar because they are all of the same kind: they all represent ‘persons’ with the same interface, the same kind of data (i.e. name, dateOfBirth, etc.), and the same kind of behavior (i.e. getAge(Date), getName(), etc.). Therefore, you can have a class called Person containing instructions on how to create Person objects and use that class to instantiate objects Adam, Beth, Charlie, and Daisy.
Similarly, you need classes AgeList, Calculator, and Main classes to instantiate one each of AgeList, Calculator, and Main objects.
| Class | Objects |
|---|---|
Person | objects representing Adam, Beth, Charlie, Daisy |
AgeList | an object to represent the age list |
Calculator | an object to do the calculations |
Main | an object to represent you (i.e., the one who manages the whole operation) |
Class Level Members
While all objects of a class have the same attributes, each object has its own copy of the attribute value.
All Person objects have the name attribute but the value of that attribute varies between Person objects.
However, some attributes are not suitable to be maintained by individual objects. Instead, they should be maintained centrally, shared by all objects of the class. They are like ‘global variables’ but attached to a specific class. Such variables whose value is shared by all instances of a class are called class-level attributes.
The attribute totalPersons should be maintained centrally and shared by all Person objects rather than copied at each Person object.
Similarly, when a normal method is being called, a message is being sent to the receiving object and the result may depend on the receiving object.
Sending the getName() message to the Adam object results in the response "Adam" while sending the same message to the Beth object results in the response "Beth".
However, there can be methods related to a specific class but not suitable for sending messages to a specific object of that class. Such methods that are called using the class instead of a specific instance are called class-level methods.
The method getTotalPersons() is not suitable to send to a specific Person object because a specific object of the Person class should not have to know about the total number of Person objects.
Class-level attributes and methods are collectively called class-level members (also called static members sometimes because some programming languages use the keyword static to identify class-level members). They are to be accessed using the class name rather than an instance of the class.
Enumerations
An Enumeration is a fixed set of values that can be considered as a data type. An enumeration is often useful when using a regular data type such as int or String would allow invalid values to be assigned to a variable.
Suppose you want a variable called priority to store the priority of something. There are only three priority levels: high, medium, and low. You can declare the variable priority as of type int and use only values 2, 1, and 0 to indicate the three priority levels. However, this opens the possibility of an invalid value such as 9 being assigned to it. But if you define an enumeration type called Priority that has three values HIGH, MEDIUM and LOW only, a variable of type Priority will never be assigned an invalid value because the compiler is able to catch such an error.
Priority: HIGH, MEDIUM, LOW
What
Objects in an OO solution need to be connected to each other to form a network so that they can interact with each other. Such connections between objects are called associations.
Suppose an OOP program for managing a learning management system creates an object structure to represent the related objects. In that object structure you can expect to have associations between a Course object that represents a specific course and Student objects that represent students taking that course.
Associations in an object structure can change over time.
To continue the previous example, the associations between a Course object and Student objects can change as students enroll in the module or drop the module over time.
Associations among objects can be generalized as associations between the corresponding classes too.
In our example, as some Course objects can have associations with some Student objects, you can view it as an association between the Course class and the Student class.
Implementing associations
You use instance level variables to implement associations.
Navigability
When two classes are linked by an association, it does not necessarily mean the two objects taking part in an instance of the association knows about (i.e., has a reference to) each other. The concept of which object in the association knows about the other object is called navigability.
Navigability can be unidirectional or bidirectional. Suppose there is an association between the classes Box and Rope, and the Box object b and the Rope object r is taking part in one instance of that association.
- Unidirectional: If the navigability is from
BoxtoRope,bwill have a reference torbutrwill not have a reference tob. Similarly, if the navigability is in the other direction,rwill have a reference tobbutbwill not have a reference tor. - Bidirectional:
bwill have a reference torandrwill have a reference tobi.e., the two objects will be pointing to each other for the same single instance of the association.
Note that two unidirectional associations in opposite directions do not add up to a single bidirectional association.
In the code below, there is a bidirectional association between the Person class and the Cat class i.e., if Person p is the owner of the Cat c, p it will result in p and c having references to each other.
class Person {
    Cat pet;
    //...
}

class Cat{
    Person owner;
    //...
}
class Person:

  def __init__(self):
    self.pet = None  # a Cat object


class Cat:

  def __init__(self):
    self.owner = None  # a Person object
The code below has two unidirectional associations between the Person class and the Cat class (in opposite directions) because the breeder is not necessarily the same person keeping the cat as a pet i.e., there are two separate associations here, which rules out it being a bidirectional association.
class Person {
    Cat pet;
    //...
}

class Cat{
    Person breeder;
    //...
}
class Person:

  def __init__(self):
    self.pet = None  # a Cat object


class Cat:

  def __init__(self):
    self.breeder = None  # a Person object
Multiplicity
Multiplicity is the aspect of an OOP solution that dictates how many objects take part in each association.
The multiplicity of the association between Course objects and Student objects tells you how many Course objects can be associated with one Student object and vice versa.
Implementing multiplicity
A normal instance-level variable gives us a 0..1 multiplicity (also called optional associations) because a variable can hold a reference to a single object or null.
In the code below, the Logic class has a variable that can hold 0..1 i.e., zero or one Minefield objects.
class Logic {
    Minefield minefield;
    // ...
}

class Minefield {
    //...
}
class Logic:

  def __init__(self):
    self.minefield = None

  # ...


class Minefield:
  # ...
A variable can be used to implement a 1 multiplicity too (also called compulsory associations).
In the code below, the Logic class will always have a ConfigGenerator object, provided the variable is not set to null at some point.
class Logic {
    ConfigGenerator cg = new ConfigGenerator();
    ...
}
class Logic:

  def __init__(self):
    self.config_gen = ConfigGenerator()
Bidirectional associations require matching variables in both classes.
In the code below, the Foo class has a variable to hold a Bar object and vice versa i.e., each object can have an association with an object of the other type.
class Foo {
    Bar bar;
    //...
}

class Bar {
    Foo foo;
    //...
}
class Foo:

  def __init__(self, bar):
    self.bar = bar;


class Bar:

  def __init__(self, foo):
    self.foo = foo;
To implement other multiplicities, choose a suitable data structure such as Arrays, ArrayLists, HashMaps, Sets, etc.
This code uses a two-dimensional array to implement a 1-to-many association from the Minefield to Cell.
class Minefield {
    Cell[][] cell;
    ...
}
class Minefield:

  def __init__(self):
    self.cells = {1:[], 2:[], 3:[]}
Dependencies
In the context of OOP associations, a dependency is a need for one class to depend on another without having a direct association in the same direction. Reason for the exclusion: If there is an association from class Foo to class Bar (i.e., navigable from Foo to Bar), that means Foo is obviously dependent on Bar and hence there is no point in mentioning dependency specifically. In other words, we are only concerned about non-obvious dependencies here. One cause of such dependencies is interactions between objects that do not have a long-term link between them.
A Course class can have a dependency on a Registrar class because the Course class needs to refer to the Registrar class to obtain the the maximum number of students it can support (e.g., Registrar.MAX_COURSE_CAPACITY).
In the code below, Foo has a dependency on Bar but it is not an association because it is only a interaction and there is no long term relationship between a Foo object and a Bar object. i.e. the Foo object does not keep the Bar object it receives as a parameter.
class Foo {

    int calculate(Bar bar) {
        return bar.getValue();
    }
}

class Bar {
    int value;

    int getValue() {
        return value;
    }
}
class Foo:

    def calculate(self, bar):
        return bar.value;

class Bar:

    def __init__(self, value):
      self.value = value
Composition
A composition is an association that represents a strong whole-part relationship. When the whole is destroyed, parts are destroyed too i.e., the part should not exist without being attached to a whole.
A Board (used for playing board games) consists of Square objects.
Composition also implies that there cannot be cyclical links.
The ‘sub-folder’ association between Folder objects is a composition type association. That means if the Folder object foo is a sub-folder of Folder object bar, bar cannot be a sub-folder of foo.
Whether a relationship is a composition can depend on the context.
Is the relationship between Email and EmailSubject composition? That is, is the email subject part of an email to the extent that an email subject cannot exist without an email?
- When modeling an application that sends emails, the answer is 'yes'.
- When modeling an application that gather analytics about email traffic, the answer may be 'no' (e.g., the application might collect just the email subjects for text analysis).
A common use of composition is when parts of a big class are carved out as smaller classes for the ease of managing the internal design. In such cases, the classes extracted out still act as parts of the bigger class and the outside world has no business knowing about them.
Cascading deletion alone is not sufficient for composition. Suppose there is a design in which Person objects are attached to Task objects and the former get deleted whenever the latter is deleted. This fact alone does not mean there is a composition relationship between the two classes. For it to be composition, a Person must be an integral part of a Task in the context of that association, at the concept level (not simply at implementation level).
Identifying and keeping track of composition relationships in the design has benefits such as helping to maintain the data integrity of the system. For example, when you know that a certain relationship is a composition, you can take extra care in your implementation to ensure that when the whole object is deleted, all its parts are deleted too.
Implementing composition
Composition is implemented using a normal variable. If correctly implemented, the ‘part’ object will be deleted when the ‘whole’ object is deleted. Ideally, the ‘part’ object may not even be visible to clients of the ‘whole’ object.
class Email {
    private Subject subject;
  ...
}
class Email:

  def __init__(self):
    self.__subject = Subject()
In this code, the Email has a composition type relationship with the Subject class, in the sense that the subject is part of the email.
Aggregation
Aggregation represents a container-contained relationship. It is a weaker relationship than composition.
SportsClub can act as a container for Person objects who are members of the club. Person objects can survive without a SportsClub object.
Implementing aggregation
Implementation is similar to that of composition except the containee object can exist even after the container object is deleted.
In the code below, there is an aggregation association between the Team class and the Person class in that a Team contains a Person object who is the leader of the team.
class Team {
    Person leader;
    ...
    void setLeader(Person p) {
        leader = p;
    }
}
class Team:

  def __init__(self):
    self.__leader = None

  def set_leader(self, person):
    self.__leader = person
Association Classes
An association class represents additional information about an association. It is a normal class but plays a special role from a design point of view.
A Man class and a Woman class are linked with a ‘married to’ association and there is a need to store the date of marriage. However, that data is related to the association rather than specifically owned by either the Man object or the Woman object. In such situations, an additional association class can be introduced, e.g. a Marriage class, to store such information.
Implementing association classes
There is no special way to implement an association class. It can be implemented as a normal class that has variables to represent the endpoint of the association it represents.
In the code below, the Transaction class is an association class that represents a transaction between a Person who is the seller and another Person who is the buyer.
class Transaction {

    //all fields are compulsory
    Person seller;
    Person buyer;
    Date date;
    String receiptNumber;

    Transaction(Person seller, Person buyer, Date date, String receiptNumber) {
        //set fields
    }
}
What
The OOP concept Inheritance allows you to define a new class based on an existing class.
For example, you can use inheritance to define an EvaluationReport class based on an existing Report class so that the EvaluationReport class does not have to duplicate data/behaviors that are already implemented in the Report class. The EvaluationReport can inherit the wordCount attribute and the print() method from the base class Report.
- Other names for Base class: Parent class, Superclass
- Other names for Derived class: Child class, Subclass, Extended class
A superclass is said to be more general than the subclass. Conversely, a subclass is said to be more specialized than the superclass.
Applying inheritance on a group of similar classes can result in the common parts among classes being extracted into more general classes.
Man and Woman behave the same way for certain things. However, the two classes cannot be simply replaced with a more general class Person because of the need to distinguish between Man and Woman for certain other things. A solution is to add the Person class as a superclass (to contain the code common to men and women) and let Man and Woman inherit from Person class.
Inheritance implies the derived class can be considered as a sub-type of the base class (and the base class is a super-type of the derived class), resulting in an is a relationship.
Inheritance does not necessarily mean a sub-type relationship exists. However, the two often go hand-in-hand. For simplicity, at this point let us assume inheritance implies a sub-type relationship.
To continue the previous example,
Womanis aPersonManis aPerson
Inheritance relationships through a chain of classes can result in inheritance hierarchies (aka inheritance trees).
Two inheritance hierarchies/trees are given below. Note that the triangle points to the parent class. Observe how the Parrot is a Bird as well as it is an Animal.

Multiple Inheritance is when a class inherits directly from multiple classes. Multiple inheritance among classes is allowed in some languages (e.g., Python, C++) but not in other languages (e.g., Java, C#).
The Honey class inherits from the Food class and the Medicine class because honey can be consumed as a food as well as a medicine (in some oriental medicine practices). Similarly, a Car is a Vehicle, an Asset and a Liability.

Overriding
Method overriding is when a sub-class changes the behavior inherited from the parent class by re-implementing the method. Overridden methods have the same name, same type signature, and same return type.
Consider the following case of EvaluationReport class inheriting the Report class:
Report methods | EvaluationReport methods | Overrides? |
|---|---|---|
print() | print() | Yes |
write(String) | write(String) | Yes |
read():String | read(int):String | No. Reason: the two methods have different signatures; This is a case of overloading (rather than overriding). |
Overloading
Method overloading is when there are multiple methods with the same name but different type signatures. Overloading is used to indicate that multiple operations do similar things but take different parameters.
Type signature: The type signature of an operation is the type sequence of the parameters. The return type and parameter names are not part of the type signature. However, the parameter order is significant.
Example:
| Method | Type Signature |
|---|---|
int add(int X, int Y) | (int, int) |
void add(int A, int B) | (int, int) |
void m(int X, double Y) | (int, double) |
void m(double X, int Y) | (double, int) |
In the case below, the calculate method is overloaded because the two methods have the same name but different type signatures (String) and (int).
calculate(String): voidcalculate(int): void
Interfaces
An interface is a behavior specification i.e. a collection of . If a class , it means the class is able to support the behaviors specified by the said interface.
There are a number of situations in software engineering when it is important for disparate groups of programmers to agree to a "contract" that spells out how their software interacts. Each group should be able to write their code without any knowledge of how the other group's code is written. Generally speaking, interfaces are such contracts. --Oracle Docs on Java
Suppose SalariedStaff is an interface that contains two methods setSalary(int) and getSalary(). AcademicStaff can declare itself as implementing the SalariedStaff interface, which means the AcademicStaff class must implement all the methods specified by the SalariedStaff interface i.e., setSalary(int) and getSalary().
A class implementing an interface results in an is-a relationship, just like in class inheritance.
In the example above, AcademicStaff is a SalariedStaff. An AcademicStaff object can be used anywhere a SalariedStaff object is expected e.g. SalariedStaff ss = new AcademicStaff().
Abstract Classes
Abstract class: A class declared as an abstract class cannot be instantiated, but it can be subclassed.
You can declare a class as abstract when a class is merely a representation of commonalities among its subclasses in which case it does not make sense to instantiate objects of that class.
The Animal class that exists as a generalization of its subclasses Cat, Dog, Horse, Tiger etc. can be declared as abstract because it does not make sense to instantiate an Animal object.
Abstract method: An abstract method is a method signature without a method implementation.
The move method of the Animal class is likely to be an abstract method as it is not possible to implement a move method at the Animal class level to fit all subclasses because each animal type can move in a different way.
A class that has an abstract method becomes an abstract class because the class definition is incomplete (due to the missing method body) and it is not possible to create objects using an incomplete class definition.
Substitutability
Every instance of a subclass is an instance of the superclass, but not vice-versa. As a result, inheritance allows substitutability: the ability to substitute a child class object where a parent class object is expected.
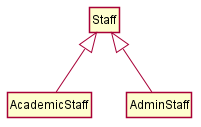
An AcademicStaff is an instance of a Staff, but a Staff is not necessarily an instance of an AcademicStaff. i.e. wherever an object of the superclass is expected, it can be substituted by an object of any of its subclasses.
The following code is valid because an AcademicStaff object is substitutable as a Staff object.
Staff staff = new AcademicStaff(); // OK
But the following code is not valid because staff is declared as a Staff type and therefore its value may or may not be of type AcademicStaff, which is the type expected by variable academicStaff.
Staff staff;
...
AcademicStaff academicStaff = staff; // Not OK
Dynamic and Static Binding
Dynamic binding ( ): a mechanism where method calls in code are at , rather than at compile time.
Overridden methods are resolved using dynamic binding, and therefore resolves to the implementation in the actual type of the object.
Consider the code below. The declared type of s is Staff and it appears as if the adjustSalary(int) operation of the Staff class is invoked.
void adjustSalary(int byPercent) {
    for (Staff s: staff) {
        s.adjustSalary(byPercent);
    }
}
However, at runtime s can receive an object of any subclass of Staff. That means the adjustSalary(int) operation of the actual subclass object will be called. If the subclass does not override that operation, the operation defined in the superclass (in this case, Staff class) will be called.
Static binding (aka early binding): When a method call is resolved at compile time.
In contrast, overloaded methods are resolved using static binding.
Note how the constructor is overloaded in the class below. The method call new Account() is bound to the first constructor at compile time.
class Account {

    Account() {
        // Signature: ()
        ...
    }

    Account(String name, String number, double balance) {
        // Signature: (String, String, double)
        ...
    }
}
Similarly, the calculateGrade method is overloaded in the code below and a method call calculateGrade("A1213232") is bound to the second implementation, at compile time.
void calculateGrade(int[] averages) { ... }
void calculateGrade(String matric) { ... }
What
Polymorphism:
The ability of different objects to respond, each in its own way, to identical messages is called polymorphism. -- Object-Oriented Programming with Objective-C, Apple
Polymorphism allows you to write code targeting superclass objects, use that code on subclass objects, and achieve possibly different results based on the actual class of the object.
Assume classes Cat and Dog are both subclasses of the Animal class. You can write code targeting Animal objects and use that code on Cat and Dog objects, achieving possibly different results based on whether it is a Cat object or a Dog object. Some examples:
- Declare an array of type
Animaland still be able to storeDogandCatobjects in it. - Define a method that takes an
Animalobject as a parameter and yet be able to passDogandCatobjects to it. - Call a method on a
Dogor aCatobject as if it is anAnimalobject (i.e., without knowing whether it is aDogobject or aCatobject) and get a different response from it based on its actual class e.g., call theAnimalclass's methodspeak()on objectaand get a"Meow"as the return value ifais aCatobject and"Woof"if it is aDogobject.
Polymorphism literally means "ability to take many forms".
How
Three concepts combine to achieve polymorphism: substitutability, operation overriding, and dynamic binding.
- Substitutability: Because of substitutability, you can write code that expects objects of a parent class and yet use that code with objects of child classes. That is how polymorphism is able to treat objects of different types as one type.
- Overriding: To get polymorphic behavior from an operation, the operation in the superclass needs to be overridden in each of the subclasses. That is how overriding allows objects of different subclasses to display different behaviors in response to the same method call.
- Dynamic binding: Calls to overridden methods are bound to the implementation of the actual object's class dynamically during the runtime. That is how the polymorphic code can call the method of the parent class and yet execute the implementation of the child class.
Miscellaneous
What is the difference between a Class, an Abstract Class, and an Interface?
- An interface is a behavior specification with no implementation.
- A class is a behavior specification + implementation.
- An abstract class is a behavior specification + a possibly incomplete implementation.
How does overriding differ from overloading?
Overloading is used to indicate that multiple operations do similar things but take different parameters. Overloaded methods have the same method name but different method signatures and possibly different return types.
Overriding is when a sub-class redefines an operation using the same method name and the same type signature. Overridden methods have the same name, same method signature, and same return type.
SECTION: REQUIREMENTS
Introduction
A software requirement specifies a need to be fulfilled by the software product.
A software project may be,
- a brown-field project i.e., develop a product to replace/update an existing software product
- a green-field project i.e., develop a totally new system with no precedent
In either case, requirements need to be gathered, analyzed, specified, and managed.
Requirements come from stakeholders.
Stakeholder: A party that is potentially affected by the software project. e.g. users, sponsors, developers, interest groups, government agencies, etc.
Identifying requirements is often not easy. For example, stakeholders may not be aware of their precise needs, may not know how to communicate their requirements correctly, may not be willing to spend effort in identifying requirements, etc.
Non-Functional Requirements
Requirements can be divided into two in the following way:
- Functional requirements specify what the system should do.
- Non-functional requirements specify the constraints under which the system is developed and operated.
Some examples of non-functional requirement categories:
- Data requirements e.g. size, , etc.,
- Environment requirements e.g. technical environment in which the system would operate in or needs to be compatible with.
- Accessibility, Capacity, Compliance with regulations, Documentation, Disaster recovery, Efficiency, Extensibility, Fault tolerance, Interoperability, Maintainability, Privacy, Portability, Quality, Reliability, Response time, Robustness, Scalability, Security, Stability, Testability, and more ...
You may have to spend an extra effort in digging NFRs out as early as possible because,
- NFRs are easier to miss e.g., stakeholders tend to think of functional requirements first
- sometimes NFRs are critical to the success of the software. E.g. A web application that is too slow or that has low security is unlikely to succeed even if it has all the right functionality.
Prioritizing Requirements
Requirements can be prioritized based on the importance and urgency, while keeping in mind the constraints of schedule, budget, staff resources, quality goals, and other constraints.
A common approach is to group requirements into priority categories. Note that all such scales are subjective, and stakeholders define the meaning of each level in the scale for the project at hand.
An example scheme for categorizing requirements:
Essential: The product must have this requirement fulfilled or else it does not get user acceptance.Typical: Most similar systems have this feature although the product can survive without it.Novel: New features that could differentiate this product from the rest.
Other schemes:
High,Medium,LowMust-have,Nice-to-have,Unlikely-to-haveLevel 0,Level 1,Level 2, ...
Some requirements can be discarded if they are considered ‘out of ’.
The requirement given below is for a Calendar application. Stakeholders of the software (e.g. product designers) might decide the following requirement is not in the scope of the software.
The software records the actual time taken by each task and show the difference between the actual and scheduled time for the task.
Quality of Requirements
Here are some characteristics of well-defined requirements [📖 zielczynski]:
- Unambiguous
- Testable (verifiable)
- Clear (concise, terse, simple, precise)
- Correct
- Understandable
- Feasible (realistic, possible)
- Independent
- Necessary
- Implementation-free (i.e. abstract)
Besides these criteria for individual requirements, the set of requirements as a whole should be
- Consistent
- Non-redundant
- Complete
Brainstorming
Brainstorming: A group activity designed to generate a large number of diverse and creative ideas for the solution of a problem.
In a brainstorming session there are no "bad" ideas. The aim is to generate ideas; not to validate them. Brainstorming encourages you to "think outside the box" and put "crazy" ideas on the table without fear of rejection.
User Surveys
Surveys can be used to solicit responses and opinions from a large number of stakeholders regarding a current product or a new product.
Observation
Observing users in their natural work environment can uncover product requirements. Usage data of an existing system can also be used to gather information about how an existing system is being used, which can help in building a better replacement e.g. to find the situations where the user makes mistakes when using the current system.
Interviews
Interviewing stakeholders and domain experts can produce useful information about project requirements.
Focus Groups
[source]
Focus groups are a kind of informal interview within an interactive group setting. A group of people (e.g. potential users, beta testers) are asked about their understanding of a specific issue, process, product, advertisement, etc.
Prototyping
Prototype: A prototype is a mock up, a scaled down version, or a partial system constructed
- to get users’ feedback.
- to validate a technical concept (a "proof-of-concept" prototype).
- to give a preview of what is to come, or to compare multiple alternatives on a small scale before committing fully to one alternative.
- for early field-testing under controlled conditions.
Prototyping can uncover requirements, in particular, those related to how users interact with the system. UI prototypes or mock ups are often used in brainstorming sessions, or in meetings with the users to get quick feedback from them.
A mock up (also called a wireframe diagram) of a dialog box:

[source: plantuml.com]
Prototyping can be used for discovering as well as specifying requirements e.g. a UI prototype can serve as a specification of what to build.
Product Surveys
Studying existing products can unearth shortcomings of existing solutions that can be addressed by a new product. Product manuals and other forms of documentation of an existing system can tell us how the existing solutions work.
When developing a game for a mobile device, a look at a similar PC game can give insight into the kind of features and interactions the mobile game can offer.
What
A textual description (i.e. prose) can be used to describe requirements. Prose is especially useful when describing abstract ideas such as the vision of a product.
The product vision of the TEAMMATES Project given below is described using prose.
TEAMMATES aims to become the biggest student project in the world (biggest here refers to 'many contributors, many users, large code base, evolving over a long period'). Furthermore, it aims to serve as a training tool for Software Engineering students who want to learn SE skills in the context of a non-trivial real software product.
Avoid using lengthy prose to describe requirements; they can be hard to follow.
What
Feature list: A list of features of a product grouped according to some criteria such as aspect, priority, order of delivery, etc.
A sample feature list from a simple Minesweeper game (only a brief description has been provided to save space):
- Basic play – Single player play.
- Difficulty levels
- Medium levels
- Advanced levels
- Versus play – Two players can play against each other.
- Timer – Additional fixed time restriction on the player.
- ...
Introduction
User story: User stories are short, simple descriptions of a feature told from the perspective of the person who desires the new capability, usually a user or customer of the system. [Mike Cohn]
A common format for writing user stories is:
User story format: As a {user type/role} I can {function} so that {benefit}
Examples (from a Learning Management System):
- As a student, I can download files uploaded by lecturers, so that I can get my own copy of the files
- As a lecturer, I can create discussion forums, so that students can discuss things online
- As a tutor, I can print attendance sheets, so that I can take attendance during the class
You can write user stories on index cards or sticky notes, and arrange them on walls or tables, to facilitate planning and discussion. Alternatively, you can use a software (e.g., GitHub Project Boards, Trello, Google Docs, ...) to manage user stories digitally.
Details
The {benefit} can be omitted if it is obvious.
As a user, I can login to the system so that I can access my data
It is recommended to confirm there is a concrete benefit even if you omit it from the user story. If not, you could end up adding features that have no real benefit.
You can add more characteristics to the {user role} to provide more context to the user story.
- As a forgetful user, I can view a password hint, so that I can recall my password.
- As an expert user, I can tweak the underlying formatting tags of the document, so that I can format the document exactly as I need.
You can write user stories at various levels. High-level user stories, called epics (or themes) cover bigger functionality. You can then break down these epics to multiple user stories of normal size.
[Epic] As a lecturer, I can monitor student participation levels
- As a lecturer, I can view the forum post count of each student
so that I can identify the activity level of students in the forum - As a lecturer, I can view webcast view records of each student
so that I can identify the students who did not view webcasts - As a lecturer, I can view file download statistics of each student
so that I can identify the students who did not download lecture materials
You can add conditions of satisfaction to a user story to specify things that need to be true for the user story implementation to be accepted as ‘done’.
As a lecturer, I can view the forum post count of each student so that I can identify the activity level of students in the forum.
Conditions:
Separate post count for each forum should be shown
Total post count of a student should be shown
The list should be sortable by student name and post count
Other useful info that can be added to a user story includes (but not limited to)
- Priority: how important the user story is
- Size: the estimated effort to implement the user story
- Urgency: how soon the feature is needed
Usage
User stories capture user requirements in a way that is convenient for , , and .
[User stories] strongly shift the focus from writing about features to discussing them. In fact, these discussions are more important than whatever text is written. [Mike Cohn, MountainGoat Software 🔗]
User stories differ from mainly in the level of detail. User stories should only provide enough details to make a reasonably low risk estimate of how long the user story will take to implement. When the time comes to implement the user story, the developers will meet with the customer face-to-face to work out a more detailed description of the requirements. [more...]
User stories can capture non-functional requirements too because even NFRs must benefit some stakeholder.
An example of an NFR captured as a user story:
| As a | I want to | so that |
|---|---|---|
| impatient user | to be able experience reasonable response time from the website while up to 1000 concurrent users are using it | I can use the app even when the traffic is at the maximum expected level |
Given their lightweight nature, user stories are quite handy for recording requirements during early stages of requirements gathering.
A recipe for brainstorming user stories
Given below is a possible recipe you can take when using user stories for early stages of requirement gathering.
Step 0: Clear your mind of preconceived product ideas
Even if you already have some idea of what your product will look/behave like in the end, clear your mind of those ideas. The product is the solution. At this point, we are still at the stage of figuring out the problem (i.e., user requirements). Let's try to get from the problem to the solution in a systematic way, one step at a time.
Step 1: Define the target user as a persona:
Decide your target user's profile (e.g. a student, office worker, programmer, salesperson) and work patterns (e.g. Does he work in groups or alone? Does he share his computer with others?). A clear understanding of the target user will help when deciding the importance of a user story. You can even narrow it down to a persona. Here is an example:
Jean is a university student studying in a non-IT field. She interacts with a lot of people due to her involvement in university clubs/societies. ...
Step 2: Define the problem scope:
Decide the exact problem you are going to solve for the target user. It is also useful to specify what related problems it will not solve so that the exact scope is clear.
ProductX helps Jean keep track of all her school contacts. It does not cover communicating with contacts.
Step 3: List scenarios to form a narrative:
Think of the various scenarios your target user is likely to go through as she uses your app. Following a chronological sequence as if you are telling a story might be helpful.
A. First use:
- Jean gets to know about ProductX. She downloads it and launches it to check out what it can do.
- After playing around with the product for a bit, Jean wants to start using it for real.
- ...
B. Second use: (Jean is still a beginner)
- Jean launches ProductX. She wants to find ...
- ...
C. 10th use: (Jean is a little bit familiar with the app)
- ...
D. 100th use: (Jean is an expert user)
- Jean launches the app and does ... and ... followed by ... as per her usual habit.
- Jean feels some of the data in the app are no longer needed. She wants to get rid of them to reduce clutter.
More examples that might apply to some products:
- Jean uses the app at the start of the day to ...
- Jean uses the app before going to sleep to ...
- Jean hasn't used the app for a while because she was on a three-month training programme. She is now back at work and wants to resume her daily use of the app.
- Jean moves to another company. Some of her clients come with her but some don't.
- Jean starts freelancing in her spare time. She wants to keep her freelancing clients separate from her other clients.
Step 4: List the user stories to support the scenarios:
Based on the scenarios, decide on the user stories you need to support. For example, based on the scenario 'A. First use', you might have user stories such as these:
- As a potential user exploring the app, I can see the app populated with sample data, so that I can easily see how the app will look like when it is in use.
- As a user ready to start using the app, I can purge all current data, so that I can get rid of sample/experimental data I used for exploring the app.
To give another example, based on the scenario 'D. 100th use', you might have user stories such as these:
- As an expert user, I can create shortcuts for tasks, so that I can save time on frequently performed tasks.
- As a long-time user, I can archive/hide unused data, so that I am not distracted by irrelevant data.
Do not 'evaluate' the value of user stories while brainstorming. Reason: an important aspect of brainstorming is not judging the ideas generated.
Other tips:
- Don't be too hasty to discard 'unusual' user stories:
Those might make your product unique and stand out from the rest, at least for the target users. - Don't go into too much detail:
For example, consider this user story:
As a user, I want to see a list of tasks that need my attention most at the present time, so that I pay attention to them first.
When discussing this user story, don't worry about what tasks should be considered 'needs my attention most at the present time'. Those details can be worked out later. - Don't be biased by preconceived product ideas:
When you are at the stage of identifying user needs, clear your mind of ideas you have about what your end product will look like. That is, don't try to reverse-engineer a preconceived product idea into user stories. - Don't discuss implementation details or whether you are actually going to implement it:
When gathering requirements, your decision is whether the user's need is important enough for you to want to fulfil it. Implementation details can be discussed later. If a user story turns out to be too difficult to implement later, you can always omit it from the implementation plan.
While use cases can be recorded on in the initial stages, an online tool is more suitable for longer-term management of user stories, especially if the team is not .
Introduction
Use case: A description of a set of sequences of actions, including variants, that a system performs to yield an observable result of value to an actor [ 📖 : ].
A use case describes an interaction between the user and the system for a specific functionality of the system.
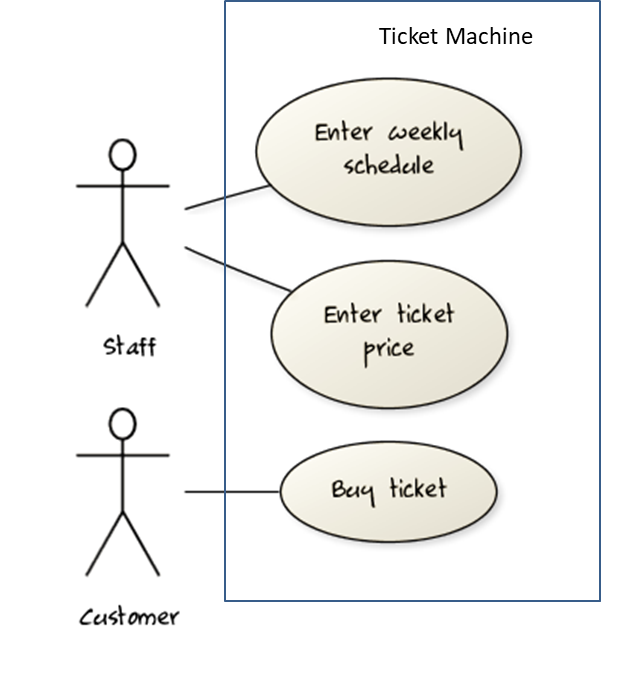
UML includes a diagram type called use case diagrams that can illustrate use cases of a system visually, providing a visual ‘table of contents’ of the use cases of a system.
In the example on the right, note how use cases are shown as ovals and user roles relevant to each use case are shown as stick figures connected to the corresponding ovals.
Use cases capture the functional requirements of a system.
What
Glossary: A glossary serves to ensure that all stakeholders have a common understanding of the noteworthy terms, abbreviations, acronyms etc.
Here is a partial glossary from a variant of the Snakes and Ladders game:
- Conditional square: A square that specifies a specific face value which a player has to throw before his/her piece can leave the square.
- Normal square: a normal square does not have any conditions, snakes, or ladders in it.
SECTION: DESIGN
What
Design is the creative process of transforming the problem into a solution; the solution is also called design. -- 📖 Software Engineering Theory and Practice, Shari Lawrence; Atlee, Joanne M. Pfleeger
Software design has two main aspects:
- Product/external design: designing the external behavior of the product to meet the users' requirements. This is usually done by product designers with input from business analysts, user experience experts, user representatives, etc.
- Implementation/internal design: designing how the product will be implemented to meet the required external behavior. This is usually done by software architects and software engineers.
What
Abstraction is a technique for dealing with complexity. It works by establishing a level of complexity we are interested in, and suppressing the more complex details below that level.
The guiding principle of abstraction is that only details that are relevant to the current perspective or the task at hand need to be considered. As most programs are written to solve complex problems involving large amounts of intricate details, it is impossible to deal with all these details at the same time. That is where abstraction can help.
Data abstraction: abstracting away the lower level data items and thinking in terms of bigger entities
Within a certain software component, you might deal with a user data type, while ignoring the details contained in the user data item such as name, and date of birth. These details have been ‘abstracted away’ as they do not affect the task of that software component.
Control abstraction: abstracting away details of the actual control flow to focus on tasks at a higher level
print(“Hello”) is an abstraction of the actual output mechanism within the computer.
Abstraction can be applied repeatedly to obtain progressively higher levels of abstraction.
An example of different levels of data abstraction: a File is a data item that is at a higher level than an array and an array is at a higher level than a bit.
An example of different levels of control abstraction: execute(Game) is at a higher level than print(Char) which is at a higher level than an Assembly language instruction MOV.
Abstraction is a general concept that is not limited to just data or control abstractions.
Some more general examples of abstraction:
- An OOP class is an abstraction over related data and behaviors.
- An architecture is a higher-level abstraction of the design of a software.
- Models (e.g., UML models) are abstractions of some aspect of reality.
What
Coupling is a measure of the degree of dependence between components, classes, methods, etc. Low coupling indicates that a component is less dependent on other components. High coupling (aka tight coupling or strong coupling) is discouraged due to the following disadvantages:
- Maintenance is harder because a change in one module could cause changes in other modules coupled to it (i.e. a ripple effect).
- Integration is harder because multiple components coupled with each other have to be integrated at the same time.
- Testing and reuse of the module is harder due to its dependence on other modules.
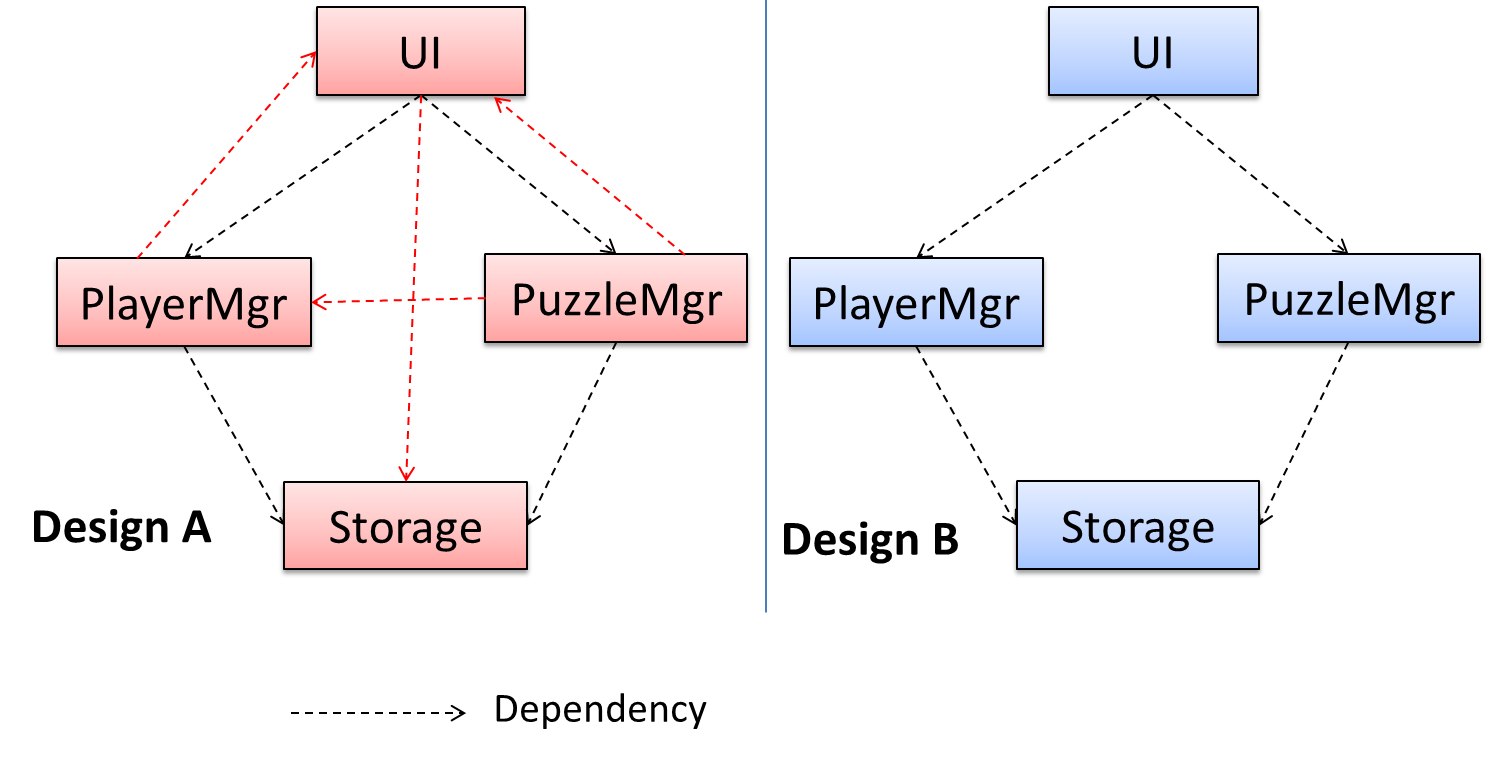
In the example below, design A appears to have more coupling between the components than design B.
How
X is coupled to Y if a change to Y can potentially require a change in X.
If the Foo class calls the method Bar#read(), Foo is coupled to Bar because a change to Bar can potentially (but not always) require a change in the Foo class e.g. if the signature of Bar#read() is changed, Foo needs to change as well, but a change to the Bar#write() method may not require a change in the Foo class because Foo does not call Bar#write().
Some examples of coupling: A is coupled to B if,
Ahas access to the internal structure ofB(this results in a very high level of coupling)AandBdepend on the same global variableAcallsBAreceives an object ofBas a parameter or a return valueAinherits fromBAandBare required to follow the same data format or communication protocol
What
Cohesion is a measure of how strongly-related and focused the various responsibilities of a component are. A highly-cohesive component keeps related functionalities together while keeping out all other unrelated things.
Higher cohesion is better. Disadvantages of low cohesion (aka weak cohesion):
- Lowers the understandability of modules as it is difficult to express module functionalities at a higher level.
- Lowers maintainability because a module can be modified due to unrelated causes (reason: the module contains code unrelated to each other) or many modules may need to be modified to achieve a small change in behavior (reason: because the code related to that change is not localized to a single module).
- Lowers reusability of modules because they do not represent logical units of functionality.
How
Cohesion can be present in many forms. Some examples:
- Code related to a single concept is kept together, e.g. the
Studentcomponent handles everything related to students. - Code that is invoked close together in time is kept together, e.g. all code related to initializing the system is kept together.
- Code that manipulates the same data structure is kept together, e.g. the
GameArchivecomponent handles everything related to the storage and retrieval of game sessions.
Suppose a Payroll application contains a class that deals with writing data to the database. If the class includes some code to show an error dialog to the user if the database is unreachable, that class is not cohesive because it seems to be interacting with the user as well as the database.
What
A model is a representation of something else.
A class diagram is a model that represents a software design.
A model provides a simpler view of a complex entity because a model captures only a selected aspect. This omission of some aspects implies models are abstractions.
A class diagram captures the structure of the software design but not the behavior.
Multiple models of the same entity may be needed to capture it fully.
In addition to a class diagram (or even multiple class diagrams), a number of other diagrams may be needed to capture various interesting aspects of the software.
How
In software development, models are useful in several ways:
a) To analyze a complex entity related to software development.
Some examples of using models for analysis:
- Models of the can be built to aid the understanding of the problem to be solved.
- When planning a software solution, models can be created to figure out how the solution is to be built. An architecture diagram is such a model.
b) To communicate information among stakeholders. Models can be used as a visual aid in discussions and documentation.
Some examples of using models to communicate:
- You can use an architecture diagram to explain the high-level design of the software to developers.
- A business analyst can use a use case diagram to explain to the customer the functionality of the system.
- A class diagram can be reverse-engineered from code so as to help explain the design of a component to a new developer.
c) As a blueprint for creating software. Models can be used as instructions for building software.
Some examples of using models as blueprints:
- A senior developer draws a class diagram to propose a design for an OOP software and passes it to a junior programmer to implement.
- A software tool allows users to draw UML models using its interface and the tool automatically generates the code based on the model.
UML Models
The following diagram uses the class diagram notation to show the different types of UML diagrams.
source:https://en.wikipedia.org/
OO Structures
An OO solution is basically a network of objects interacting with each other. Therefore, it is useful to be able to model how the relevant objects are 'networked' together inside a software i.e. how the objects are connected together.
Given below is an illustration of some objects and how they are connected together. Note: the diagram uses an ad-hoc notation.

Note that these object structures within the same software can change over time.
Given below is how the object structure in the previous example could have looked like at a different time.

However, object structures do not change at random; they change based on a set of rules, as was decided by the designer of that software. Those rules that object structures need to follow can be illustrated as a class structure i.e. a structure that exists among the relevant classes.
Here is a class structure (drawn using an ad-hoc notation) that matches the object structures given in the previous two examples. For example, note how this class structure does not allow any connection between Genre objects and Author objects, a rule followed by the two object structures above.

UML Object Diagrams are used to model object structures and UML Class Diagrams are used to model class structures of an OO solution.
Here is an object diagram for the above example:

And here is the class diagram for it:

Class Diagrams (Basics)
Contents of the panels given below belong to a different chapter; they have been embedded here for convenience and are collapsed by default to avoid content duplication in the printed version.
Classes form the basis of class diagrams.
Associations are the main connections among the classes in a class diagram.
The most basic class diagram is a bunch of classes with some solid lines among them to represent associations, such as this one.
An example class diagram showing associations between classes.

In addition, associations can show additional decorations such as association labels, association roles, multiplicity and navigability to add more information to a class diagram.
Here is the same class diagram shown earlier but with some additional information included:

Sequence Diagrams - Basic
Sequence diagrams model the interactions between various entities in a system, in a specific scenario. Modelling such scenarios is useful, for example, to verify the design of the internal interactions is able to provide the expected outcomes.
Some examples where a sequence diagram can be used:
To model how components of a system interact with each other to respond to a user action.
To model how objects inside a component interact with each other to respond to a method call it received from another component.
What
The software architecture of a program or computing system is the structure or structures of the system, which comprise software elements, the externally visible properties of those elements, and the relationships among them. Architecture is concerned with the public side of interfaces; private details of elements—details having to do solely with internal implementation—are not architectural. -- Software Architecture in Practice (2nd edition), Bass, Clements, and Kazman
The software architecture shows the overall organization of the system and can be viewed as a very high-level design. It usually consists of a set of interacting components that fit together to achieve the required functionality. It should be a simple and technically viable structure that is well-understood and agreed-upon by everyone in the development team, and it forms the basis for the implementation.
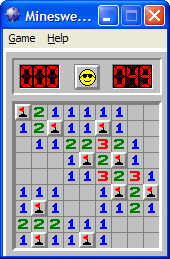
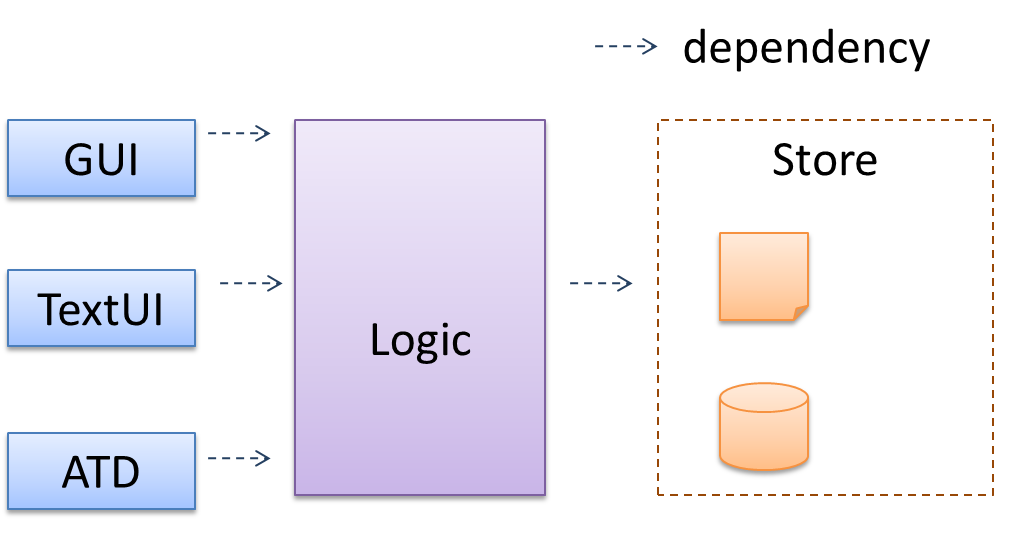
A possible architecture for a Minesweeper game:
 |  |
Main components:
GUI: Graphical user interfaceTextUi: Textual user interfaceATD: An automated test driver used for testing the game logicLogic: Computation and logic of the gameStore: Storage and retrieval of game data (high scores etc.)
The architecture is typically designed by the software architect, who provides the technical vision of the system and makes high-level (i.e. architecture-level) technical decisions about the project.
Reading
Architecture diagrams are free-form diagrams. There is no universally adopted standard notation for architecture diagrams. Any symbols that reasonably describe the architecture may be used.
Some example architecture diagrams:
Drawing
While architecture diagrams have no standard notation, try to follow these basic guidelines when drawing them.
Minimize the variety of symbols. If the symbols you choose do not have widely-understood meanings e.g. A drum symbol is widely-understood as representing a database, explain their meaning.
Avoid the indiscriminate use of double-headed arrows to show interactions between components.
Consider the two architecture diagrams of the same software given below. Because Diagram 2 uses double-headed arrows, the important fact that GUI has a bidirectional dependency with the Logic component is no longer captured.

What
Software architectures follow various high-level styles (aka architectural patterns), just like how building architectures follow various architecture styles.
n-tier style, client-server style, event-driven style, transaction processing style, service-oriented style, pipes-and-filters style, message-driven style, broker style, ...
What
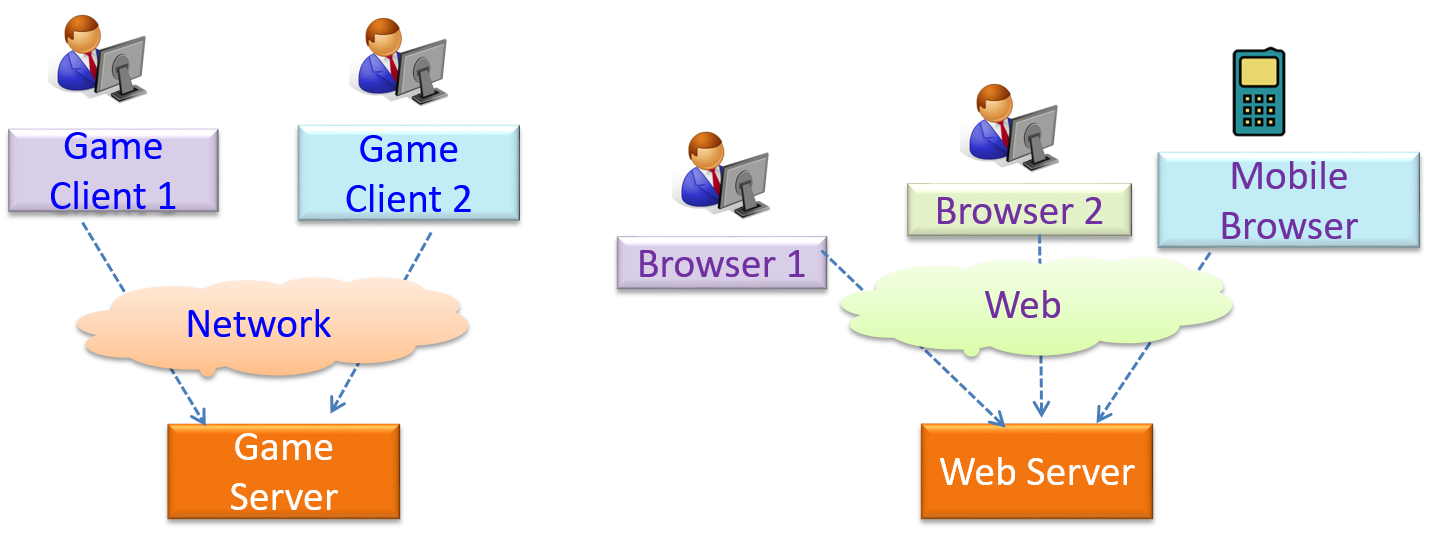
The client-server style has at least one component playing the role of a server and at least one client component accessing the services of the server. This is an architectural style used often in distributed applications.
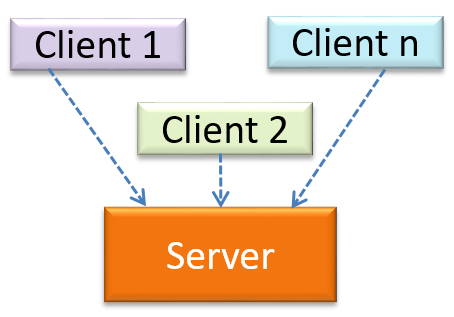
The online game and the web application below use the client-server style.
What
Design pattern: An elegant reusable solution to a commonly recurring problem within a given context in software design.
In software development, there are certain problems that recur in a certain context.
Some examples of recurring design problems:
| Design Context | Recurring Problem |
|---|---|
| Assembling a system that makes use of other existing systems implemented using different technologies | What is the best architecture? |
| UI needs to be updated when the data in the application backend changes | How to initiate an update to the UI when data changes without coupling the backend to the UI? |
After repeated attempts at solving such problems, better solutions are discovered and refined over time. These solutions are known as design patterns, a term popularized by the seminal book Design Patterns: Elements of Reusable Object-Oriented Software by the so-called "Gang of Four" (GoF) written by Eric Gamma, Richard Helm, Ralph Johnson, and John Vlissides.
Format
The common format to describe a pattern consists of the following components:
- Context: The situation or scenario where the design problem is encountered.
- Problem: The main difficulty to be resolved.
- Solution: The core of the solution. It is important to note that the solution presented only includes the most general details, which may need further refinement for a specific context.
- Anti-patterns (optional): Commonly used solutions, which are usually incorrect and/or inferior to the Design Pattern.
- Consequences (optional): Identifying the pros and cons of applying the pattern.
- Other useful information (optional): Code examples, known uses, other related patterns, etc.
What
Context
Certain classes should have no more than just one instance (e.g. the main controller class of the system). These single instances are commonly known as singletons.
Problem
A normal class can be instantiated multiple times by invoking the constructor.
Solution
Make the constructor of the singleton class private, because a public constructor will allow others to instantiate the class at will. Provide a public class-level method to access the single instance.
Example:
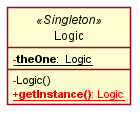
Implementation
Here is the typical implementation of how the Singleton pattern is applied to a class:
class Logic {
    private static Logic theOne = null;

    private Logic() {
        ...
    }

    public static Logic getInstance() {
        if (theOne == null) {
            theOne = new Logic();
        }
        return theOne;
    }
}
Notes:
- The constructor is
private, which prevents instantiation from outside the class. - The single instance of the singleton class is maintained by a
privateclass-level variable. - Access to this object is provided by a
publicclass-level operationgetInstance()which instantiates a single copy of the singleton class when it is executed for the first time. Subsequent calls to this operation return the single instance of the class.
If Logic was not a Singleton class, an object is created like this:
Logic m = new Logic();
But now, the Logic object needs to be accessed like this:
Logic m = Logic.getInstance();
Evaluation
Pros:
- easy to apply
- effective in achieving its goal with minimal extra work
- provides an easy way to access the singleton object from anywhere in the code base
Cons:
- The singleton object acts like a global variable that increases coupling across the code base.
- In testing, it is difficult to replace Singleton objects with stubs (static methods cannot be overridden).
- In testing, singleton objects carry data from one test to another even when you want each test to be independent of the others.
Given that there are some significant cons, it is recommended that you apply the Singleton pattern when, in addition to requiring only one instance of a class, there is a risk of creating multiple objects by mistake, and creating such multiple objects has real negative consequences.
What
Context
Components need to access functionality deep inside other components.
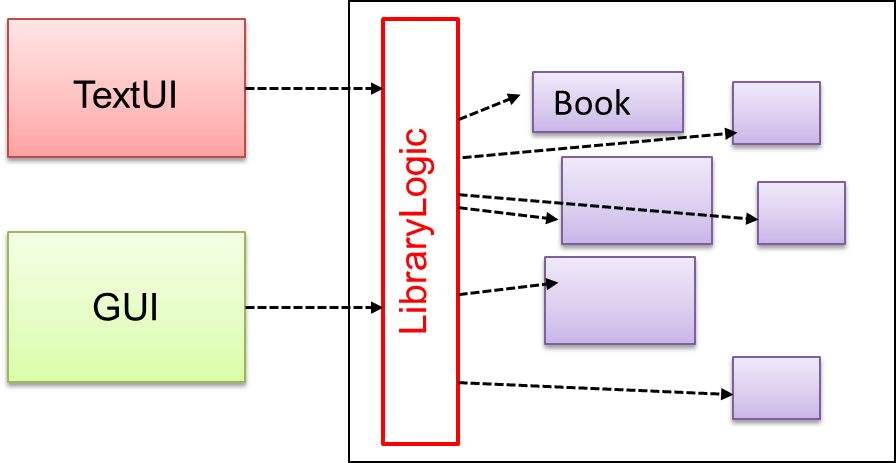
The UI component of a Library system might want to access functionality of the Book class contained inside the Logic component.
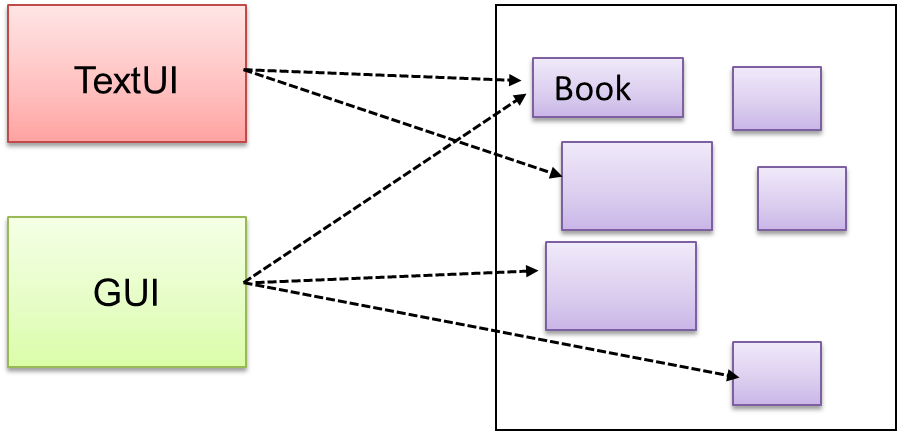
Problem
Access to the component should be allowed without exposing its internal details. e.g. the UI component should access the functionality of the Logic component without knowing that it contains a Book class within it.
Solution
Include a class that sits between the component internals and users of the component such that all access to the component happens through the Facade class.
The following class diagram applies the Facade pattern to the Library System example. The LibraryLogic class is the Facade class.
SECTION: IMPLEMENTATION
What
Professional software engineers often write code using Integrated Development Environments (IDEs). IDEs support most development-related work within the same tool (hence, the term integrated).
An IDE generally consists of:
- A source code editor that includes features such as syntax coloring, auto-completion, easy code navigation, error highlighting, and code-snippet generation.
- A compiler and/or an interpreter (together with other build automation support) that facilitates the compilation/linking/running/deployment of a program.
- A debugger that allows the developer to execute the program one step at a time to observe the run-time behavior in order to locate bugs.
- Other tools that aid various aspects of coding e.g. support for automated testing, drag-and-drop construction of UI components, version management support, simulation of the target runtime platform, and modeling support.
Examples of popular IDEs:
- Java: Eclipse, Intellij IDEA, NetBeans
- C#, C++: Visual Studio
- Swift: XCode
- Python: PyCharm
Some web-based IDEs have appeared in recent times too e.g., Amazon's Cloud9 IDE.
Some experienced developers, in particular those with a UNIX background, prefer lightweight yet powerful text editors with scripting capabilities (e.g. Emacs) over heavier IDEs.
What
Debugging is the process of discovering defects in the program. Here are some approaches to debugging:
- Bad -- By inserting temporary print statements: This is an ad-hoc approach in which print statements are inserted in the program to print information relevant to debugging, such as variable values. e.g.
Exiting process() method, x is 5.347. This approach is not recommended due to these reasons:- Incurs extra effort when inserting and removing the print statements.
- These extraneous program modifications increase the risk of introducing errors into the program.
- These print statements, if not removed promptly after the debugging, may even appear unexpectedly in the production version.
- Bad -- By manually tracing through the code: Otherwise known as ‘eye-balling’, this approach doesn't have the cons of the previous approach, but it too is not recommended (other than as a 'quick try') due to these reasons:
- It is a difficult, time consuming, and error-prone technique.
- If you didn't spot the error while writing the code, you might not spot the error when reading the code either.
- Good -- Using a debugger: A debugger tool allows you to pause the execution, then step through the code one statement at a time while examining the internal state if necessary. Most IDEs come with an inbuilt debugger. This is the recommended approach for debugging.
Basic
Always code as if the person who ends up maintaining your code will be a violent psychopath who knows where you live. -- Martin Golding
Production code needs to be of high quality. Given how the world is becoming increasingly dependent on software, poor quality code is something no one can afford to tolerate.
Introduction
Programs should be written and polished until they acquire publication quality. --Niklaus Wirth
Among various dimensions of code quality, such as run-time efficiency, security, and robustness, one of the most important is understandability. This is because in any non-trivial software project, code needs to be read, understood, and modified by other developers later on. Even if you do not intend to pass the code to someone else, code quality is still important because you will become a 'stranger' to your own code someday.
The two code samples given below achieve the same functionality, but one is easier to read.
Bad | |
Good | |
Bad | | Good |
Avoid Long Methods
Be wary when a method is longer than the computer screen, and take corrective action when it goes beyond 30 LOC (lines of code). The bigger the haystack, the harder it is to find a needle.
Avoid Deep Nesting
If you need more than 3 levels of indentation, you're screwed anyway, and should fix your program. --Linux 1.3.53 Coding Style
In particular, avoid arrowhead style code.
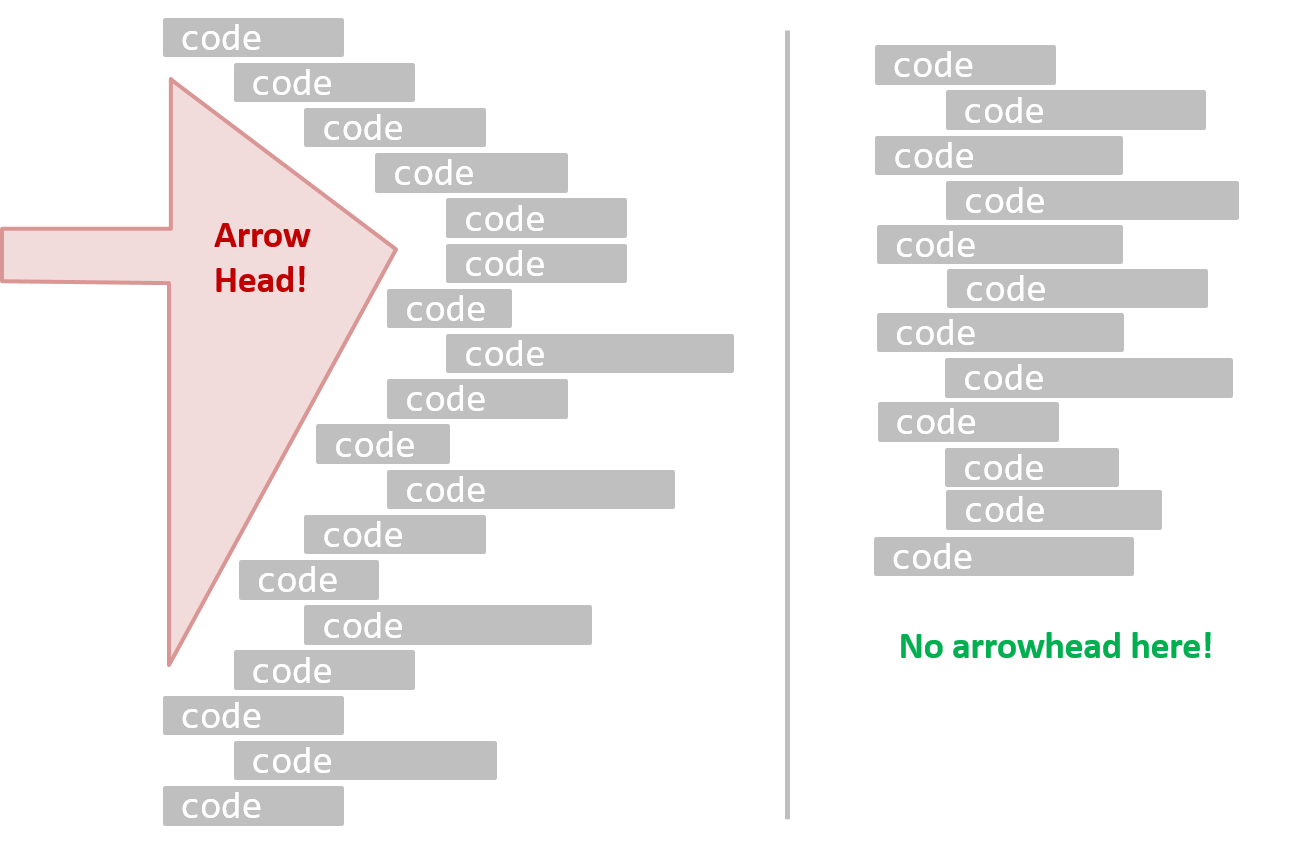
A real code example:
Bad | |
Good | |
Bad | | Good |
Avoid Complicated Expressions
Avoid complicated expressions, especially those having many negations and nested parentheses. If you must evaluate complicated expressions, have it done in steps (i.e. calculate some intermediate values first and use them to calculate the final value).
Example:
Bad
return ((length < MAX_LENGTH) || (previousSize != length))
        && (typeCode == URGENT);
Good
boolean isWithinSizeLimit = length < MAX_LENGTH;
boolean isSameSize = previousSize != length;
boolean isValidCode = isWithinSizeLimit || isSameSize;

boolean isUrgent = typeCode == URGENT;

return isValidCode && isUrgent;
Example:
Bad
return ((length < MAX_LENGTH) or (previous_size != length)) and (type_code == URGENT)
Good
is_within_size_limit = length < MAX_LENGTH
is_same_size = previous_size != length
is_valid_code = is_within_size_limit or is_same_size

is_urgent = type_code == URGENT

return is_valid_code and is_urgent
The competent programmer is fully aware of the strictly limited size of his own skull; therefore he approaches the programming task in full humility, and among other things he avoids clever tricks like the plague. -- Edsger Dijkstra
Avoid Magic Numbers
When the code has a number that does not explain the meaning of the number, it is called a "magic number" (as in "the number appears as if by magic"). Using a makes the code easier to understand because the name tells us more about the meaning of the number.
Example:
Bad | | Good |
Note: Python does not have a way to make a variable a constant. However, you can use a normal variable with an ALL_CAPS name to simulate a constant.
Bad | | Good |
Similarly, you can have ‘magic’ values of other data types.
Bad
return "Error 1432"; // A magic string!
return "Error 1432" # A magic string!
In general, try to avoid any magic literals.
Make the Code Obvious
Make the code as explicit as possible, even if the language syntax allows them to be implicit. Here are some examples:
- [
Java] Use explicit type conversion instead of implicit type conversion. - [
Java,Python] Use parentheses/braces to show groupings even when they can be skipped. - [
Java,Python] Use enumerations when a certain variable can take only a small number of finite values. For example, instead of declaring the variable 'state' as an integer and using values 0, 1, 2 to denote the states 'starting', 'enabled', and 'disabled' respectively, declare 'state' as typeSystemStateand define an enumerationSystemStatethat has values'STARTING','ENABLED', and'DISABLED'.
Structure Code Logically
Lay out the code so that it adheres to the logical structure. The code should read like a story. Just like how you use section breaks, chapters and paragraphs to organize a story, use classes, methods, indentation and line spacing in your code to group related segments of the code. For example, you can use blank lines to group related statements together.
Sometimes, the correctness of your code does not depend on the order in which you perform certain intermediary steps. Nevertheless, this order may affect the clarity of the story you are trying to tell. Choose the order that makes the story most readable.
Do Not 'Trip Up' Reader
Avoid things that would make the reader go ‘huh?’, such as,
- unused parameters in the method signature
- similar things that look different
- different things that look similar
- multiple statements in the same line
- data flow anomalies such as, pre-assigning values to variables and modifying it without any use of the pre-assigned value
Practice KISSing
As the old adage goes, "keep it simple, stupid” (KISS). Do not try to write ‘clever’ code. For example, do not dismiss the brute-force yet simple solution in favor of a complicated one because of some ‘supposed benefits’ such as 'better reusability' unless you have a strong justification.
Debugging is twice as hard as writing the code in the first place. Therefore, if you write the code as cleverly as possible, you are, by definition, not smart enough to debug it. -- Brian W. Kernighan
Programs must be written for people to read, and only incidentally for machines to execute. -- Abelson and Sussman
Avoid Premature Optimizations
Optimizing code prematurely has several drawbacks:
- You may not know which parts are the real performance bottlenecks. This is especially the case when the code undergoes transformations (e.g. compiling, minifying, transpiling, etc.) before it becomes an executable. Ideally, you should use a profiler tool to identify the actual bottlenecks of the code first, and optimize only those parts.
- Optimizing can complicate the code, affecting correctness and understandability.
- Hand-optimized code can be harder for the compiler to optimize (the simpler the code, the easier it is for the compiler to optimize). In many cases, a compiler can do a better job of optimizing the runtime code if you don't get in the way by trying to hand-optimize the source code.
A popular saying in the industry is make it work, make it right, make it fast which means in most cases, getting the code to perform correctly should take priority over optimizing it. If the code doesn't work correctly, it has no value no matter how fast/efficient it is.
Premature optimization is the root of all evil in programming. -- Donald Knuth
Note that there are cases where optimizing takes priority over other things e.g. when writing code for resource-constrained environments. This guideline is simply a caution that you should optimize only when it is really needed.
SLAP Hard
Avoid varying the level of abstraction within a code fragment. Note: The book The Productive Programmer (by Neal Ford) calls this the Single Level of Abstraction Principle (SLAP) while the book Clean Code (by Robert C. Martin) calls this One Level of Abstraction per Function.
Example:
Bad (readData(); and salary = basic * rise + 1000; are at different levels of abstraction)
readData();
salary = basic * rise + 1000;
tax = (taxable ? salary * 0.07 : 0);
displayResult();
Good (all statements are at the same level of abstraction)
readData();
processData();
displayResult();
Make the Happy Path Prominent
The happy path (i.e. the execution path taken when everything goes well) should be clear and prominent in your code. Restructure the code to make the happy path unindented as much as possible. It is the ‘unusual’ cases that should be indented. Someone reading the code should not get distracted by alternative paths taken when error conditions happen. One technique that could help in this regard is the use of guard clauses.
Example:
Bad
if (!isUnusualCase) {  //detecting an unusual condition
    if (!isErrorCase) {
        start();    //main path
        process();
        cleanup();
        exit();
    } else {
        handleError();
    }
} else {
    handleUnusualCase(); //handling that unusual condition
}
In the code above,
- unusual condition detections are separated from their handling.
- the main path is nested deeply.
Good
if (isUnusualCase) { //Guard Clause
    handleUnusualCase();
    return;
}

if (isErrorCase) { //Guard Clause
    handleError();
    return;
}

start();
process();
cleanup();
exit();
In contrast, the above code
- deals with unusual conditions as soon as they are detected so that the reader doesn't have to remember them for long.
- keeps the main path un-indented.
Introduction
One essential way to improve code quality is to follow a consistent style. That is why software engineers follow a strict coding standard (aka style guide).
The aim of a coding standard is to make the entire code base look like it was written by one person. A coding standard is usually specific to a programming language and specifies guidelines such as the locations of opening and closing braces, indentation styles and naming styles (e.g. whether to use Hungarian style, Pascal casing, Camel casing, etc.). It is important that the whole team/company uses the same coding standard and that the standard is generally not inconsistent with typical industry practices. If a company's coding standard is very different from what is typically used in the industry, new recruits will take longer to get used to the company's coding style.
IDEs can help to enforce some parts of a coding standard e.g. indentation rules.
Use Nouns for Things and Verbs for Actions
Every system is built from a domain-specific language designed by the programmers to describe that system. Functions are the verbs of that language, and classes are the nouns.
-- Robert C. Martin, Clean Code: A Handbook of Agile Software Craftsmanship
Use nouns for classes/variables and verbs for methods/functions.
Examples:
| Name for a | Bad | Good |
|---|---|---|
| Class | CheckLimit | LimitChecker |
| Method | result() | calculate() |
Distinguish clearly between single-valued and multi-valued variables.
Examples:
Good
Person student;
ArrayList<Person> students;
Good
name = 'Jim'
names = ['Jim', 'Alice']
Use Name to Explain
A name is not just for differentiation; it should explain the named entity to the reader accurately and at a sufficient level of detail.
Examples:
| Bad | Good |
|---|---|
processInput() (what 'process'?) | removeWhiteSpaceFromInput() |
flag | isValidInput |
temp |
If a name has multiple words, they should be in a sensible order.
Examples:
| Bad | Good |
|---|---|
bySizeOrder() | orderBySize() |
Imagine going to the doctor's and saying "My eye1 is swollen"! Don’t use numbers or case to distinguish names.
Examples:
| Bad | Bad | Good |
|---|---|---|
value1, value2 | value, Value | originalValue, finalValue |
Not Too Long, Not Too Short
While it is preferable not to have lengthy names, names that are 'too short' are even worse. If you must abbreviate or use acronyms, do it consistently. Explain their full meaning at an obvious location.
Avoid Misleading Names
Related things should be named similarly, while unrelated things should NOT.
Example: Consider these variables
colorBlack: hex value for color blackcolorWhite: hex value for color whitecolorBlue: number of times blue is usedhexForRed: hex value for color red
This is misleading because colorBlue is named similar to colorWhite and colorBlack but has a different purpose while hexForRed is named differently but has a very similar purpose to the first two variables. The following is better:
hexForBlackhexForWhitehexForRedblueColorCount
Avoid misleading or ambiguous names (e.g. those with multiple meanings), similar sounding names, hard-to-pronounce ones (e.g. avoid ambiguities like "is that a lowercase L, capital I or number 1?", or "is that number 0 or letter O?"), almost similar names.
Examples:
| Bad | Good | Reason |
|---|---|---|
phase0 | phaseZero | Is that zero or letter O? |
rwrLgtDirn | rowerLegitDirection | Hard to pronounce |
right left wrong | rightDirection leftDirection wrongResponse | right is for 'correct' or 'opposite of 'left'? |
redBooks readBooks | redColorBooks booksRead | red and read (past tense) sounds the same |
FiletMignon | egg | If the requirement is just a name of a food, egg is a much easier to type/say choice than FiletMignon |
Use the Default Branch
Always include a default branch in case statements.
Furthermore, use it for the intended default action and not just to execute the last option. If there is no default action, you can use the default branch to detect errors (i.e. if execution reached the default branch, raise a suitable error). This also applies to the final else of an if-else construct. That is, the final else should mean 'everything else', and not the final option. Do not use else when an if condition can be explicitly specified, unless there is absolutely no other possibility.
Bad
if (red) print "red";
else print "blue";
Good
if (red) print "red";
else if (blue) print "blue";
else error("incorrect input");
Don't Recycle Variables or Parameters
- Use one variable for one purpose. Do not reuse a variable for a different purpose other than its intended one, just because the data type is the same.
- Do not reuse formal parameters as local variables inside the method.
Bad
double computeRectangleArea(double length, double width) {
    length = length * width;
    return length;
}
def compute_rectangle_area(length, width):
    length = length * width
    return length
Good
double computeRectangleArea(double length, double width) {
    double area;
    area = length * width;
    return area;
}
def compute_rectangle_area(length, width):
    area = length * width
    return area
}
Avoid Empty Catch Blocks
Never write an empty catch statement. At least give a comment to explain why the catch block is left empty.
Delete Dead Code
You might feel reluctant to delete code you have painstakingly written, even if you have no use for that code anymore ("I spent a lot of time writing that code; what if I need it again?"). Consider all code as baggage you have to carry; get rid of unused code the moment it becomes redundant. If you need that code again, simply recover it from the revision control tool you are using. Deleting code you wrote previously is a sign that you are improving.
Minimise Scope of Variables
Minimize global variables. Global variables may be the most convenient way to pass information around, but they do create implicit links between code segments that use the global variable. Avoid them as much as possible.
Define variables in the least possible scope. For example, if the variable is used only within the if block of the conditional statement, it should be declared inside that if block.
The most powerful technique for minimizing the scope of a local variable is to declare it where it is first used. -- Effective Java, by Joshua Bloch
Resources:
Minimise Code Duplication
Code duplication, especially when you copy-paste-modify code, often indicates a poor quality implementation. While it may not be possible to have zero duplication, always think twice before duplicating code; most often there is a better alternative.
This guideline is closely related to the DRY Principle.
Introduction
Good code is its own best documentation. As you’re about to add a comment, ask yourself, ‘How can I improve the code so that this comment isn’t needed?’ Improve the code and then document it to make it even clearer. -- Steve McConnell, Author of Clean Code
Some think commenting heavily increases the 'code quality'. That is not so. Avoid writing comments to explain bad code. Improve the code to make it self-explanatory.
Do Not Repeat the Obvious
If the code is self-explanatory, refrain from repeating the description in a comment just for the sake of 'good documentation'.
Bad
//increment x
x++;

//trim the input
trimInput();
Bad
# increment x
x = x + 1

# trim the input
trim_input()
Write to the Reader
Do not write comments as if they are private notes to yourself. Instead, write them well enough to be understood by another programmer. One type of comment that is almost always useful is the header comment that you write for a class or an operation to explain its purpose.
Examples:
Bad Reason: this comment will only make sense to the person who wrote it
// a quick trim function used to fix bug I detected overnight
void trimInput() {
    ....
}
Good
/** Trims the input of leading and trailing spaces */
void trimInput() {
    ....
}
Bad Reason: this comment will only make sense to the person who wrote it
def trim_input():
"""a quick trim function used to fix bug I detected overnight"""
    ...
Good
def trim_input():
"""Trim the input of leading and trailing spaces"""
    ...
Explain WHAT and WHY, not HOW
Comments should explain the what and why aspects of the code, rather than the how aspect.
What: The specification of what the code is supposed to do. The reader can compare such comments to the implementation to verify if the implementation is correct.
Example: This method is possibly buggy because the implementation does not seem to match the comment. In this case, the comment could help the reader to detect the bug.
/** Removes all spaces from the {@code input} */
void compact(String input) {
    input.trim();
}
Why: The rationale for the current implementation.
Example: Without this comment, the reader will not know the reason for calling this method.
// Remove spaces to comply with IE23.5 formatting rules
compact(input);
How: The explanation for how the code works. This should already be apparent from the code, if the code is self-explanatory. Adding comments to explain the same thing is redundant.
Example:
Bad Reason: Comment explains how the code works.
// return true if both left end and right end are correct
//    or the size has not incremented
return (left && right) || (input.size() == size);
Good Reason: Code refactored to be self-explanatory. Comment no longer needed.
boolean isSameSize = (input.size() == size);
return (isLeftEndCorrect && isRightEndCorrect) || isSameSize;
What
The first version of the code you write may not be of production quality. It is OK to first concentrate on making the code work, rather than worry over the quality of the code, as long as you improve the quality later. This process of improving a program's internal structure in small steps without modifying its external behavior is called refactoring.
- Refactoring is not rewriting: Discarding poorly-written code entirely and re-writing it from scratch is not refactoring because refactoring needs to be done in small steps.
- Refactoring is not bug fixing: By definition, refactoring is different from bug fixing or any other modifications that alter the external behavior (e.g. adding a feature) of the component in concern.
Improving code structure can have many secondary benefits: e.g.
- hidden bugs become easier to spot
- improve performance (sometimes, simpler code runs faster than complex code because simpler code is easier for the compiler to optimize).
Given below are two common refactorings (more).
Refactoring Name: Consolidate Duplicate Conditional Fragments
Situation: The same fragment of code is in all branches of a conditional expression.
Method: Move it outside of the expression.
Example:
| → | |
| → | |
Refactoring Name: Extract Method
Situation: You have a code fragment that can be grouped together.
Method: Turn the fragment into a method whose name explains the purpose of the method.
Example:
void printOwing() {
    printBanner();

    // print details
    System.out.println("name:	" + name);
    System.out.println("amount	" + getOutstanding());
}
void printOwing() {
    printBanner();
    printDetails(getOutstanding());
}

void printDetails(double outstanding) {
    System.out.println("name:	" + name);
    System.out.println("amount	" + outstanding);
}
def print_owing():
    print_banner()

    # print details
    print("name:	" + name)
    print("amount	" + get_outstanding())
def print_owing():
    print_banner()
    print_details(get_outstanding())

def print_details(amount):
    print("name:	" + name)
    print("amount	" + amount)
Some IDEs have builtin support for basic refactorings such as automatically renaming a variable/method/class in all places it has been used.
Refactoring, even if done with the aid of an IDE, may still result in regressions. Therefore, each small refactoring should be followed by regression testing.
What
Developer-to-developer documentation can be in one of two forms:
- Documentation for developer-as-user: Software components are written by developers and reused by other developers, which means there is a need to document how such components are to be used. Such documentation can take several forms:
- API documentation: APIs expose functionality in small-sized, independent and easy-to-use chunks, each of which can be documented systematically.
- Tutorial-style instructional documentation: In addition to explaining functions/methods independently, some higher-level explanations of how to use an API can be useful.
- Example of API Documentation: String API.
- Example of tutorial-style documentation: Java Internationalization Tutorial.
- Example of API Documentation: string API.
- Example of tutorial-style documentation: How to use Regular Expressions in Python
- Documentation for developer-as-maintainer: There is a need to document how a system or a component is designed, implemented and tested so that other developers can maintain and evolve the code. Writing documentation of this type is harder because of the need to explain complex internal details. However, given that readers of this type of documentation usually have access to the source code itself, only some information needs to be included in the documentation, as code (and code comments) can also serve as a complementary source of information.
- An example: se-edu/addressbook-level4 Developer Guide.
Another view proposed by Daniele Procida in this article is as follows:
There is a secret that needs to be understood in order to write good software documentation: there isn’t one thing called documentation, there are four. They are: tutorials, how-to guides, explanation and technical reference. They represent four different purposes or functions, and require four different approaches to their creation. Understanding the implications of this will help improve most software documentation - often immensely. ...
TUTORIALS
A tutorial:
- is learning-oriented
- allows the newcomer to get started
- is a lesson
Analogy: teaching a small child how to cook
HOW-TO GUIDES
A how-to guide:
- is goal-oriented
- shows how to solve a specific problem
- is a series of steps
Analogy: a recipe in a cookery book
EXPLANATION
An explanation:
- is understanding-oriented
- explains
- provides background and context
Analogy: an article on culinary social history
REFERENCE
A reference guide:
- is information-oriented
- describes the machinery
- is accurate and complete
Analogy: a reference encyclopedia article
Software documentation (applies to both user-facing and developer-facing) is best kept in a text format for ease of version tracking. A writer-friendly source format is also desirable as non-programmers (e.g., technical writers) may need to author/edit such documents. As a result, formats such as Markdown, AsciiDoc, and PlantUML are often used for software documentation.
What
JavaDoc is a tool for generating API documentation in HTML format from comments in the source code. In addition, modern IDEs use JavaDoc comments to generate explanatory tooltips.
An example method header comment in JavaDoc format (adapted from Oracle's Java documentation)
/**
 * Returns an Image object that can then be painted on the screen.
 * The url argument must specify an absolute {@link URL}. The name
 * argument is a specifier that is relative to the url argument.
 * <p>
 * This method always returns immediately, whether or not the
 * image exists. When this applet attempts to draw the image on
 * the screen, the data will be loaded. The graphics primitives
 * that draw the image will incrementally paint on the screen.
 *
 * @param url an absolute URL giving the base location of the image
 * @param name the location of the image, relative to the url argument
 * @return the image at the specified URL
 * @see Image
 */
public Image getImage(URL url, String name) {
    try {
        return getImage(new URL(url, name));
    } catch (MalformedURLException e) {
        return null;
    }
}
Generated HTML documentation:
Tooltip generated by Intellij IDE:
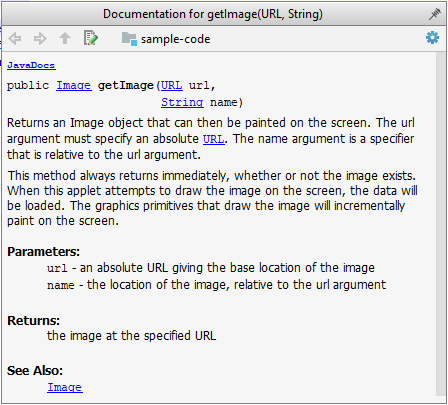
How
In the absence of more extensive guidelines (e.g., given in a coding standard adopted by your project), you can follow the two examples below in your code.
A minimal JavaDoc comment example for methods:
/**
 * Returns lateral location of the specified position.
 * If the position is unset, NaN is returned.
 *
 * @param x X coordinate of position.
 * @param y Y coordinate of position.
 * @param zone Zone of position.
 * @return Lateral location.
 * @throws IllegalArgumentException If zone is <= 0.
 */
public double computeLocation(double x, double y, int zone)
    throws IllegalArgumentException {
    // ...
}
A minimal JavaDoc comment example for classes:
package ...

import ...

/**
 * Represents a location in a 2D space. A <code>Point</code> object corresponds to
 * a coordinate represented by two integers e.g., <code>3,6</code>
 */
public class Point {
    // ...
}
What
Well-written applications include error-handling code that allows them to recover gracefully from unexpected errors. When an error occurs, the application may need to request user intervention, or it may be able to recover on its own. In extreme cases, the application may log the user off or shut down the system. -- Microsoft
What
Exceptions are used to deal with 'unusual' but not entirely unexpected situations that the program might encounter at runtime.
Exception:
The term exception is shorthand for the phrase "exceptional event." An exception is an event, which occurs during the execution of a program, that disrupts the normal flow of the program's instructions. –- Java Tutorial (Oracle Inc.)
Examples:
- A network connection encounters a timeout due to a slow server.
- The code tries to read a file from the hard disk but the file is corrupted and cannot be read.
How
Most languages allow code that encountered an "exceptional" situation to encapsulate details of the situation in an Exception object and throw/raise that object so that another piece of code can catch it and deal with it. This is especially useful when the code that encountered the unusual situation does not know how to deal with it.
The extract below from the -- Java Tutorial (with slight adaptations) explains how exceptions are typically handled.
When an error occurs at some point in the execution, the code being executed creates an exception object and hands it off to the runtime system. The exception object contains information about the error, including its type and the state of the program when the error occurred. Creating an exception object and handing it to the runtime system is called throwing an exception.
After a method throws an exception, the runtime system attempts to find something to handle it in the . The runtime system searches the call stack for a method that contains a block of code that can handle the exception. This block of code is called an exception handler. The search begins with the method in which the error occurred and proceeds through the call stack in the reverse order in which the methods were called. When an appropriate handler is found, the runtime system passes the exception to the handler. An exception handler is considered appropriate if the type of the exception object thrown matches the type that can be handled by the handler.
The exception handler chosen is said to catch the exception. If the runtime system exhaustively searches all the methods on the call stack without finding an appropriate exception handler, the program terminates.
Advantages of exception handling in this way:
- The ability to propagate error information through the call stack.
- The separation of code that deals with 'unusual' situations from the code that does the 'usual' work.
What
Assertions are used to define assumptions about the program state so that the runtime can verify them. An assertion failure indicates a possible bug in the code because the code has resulted in a program state that violates an assumption about how the code should behave.
An assertion can be used to express something like when the execution comes to this point, the variable v cannot be null.
If the runtime detects an assertion failure, it typically takes some drastic action such as terminating the execution with an error message. This is because an assertion failure indicates a possible bug and the sooner the execution stops, the safer it is.
In the Java code below, suppose you set an assertion that timeout returned by Config.getTimeout() is greater than 0. Now, if Config.getTimeout() returns -1 in a specific execution of this line, the runtime can detect it as an assertion failure -- i.e. an assumption about the expected behavior of the code turned out to be wrong which could potentially be the result of a bug -- and take some drastic action such as terminating the execution.
int timeout = Config.getTimeout();
How
Use the assert keyword to define assertions.
This assertion will fail with the message x should be 0 if x is not 0 at this point.
x = getX();
assert x == 0 : "x should be 0";
...
Assertions can be disabled without modifying the code.
java -enableassertions HelloWorld (or java -ea HelloWorld) will run HelloWorld with assertions enabled while java -disableassertions HelloWorld will run it without verifying assertions.
Java disables assertions by default. This could create a situation where you think all assertions are being verified as true while in fact they are not being verified at all. Therefore, remember to enable assertions when you run the program if you want them to be in effect.
Enable assertions in Intellij (how?) and get an assertion to fail temporarily (e.g. insert an assert false into the code temporarily) to confirm assertions are being verified.
Java assert vs JUnit assertions: They are similar in purpose but JUnit assertions are more powerful and customized for testing. In addition, JUnit assertions are not disabled by default. We recommend you use JUnit assertions in test code and Java assert in functional code.
When
It is recommended that assertions be used liberally in the code. Their impact on performance is considered low and worth the additional safety they provide.
Do not use assertions to do work because assertions can be disabled. If not, your program will stop working when assertions are not enabled.
The code below will not invoke the writeFile() method when assertions are disabled. If that method is performing some work that is necessary for your program, your program will not work correctly when assertions are disabled.
...
assert writeFile() : "File writing is supposed to return true";
Assertions are suitable for verifying assumptions about Internal Invariants, Control-Flow Invariants, Preconditions, Postconditions, and Class Invariants. Refer to [Programming with Assertions (second half)] to learn more.
Exceptions and assertions are two complementary ways of handling errors in software but they serve different purposes. Therefore, both assertions and exceptions should be used in code.
- The raising of an exception indicates an unusual condition created by the user (e.g. user inputs an unacceptable input) or the environment (e.g., a file needed for the program is missing).
- An assertion failure indicates the programmer made a mistake in the code (e.g., a null value is returned from a method that is not supposed to return null under any circumstances).
What
Logging is the deliberate recording of certain information during a program execution for future reference. Logs are typically written to a log file but it is also possible to log information in other ways e.g. into a database or a remote server.
Logging can be useful for troubleshooting problems. A good logging system records some system information regularly. When bad things happen to a system e.g. an unanticipated failure, their associated log files may provide indications of what went wrong and actions can then be taken to prevent it from happening again.
A log file is like the of an airplane; they don't prevent problems but they can be helpful in understanding what went wrong after the fact.
source: https://commons.wikimedia.org
How
Most programming environments come with logging systems that allow sophisticated forms of logging. They have features such as the ability to enable and disable logging easily or to change the logging .
This sample Java code uses Java’s default logging mechanism.
First, import the relevant Java package:
import java.util.logging.*;
Next, create a Logger:
private static Logger logger = Logger.getLogger("Foo");
Now, you can use the Logger object to log information. Note the use of a for each message. When running the code, the logging level can be set to WARNING so that log messages specified as having INFO level (which is a lower level than WARNING) will not be written to the log file at all.
// log a message at INFO level
logger.log(Level.INFO, "going to start processing");
// ...
processInput();
if (error) {
    // log a message at WARNING level
    logger.log(Level.WARNING, "processing error", ex);
}
// ...
logger.log(Level.INFO, "end of processing");
What
Build automation tools automate the steps of the build process, usually by means of build scripts.
In a non-trivial project, building a product from its source code can be a complex multi-step process. For example, it can include steps such as: pull code from the revision control system, compile, link, run automated tests, automatically update release documents (e.g. build number), package into a distributable, push to repo, deploy to a server, delete temporary files created during building/testing, email developers of the new build, and so on. Furthermore, this build process can be done ‘on demand’, it can be scheduled (e.g. every day at midnight) or it can be triggered by various events (e.g. triggered by a code push to the revision control system).
Some of these build steps such as compiling, linking and packaging, are already automated in most modern IDEs. For example, several steps happen automatically when the ‘build’ button of the IDE is clicked. Some IDEs even allow customization of this build process to some extent.
However, most big projects use specialized build tools to automate complex build processes.
Some popular build tools relevant to Java developers: Gradle, Maven, Apache Ant, GNU Make
Some other build tools: Grunt (JavaScript), Rake (Ruby)
Some build tools also serve as dependency management tools. Modern software projects often depend on third party libraries that evolve constantly. That means developers need to download the correct version of the required libraries and update them regularly. Therefore, dependency management is an important part of build automation. Dependency management tools can automate that aspect of a project.
Maven and Gradle, in addition to managing the build process, can play the role of dependency management tools too.
Continuous Integration and Continuous Deployment
An extreme application of build automation is called continuous integration (CI) in which integration, building, and testing happens automatically after each code change.
A natural extension of CI is Continuous Deployment (CD) where the changes are not only integrated continuously, but also deployed to end-users at the same time.
Some examples of CI/CD tools: Travis, Jenkins, Appveyor, CircleCI, GitHub Actions
What
Reuse is a major theme in software engineering practices. By reusing tried-and-tested components, the robustness of a new software system can be enhanced while reducing the manpower and time requirement. Reusable components come in many forms; it can be reusing a piece of code, a subsystem, or a whole software.
When
While you may be tempted to use many libraries/frameworks/platforms that seem to crop up on a regular basis and promise to bring great benefits, note that there are costs associated with reuse. Here are some:
- The reused code may be an overkill (think using a sledgehammer to crack a nut), increasing the size of, and/or degrading the performance of, your software.
- The reused software may not be mature/stable enough to be used in an important product. That means the software can change drastically and rapidly, possibly in ways that break your software.
- Non-mature software has the risk of dying off as fast as they emerged, leaving you with a dependency that is no longer maintained.
- The license of the reused software (or its dependencies) restrict how you can use/develop your software.
- The reused software might have bugs, missing features, or security vulnerabilities that are important to your product, but not so important to the maintainers of that software, which means those flaws will not get fixed as fast as you need them to.
- Malicious code can sneak into your product via compromised dependencies.
What
An Application Programming Interface (API) specifies the interface through which other programs can interact with a software component. It is a contract between the component and its clients.
A class has an API (e.g., API of the Java String class, API of the Python str class) which is a collection of public methods that you can invoke to make use of the class.
The GitHub API is a collection of web request formats that the GitHub server accepts and their corresponding responses. You can write a program that interacts with GitHub through that API.
When developing large systems, if you define the API of each component early, the development team can develop the components in parallel because the future behavior of the other components are now more predictable.
SECTION: QUALITY ASSURANCE
What
Software Quality Assurance (QA) is the process of ensuring that the software being built has the required levels of quality.
While testing is the most common activity used in QA, there are other complementary techniques such as static analysis, code reviews, and formal verification.
Validation vs Verification
Quality Assurance = Validation + Verification
QA involves checking two aspects:
- Validation: are you building the right system i.e., are the requirements correct?
- Verification: are you building the system right i.e., are the requirements implemented correctly?
Whether something belongs under validation or verification is not that important. What is more important is that both are done, instead of limiting to only verification (i.e., remember that the requirements can be wrong too).
What
Code review is the systematic examination of code with the intention of finding where the code can be improved.
Reviews can be done in various forms. Some examples below:
Pull Request reviews
- Project Management Platforms such as GitHub and BitBucket allow the new code to be proposed as Pull Requests and provide the ability for others to review the code in the PR.
In pair programming
- As pair programming involves two programmers working on the same code at the same time, there is an implicit review of the code by the other member of the pair.
Formal inspections
Inspections involve a group of people systematically examining project artifacts to discover defects. Members of the inspection team play various roles during the process, such as:
- the author - the creator of the artifact
- the moderator - the planner and executor of the inspection meeting
- the secretary - the recorder of the findings of the inspection
- the inspector/reviewer - the one who inspects/reviews the artifact
Advantages of code review over testing:
- It can detect functionality defects as well as other problems such as coding standard violations.
- It can verify non-code artifacts and incomplete code.
- It does not require test drivers or stubs.
Disadvantages:
- It is a manual process and therefore, error prone.
What
Static analysis: Static analysis is the analysis of code without actually executing the code.
Static analysis of code can find useful information such as unused variables, unhandled exceptions, style errors, and statistics. Most modern IDEs come with some inbuilt static analysis capabilities. For example, an IDE can highlight unused variables as you type the code into the editor.
The term static in static analysis refers to the fact that the code is analyzed without executing the code. In contrast, dynamic analysis requires the code to be executed to gather additional information about the code e.g., performance characteristics.
Higher-end static analysis tools (static analyzers) can perform more complex analysis such as locating potential bugs, memory leaks, inefficient code structures, etc.
Some example static analyzers for Java: CheckStyle, PMD, FindBugs
Linters are a subset of static analyzers that specifically aim to locate areas where the code can be made 'cleaner'.
What
Formal verification uses mathematical techniques to prove the correctness of a program.
Advantages:
- Formal verification can be used to prove the absence of errors. In contrast, testing can only prove the presence of errors, not their absence.
Disadvantages:
- It only proves the compliance with the specification, but not the actual utility of the software.
- It requires highly specialized notations and knowledge which makes it an expensive technique to administer. Therefore, formal verifications are more commonly used in safety-critical software such as flight control systems.
What
Testing: Operating a system or component under specified conditions, observing or recording the results, and making an evaluation of some aspect of the system or component. –- source: IEEE

When testing, you execute a set of test cases. A test case specifies how to perform a test. At a minimum, it specifies the input to the software under test (SUT) and the expected behavior.
Example: A minimal test case for testing a browser:
- Input – Start the browser using a blank page (vertical scrollbar disabled). Then, load
longfile.htmllocated in thetest datafolder. - Expected behavior – The scrollbar should be automatically enabled upon loading
longfile.html.
Test cases can be determined based on the specification, reviewing similar existing systems, or comparing to the past behavior of the SUT.
For each test case you should do the following:
- Feed the input to the SUT
- Observe the actual output
- Compare actual output with the expected output
A test case failure is a mismatch between the expected behavior and the actual behavior. A failure indicates a potential defect (or a bug), unless the error is in the test case itself.
Example: In the browser example above, a test case failure is implied if the scrollbar remains disabled after loading longfile.html. The defect/bug causing that failure could be an uninitialized variable.
Testability
Testability is an indication of how easy it is to test an SUT. As testability depends a lot on the design and implementation, you should try to increase the testability when you design and implement software. The higher the testability, the easier it is to achieve better quality software.
What
Unit testing: testing individual units (methods, classes, subsystems, ...) to ensure each piece works correctly.
In OOP code, it is common to write one or more unit tests for each public method of a class.
Here are the code skeletons for a Foo class containing two methods and a FooTest class that contains unit tests for those two methods.
class Foo {
    String read() {
        // ...
    }

    void write(String input) {
        // ...
    }

}
class FooTest {

    @Test
    void read() {
        // a unit test for Foo#read() method
    }

    @Test
    void write_emptyInput_exceptionThrown() {
        // a unit tests for Foo#write(String) method
    }

    @Test
    void write_normalInput_writtenCorrectly() {
        // another unit tests for Foo#write(String) method
    }
}
import unittest

class Foo:
  def read(self):
      # ...

  def write(self, input):
      # ...


class FooTest(unittest.TestCase):

  def test_read(self):
      # a unit test for read() method

  def test_write_emptyIntput_ignored(self):
      # a unit test for write(string) method

  def test_write_normalInput_writtenCorrectly(self):
      # another unit test for write(string) method
Stubs
A proper unit test requires the unit to be tested in isolation so that bugs in the cannot influence the test i.e. bugs outside of the unit should not affect the unit tests.
If a Logic class depends on a Storage class, unit testing the Logic class requires isolating the Logic class from the Storage class.
Stubs can isolate the from its dependencies.
Stub: A stub has the same interface as the component it replaces, but its implementation is so simple that it is unlikely to have any bugs. It mimics the responses of the component, but only for a limited set of predetermined inputs. That is, it does not know how to respond to any other inputs. Typically, these mimicked responses are hard-coded in the stub rather than computed or retrieved from elsewhere, e.g. from a database.
Consider the code below:
class Logic {
    Storage s;

    Logic(Storage s) {
        this.s = s;
    }

    String getName(int index) {
        return "Name: " + s.getName(index);
    }
}
interface Storage {
    String getName(int index);
}
class DatabaseStorage implements Storage {

    @Override
    public String getName(int index) {
        return readValueFromDatabase(index);
    }

    private String readValueFromDatabase(int index) {
        // retrieve name from the database
    }
}
Normally, you would use the Logic class as follows (note how the Logic object depends on a DatabaseStorage object to perform the getName() operation):
Logic logic = new Logic(new DatabaseStorage());
String name = logic.getName(23);
You can test it like this:
@Test
void getName() {
    Logic logic = new Logic(new DatabaseStorage());
    assertEquals("Name: John", logic.getName(5));
}
However, this logic object being tested is making use of a DataBaseStorage object which means a bug in the DatabaseStorage class can affect the test. Therefore, this test is not testing Logic in isolation from its dependencies and hence it is not a pure unit test.
Here is a stub class you can use in place of DatabaseStorage:
class StorageStub implements Storage {

    @Override
    public String getName(int index) {
        if (index == 5) {
            return "Adam";
        } else {
            throw new UnsupportedOperationException();
        }
    }
}
Note how the StorageStub has the same interface as DatabaseStorage, but is so simple that it is unlikely to contain bugs, and is pre-configured to respond with a hard-coded response, presumably, the correct response DatabaseStorage is expected to return for the given test input.
Here is how you can use the stub to write a unit test. This test is not affected by any bugs in the DatabaseStorage class and hence is a pure unit test.
@Test
void getName() {
    Logic logic = new Logic(new StorageStub());
    assertEquals("Name: Adam", logic.getName(5));
}
In addition to Stubs, there are other type of replacements you can use during testing, e.g. Mocks, Fakes, Dummies, Spies.
What
Integration testing : testing whether different parts of the software work together (i.e. integrates) as expected. Integration tests aim to discover bugs in the 'glue code' related to how components interact with each other. These bugs are often the result of misunderstanding what the parts are supposed to do vs what the parts are actually doing.
Suppose a class Car uses classes Engine and Wheel. If the Car class assumed a Wheel can support a speed of up to 200 mph but the actual Wheel can only support a speed of up to 150 mph, it is the integration test that is supposed to uncover this discrepancy.
How
Integration testing is not simply a case of repeating the unit test cases using the actual dependencies (instead of the stubs used in unit testing). Instead, integration tests are additional test cases that focus on the interactions between the parts.
Suppose a class Car uses classes Engine and Wheel. Here is how you would go about doing pure integration tests:
a) First, unit test Engine and Wheel.
b) Next, unit test Car in isolation of Engine and Wheel, using stubs for Engine and Wheel.
c) After that, do an integration test for Car by using it together with the Engine and Wheel classes to ensure that Car integrates properly with the Engine and the Wheel.
In practice, developers often use a hybrid of unit+integration tests to minimize the need for stubs.
Here's how a hybrid unit+integration approach could be applied to the same example used above:
(a) First, unit test Engine and Wheel.
(b) Next, unit test Car in isolation of Engine and Wheel, using stubs for Engine and Wheel.
(c) After that, do an integration test for Car by using it together with the Engine and Wheel classes to ensure that Car integrates properly with the Engine and the Wheel. This step should include test cases that are meant to unit test Car (i.e. test cases used in the step (b) of the example above) as well as test cases that are meant to test the integration of Car with Wheel and Engine (i.e. pure integration test cases used of the step (c) in the example above).
Note that you no longer need stubs for Engine and Wheel. The downside is that Car is never tested in isolation of its dependencies. Given that its dependencies are already unit tested, the risk of bugs in Engine and Wheel affecting the testing of Car can be considered minimal.
What
System testing: take the whole system and test it against the system specification.
System testing is typically done by a testing team (also called a QA team).
System test cases are based on the specified external behavior of the system. Sometimes, system tests go beyond the bounds defined in the specification. This is useful when testing that the system fails 'gracefully' when pushed beyond its limits.
Suppose the SUT is a browser that is supposedly capable of handling web pages containing up to 5000 characters. Given below is a test case to test if the SUT fails gracefully if pushed beyond its limits.
Test case: load a web page that is too big
* Input: loads a web page containing more than 5000 characters.
* Expected behavior: aborts the loading of the page
  and shows a meaningful error message.
This test case would fail if the browser attempted to load the large file anyway and crashed.
System testing includes testing against non-functional requirements too. Here are some examples:
- Performance testing – to ensure the system responds quickly.
- Load testing (also called stress testing or scalability testing) – to ensure the system can work under heavy load.
- Security testing – to test how secure the system is.
- Compatibility testing, interoperability testing – to check whether the system can work with other systems.
- Usability testing – to test how easy it is to use the system.
- Portability testing – to test whether the system works on different platforms.
What
Alpha testing is performed by the users, under controlled conditions set by the software development team.
Beta testing is performed by a selected subset of target users of the system in their natural work setting.
An open beta release is the release of not-yet-production-quality-but-almost-there software to the general population. For example, Google’s Gmail was in 'beta' for many years before the label was finally removed.
What
Developer testing is the testing done by the developers themselves as opposed to professional testers or end-users.
Why
Delaying testing until the full product is complete has a number of disadvantages:
- Locating the cause of a test case failure is difficult due to a large search space; in a large system, the search space could be millions of lines of code, written by hundreds of developers! The failure may also be due to multiple inter-related bugs.
- Fixing a bug found during such testing could result in major rework, especially if the bug originated from the design or during requirements specification i.e. a faulty design or faulty requirements.
- One bug might 'hide' other bugs, which could emerge only after the first bug is fixed.
- The delivery may have to be delayed if too many bugs are found during testing.
Therefore, it is better to do early testing, as hinted by the popular rule of thumb given below, also illustrated by the graph below it.
The earlier a bug is found, the easier and cheaper to have it fixed.

Such early testing of partially developed software is usually, and by necessity, done by the developers themselves i.e. developer testing.
What
Here are two alternative approaches to testing a software: Scripted testing and Exploratory testing.
Scripted testing: First write a set of test cases based on the expected behavior of the SUT, and then perform testing based on that set of test cases.
Exploratory testing: Devise test cases on-the-fly, creating new test cases based on the results of the past test cases.
Exploratory testing is ‘the simultaneous learning, test design, and test execution’ [source: bach-et-explained] whereby the nature of the follow-up test case is decided based on the behavior of the previous test cases. In other words, running the system and trying out various operations. It is called exploratory testing because testing is driven by observations during testing. Exploratory testing usually starts with areas identified as error-prone, based on the tester’s past experience with similar systems. One tends to conduct more tests for those operations where more faults are found.
Here is an example thought process behind a segment of an exploratory testing session:
“Hmm... looks like feature x is broken. This usually means feature n and k could be broken too; you need to look at them soon. But before that, you should give a good test run to feature y because users can still use the product if feature y works, even if x doesn’t work. Now, if feature y doesn’t work 100%, you have a major problem and this has to be made known to the development team sooner rather than later...”
Exploratory testing is also known as reactive testing, error guessing technique, attack-based testing, and bug hunting.
When
Which approach is better – scripted or exploratory? A mix is better.
The success of exploratory testing depends on the tester’s prior experience and intuition. Exploratory testing should be done by experienced testers, using a clear strategy/plan/framework. Ad-hoc exploratory testing by unskilled or inexperienced testers without a clear strategy is not recommended for real-world non-trivial systems. While exploratory testing may allow us to detect some problems in a relatively short time, it is not prudent to use exploratory testing as the sole means of testing a critical system.
Scripted testing is more systematic, and hence, likely to discover more bugs given sufficient time, while exploratory testing would aid in quick error discovery, especially if the tester has a lot of experience in testing similar systems.
In some contexts, you will achieve your testing mission better through a more scripted approach; in other contexts, your mission will benefit more from the ability to create and improve tests as you execute them. I find that most situations benefit from a mix of scripted and exploratory approaches. --[source: bach-et-explained]
What
Acceptance testing (aka User Acceptance Testing (UAT): test the system to ensure it meets the user requirements.
Acceptance tests give an assurance to the customer that the system does what it is intended to do. Acceptance test cases are often defined at the beginning of the project, usually based on the use case specification. Successful completion of UAT is often a prerequisite to the project sign-off.
Acceptance vs System Testing
Acceptance testing comes after system testing. Similar to system testing, acceptance testing involves testing the whole system.
Some differences between system testing and acceptance testing:
| System Testing | Acceptance Testing |
|---|---|
| Done against the system specification | Done against the requirements specification |
| Done by testers of the project team | Done by a team that represents the customer |
| Done on the development environment or a test bed | Done on the deployment site or on a close simulation of the deployment site |
| Both negative and positive test cases | More focus on positive test cases |
Note: negative test cases: cases where the SUT is not expected to work normally e.g. incorrect inputs; positive test cases: cases where the SUT is expected to work normally
Requirement specification versus system specification
The requirement specification need not be the same as the system specification. Some example differences:
| Requirements specification | System specification |
|---|---|
| limited to how the system behaves in normal working conditions | can also include details on how it will fail gracefully when pushed beyond limits, how to recover, etc. specification |
| written in terms of problems that need to be solved (e.g. provide a method to locate an email quickly) | written in terms of how the system solves those problems (e.g. explain the email search feature) |
| specifies the interface available for intended end-users | could contain additional APIs not available for end-users (for the use of developers/testers) |
However, in many cases one document serves as both a requirement specification and a system specification.
Passing system tests does not necessarily mean passing acceptance testing. Some examples:
- The system might work on the testbed environments but might not work the same way in the deployment environment, due to subtle differences between the two environments.
- The system might conform to the system specification but could fail to solve the problem it was supposed to solve for the user, due to flaws in the system design.
What
When you modify a system, the modification may result in some unintended and undesirable effects on the system. Such an effect is called a regression.
Regression testing is the re-testing of the software to detect regressions. Note that to detect regressions, you need to retest all related components, even if they had been tested before.
Regression testing is more effective when it is done frequently, after each small change. However, doing so can be prohibitively expensive if testing is done manually. Hence, regression testing is more practical when it is automated.
What
An automated test case can be run programmatically and the result of the test case (pass or fail) is determined programmatically. Compared to manual testing, automated testing reduces the effort required to run tests repeatedly and increases precision of testing (because manual testing is susceptible to human errors).
Automated Testing of CLI Apps
A simple way to semi-automate testing of a CLI (Command Line Interface) app is by using input/output re-direction.
- First, you feed the app with a sequence of test inputs that is stored in a file while redirecting the output to another file.
- Next, you compare the actual output file with another file containing the expected output.
Let's assume you are testing a CLI app called AddressBook. Here are the detailed steps:
Store the test input in the text file
input.txt.Store the output you expect from the SUT in another text file
expected.txt.Run the program as given below, which will redirect the text in
input.txtas the input toAddressBookand similarly, will redirect the output of AddressBook to a text fileoutput.txt. Note that this does not require any code changes toAddressBook.java AddressBook < input.txt > output.txtThe way to run a CLI program differs based on the language.
e.g., In Python, assuming the code is inAddressBook.pyfile, use the command
python AddressBook.py < input.txt > output.txtIf you are using Windows, use a normal command window to run the app, not a PowerShell window.
Next, you compare
output.txtwith theexpected.txt. This can be done using a utility such as Windows'FC(i.e. File Compare) command, Unix'sdiffcommand, or a GUI tool such as WinMerge.FC output.txt expected.txt
Note that the above technique is only suitable when testing CLI apps, and only if the exact output can be predetermined. If the output varies from one run to the other (e.g. it contains a time stamp), this technique will not work. In those cases, you need more sophisticated ways of automating tests.
Test Automation Using Test Drivers
A test driver is the code that ‘drives’ the for the purpose of testing i.e. invoking the SUT with test inputs and verifying if the behavior is as expected.
PayrollTest ‘drives’ the Payroll class by sending it test inputs and verifies if the output is as expected.
public class PayrollTest {
    public static void main(String[] args) throws Exception {

        // test setup
        Payroll p = new Payroll();

        // test case 1
        p.setEmployees(new String[]{"E001", "E002"});
        // automatically verify the response
        if (p.totalSalary() != 6400) {
            throw new Error("case 1 failed ");
        }

        // test case 2
        p.setEmployees(new String[]{"E001"});
        if (p.totalSalary() != 2300) {
            throw new Error("case 2 failed ");
        }

        // more tests...

        System.out.println("All tests passed");
    }
}
Test Automation Tools
JUnit is a tool for automated testing of Java programs. Similar tools are available for other languages and for automating different types of testing.
This is an automated test for a Payroll class, written using JUnit libraries.
@Test
public void testTotalSalary() {
    Payroll p = new Payroll();

    // test case 1
    p.setEmployees(new String[]{"E001", "E002"});
    assertEquals(6400, p.totalSalary());

    // test case 2
    p.setEmployees(new String[]{"E001"});
    assertEquals(2300, p.totalSalary());

    // more tests...
}
Most modern IDEs have integrated support for testing tools. The figure below shows the JUnit output when running some JUnit tests using the Eclipse IDE.
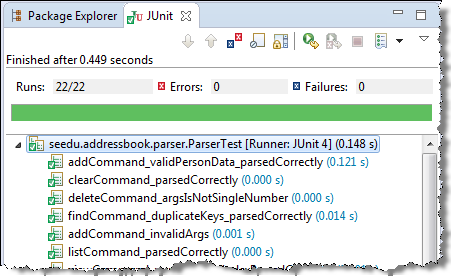
Automated Testing of GUIs
If a software product has a GUI (Graphical User Interface) component, all product-level testing (i.e. the types of testing mentioned above) need to be done using the GUI. However, testing the GUI is much harder than testing the CLI (Command Line Interface) or API, for the following reasons:
- Most GUIs can support a large number of different operations, many of which can be performed in any arbitrary order.
- GUI operations are more difficult to automate than API testing. Reliably automating GUI operations and automatically verifying whether the GUI behaves as expected is harder than calling an operation and comparing its return value with an expected value. Therefore, automated regression testing of GUIs is rather difficult.
- The appearance of a GUI (and sometimes even behavior) can be different across platforms and even environments. For example, a GUI can behave differently based on whether it is minimized or maximized, in focus or out of focus, and in a high resolution display or a low resolution display.

Moving as much logic as possible out of the GUI can make GUI testing easier. That way, you can bypass the GUI to test the rest of the system using automated API testing. While this still requires the GUI to be tested, the number of such test cases can be reduced as most of the system will have been tested using automated API testing.
There are testing tools that can automate GUI testing.
Some tools used for automated GUI testing:
TestFX can do automated testing of JavaFX GUIs
Visual Studio supports the ‘record replay’ type of GUI test automation.
Selenium can be used to automate testing of web application UIs
What
Test coverage is a metric used to measure the extent to which testing exercises the code i.e., how much of the code is 'covered' by the tests.
Here are some examples of different coverage criteria:
- Function/method coverage : based on functions executed e.g., testing executed 90 out of 100 functions.
- Statement coverage : based on the number of lines of code executed e.g., testing executed 23k out of 25k LOC.
- Decision/branch coverage : based on the decision points exercised e.g., an
ifstatement evaluated to bothtrueandfalsewith separate test cases during testing is considered 'covered'. - Condition coverage : based on the boolean sub-expressions, each evaluated to both true and false with different test cases. Condition coverage is not the same as the decision coverage.
if(x > 2 && x < 44) is considered one decision point but two conditions.
For 100% branch or decision coverage, two test cases are required:
(x > 2 && x < 44) == true: [e.g.x == 4](x > 2 && x < 44) == false: [e.g.x == 100]
For 100% condition coverage, three test cases are required:
(x > 2) == true,(x < 44) == true: [e.g.x == 4] [see note 1](x < 44) == false: [e.g.x == 100](x > 2) == false: [e.g.x == 0]
Note 1: A case where both conditions are true is needed because most execution environments use a short circuiting behavior for compound boolean expressions e.g., given an expression c1 && c2, c2 will not be evaluated if c1 is false (as the final result is going to be false anyway).
- Path coverage measures coverage in terms of possible paths through a given part of the code executed. 100% path coverage means all possible paths have been executed. A commonly used notation for path analysis is called the Control Flow Graph (CFG).
- Entry/exit coverage measures coverage in terms of possible calls to and exits from the operations in the SUT.
How
Measuring coverage is often done using coverage analysis tools. Most IDEs have inbuilt support for measuring test coverage, or at least have plugins that can measure test coverage.
Coverage analysis can be useful in improving the quality of testing e.g., if a set of test cases does not achieve 100% branch coverage, more test cases can be added to cover missed branches.
Measuring code coverage in Intellij IDEA (watch from 4 minutes 50 seconds mark)
What
Except for trivial , is not practical because such testing often requires a massive/infinite number of test cases.
Consider the test cases for adding a string object to a :
- Add an item to an empty collection.
- Add an item when there is one item in the collection.
- Add an item when there are 2, 3, .... n items in the collection.
- Add an item that has an English, a French, a Spanish, ... word.
- Add an item that is the same as an existing item.
- Add an item immediately after adding another item.
- Add an item immediately after system startup.
- ...
Exhaustive testing of this operation can take many more test cases.
Program testing can be used to show the presence of bugs, but never to show their absence!
--Edsger Dijkstra
Every test case adds to the cost of testing. In some systems, a single test case can cost thousands of dollars e.g. on-field testing of flight-control software. Therefore, test cases need to be designed to make the best use of testing resources. In particular:
Testing should be effective i.e., it finds a high percentage of existing bugs e.g., a set of test cases that finds 60 defects is more effective than a set that finds only 30 defects in the same system.
Testing should be efficient i.e., it has a high rate of success (bugs found/test cases) a set of 20 test cases that finds 8 defects is more efficient than another set of 40 test cases that finds the same 8 defects.
For testing to be , each new test you add should be targeting a potential fault that is not already targeted by existing test cases. There are test case design techniques that can help us improve the E&E of testing.
Positive vs Negative Test Cases
A positive test case is when the test is designed to produce an expected/valid behavior. On the other hand, a negative test case is designed to produce a behavior that indicates an invalid/unexpected situation, such as an error message.
Consider the testing of the method print(Integer i) which prints the value of i.
- A positive test case:
i == new Integer(50); - A negative test case:
i == null;
Black Box vs Glass Box
Test case design can be of three types, based on how much of the SUT's internal details are considered when designing test cases:
Black-box (aka specification-based or responsibility-based) approach: test cases are designed exclusively based on the SUT’s specified external behavior.
White-box (aka glass-box or structured or implementation-based) approach: test cases are designed based on what is known about the SUT’s implementation, i.e. the code.
Gray-box approach: test case design uses some important information about the implementation. For example, if the implementation of a sort operation uses different algorithms to sort lists shorter than 1000 items and lists longer than 1000 items, more meaningful test cases can then be added to verify the correctness of both algorithms.
What
Consider the testing of the following operation.
isValidMonth(m) : returns true if m (and int) is in the range [1..12]
It is inefficient and impractical to test this method for all integer values [-MIN_INT to MAX_INT]. Fortunately, there is no need to test all possible input values. For example, if the input value 233 fails to produce the correct result, the input 234 is likely to fail too; there is no need to test both.
In general, most SUTs do not treat each input in a unique way. Instead, they process all possible inputs in a small number of distinct ways. That means a range of inputs is treated the same way inside the SUT. Equivalence partitioning (EP) is a test case design technique that uses the above observation to improve the E&E of testing.
Equivalence partition (aka equivalence class): A group of test inputs that are likely to be processed by the SUT in the same way.
By dividing possible inputs into equivalence partitions you can,
- avoid testing too many inputs from one partition. Testing too many inputs from the same partition is unlikely to find new bugs. This increases the efficiency of testing by reducing redundant test cases.
- ensure all partitions are tested. Missing partitions can result in bugs going unnoticed. This increases the effectiveness of testing by increasing the chance of finding bugs.
Basic
Equivalence partitions (EPs) are usually derived from the specifications of the SUT.
These could be EPs for the isValidMonth example:
- [MIN_INT ... 0]: below the range that produces
true(producesfalse) - [1 … 12]: the range that produces
true - [13 … MAX_INT]: above the range that produces
true(producesfalse)
When the SUT has multiple inputs, you should identify EPs for each input.
Consider the method duplicate(String s, int n): String which returns a String that contains s repeated n times.
Example EPs for s:
- zero-length strings
- string containing whitespaces
- ...
Example EPs for n:
0- negative values
- ...
An EP may not have adjacent values.
Consider the method isPrime(int i): boolean that returns true if i is a prime number.
EPs for i:
- prime numbers
- non-prime numbers
Some inputs have only a small number of possible values and a potentially unique behavior for each value. In those cases, you have to consider each value as a partition by itself.
Consider the method showStatusMessage(GameStatus s): String that returns a unique String for each of the possible values of s (GameStatus is an enum). In this case, each possible value of s will have to be considered as a partition.
Note that the EP technique is merely a heuristic and not an exact science, especially when applied manually (as opposed to using an automated program analysis tool to derive EPs). The partitions derived depend on how one ‘speculates’ the SUT to behave internally. Applying EP under a glass-box or gray-box approach can yield more precise partitions.
Consider the EPs given above for the method isValidMonth. A different tester might use these EPs instead:
- [1 … 12]: the range that produces
true - [all other integers]: the range that produces
false
Some more examples:
| Specification | Equivalence partitions |
|---|---|
| [ |
| [ |
Intermediate
When deciding EPs of OOP methods, you need to identify the EPs of all data participants that can potentially influence the behaviour of the method, such as,
- the target object of the method call
- input parameters of the method call
- other data/objects accessed by the method such as global variables. This category may not be applicable if using the black box approach (because the test case designer using the black box approach will not know how the method is implemented).
Consider this method in the DataStack class:
push(Object o): boolean
- Adds
oto the top of the stack if the stack is not full. - Returns
trueif the push operation was a success. - Throws
MutabilityExceptionif the global flagFREEZE==true.InvalidValueExceptionifois null.
EPs:
DataStackobject: [full] [not full]o: [null] [not null]FREEZE: [true][false]
Consider a simple Minesweeper app. What are the EPs for the newGame() method of the Logic component?
As newGame() does not have any parameters, the only obvious participant is the Logic object itself.
Note that if the glass-box or the grey-box approach is used, other associated objects that are involved in the method might also be included as participants. For example, the Minefield object can be considered as another participant of the newGame() method. Here, the black-box approach is assumed.
Next, let us identify equivalence partitions for each participant. Will the newGame() method behave differently for different Logic objects? If yes, how will it differ? In this case, yes, it might behave differently based on the game state. Therefore, the equivalence partitions are:
PRE_GAME: before the game starts, minefield does not exist yetREADY: a new minefield has been created and the app is waiting for the player’s first moveIN_PLAY: the current minefield is already in useWON,LOST: let us assume thatnewGame()behaves the same way for these two values
Consider the Logic component of the Minesweeper application. What are the EPs for the markCellAt(int x, int y) method? The partitions in bold represent valid inputs.
Logic: PRE_GAME, READY, IN_PLAY, WON, LOSTx: [MIN_INT..-1] [0..(W-1)] [W..MAX_INT] (assuming a minefield size of WxH)y: [MIN_INT..-1] [0..(H-1)] [H..MAX_INT]Cellat(x,y): HIDDEN, MARKED, CLEARED
What
Boundary Value Analysis (BVA) is a test case design heuristic that is based on the observation that bugs often result from incorrect handling of boundaries of equivalence partitions. This is not surprising, as the end points of boundaries are often used in branching instructions, etc., where the programmer can make mistakes.
The markCellAt(int x, int y) operation could contain code such as if (x > 0 && x <= (W-1)) which involves the boundaries of x’s equivalence partitions.
BVA suggests that when picking test inputs from an equivalence partition, values near boundaries (i.e. boundary values) are more likely to find bugs.
Boundary values are sometimes called corner cases.
How
Typically, you should choose three values around the boundary to test: one value from the boundary, one value just below the boundary, and one value just above the boundary. The number of values to pick depends on other factors, such as the cost of each test case.
Some examples:
| Equivalence partition | Some possible test values (boundaries are in bold) |
|---|---|
[1-12] | 0,1,2, 11,12,13 |
[MIN_INT, 0] | MIN_INT, MIN_INT+1, -1, 0 , 1 |
[any non-null String] | Empty String, a String of maximum possible length |
[prime numbers] | No specific boundary |
[non-empty Stack] | Stack with: no elements, one element, two elements, no empty spaces, only one empty space |
Why
An SUT can take multiple inputs. You can select values for each input (using equivalence partitioning, boundary value analysis, or some other technique).
An SUT that takes multiple inputs and some values chosen for each input:
- Method to test:
calculateGrade(participation, projectGrade, isAbsent, examScore) - Values to test:
Input Valid values to test Invalid values to test participation 0, 1, 19, 20 21, 22 projectGrade A, B, C, D, F isAbsent true, false examScore 0, 1, 69, 70, 71, 72
Testing all possible combinations is effective but not efficient. If you test all possible combinations for the above example, you need to test 6x5x2x6=360 cases. Doing so has a higher chance of discovering bugs (i.e. effective) but the number of test cases will be too high (i.e. not efficient). Therefore, you need smarter ways to combine test inputs that are both effective and efficient.
Test Input Combination Strategies
Given below are some basic strategies for generating a set of test cases by combining multiple test inputs.
Let's assume the SUT has the following three inputs and you have selected the given values for testing:
SUT: foo(char p1, int p2, boolean p3)
Values to test:
| Input | Values |
|---|---|
| p1 | a, b, c |
| p2 | 1, 2, 3 |
| p3 | T, F |
The all combinations strategy generates test cases for each unique combination of test inputs.
This strategy generates 3x3x2=18 test cases.
| Test Case | p1 | p2 | p3 |
|---|---|---|---|
| 1 | a | 1 | T |
| 2 | a | 1 | F |
| 3 | a | 2 | T |
| ... | ... | ... | ... |
| 18 | c | 3 | F |
The at least once strategy includes each test input at least once.
This strategy generates 3 test cases.
| Test Case | p1 | p2 | p3 |
|---|---|---|---|
| 1 | a | 1 | T |
| 2 | b | 2 | F |
| 3 | c | 3 | VV/IV |
VV/IV = Any Valid Value / Any Invalid Value
The all pairs strategy creates test cases so that for any given pair of inputs, all combinations between them are tested. It is based on the observation that a bug is rarely the result of more than two interacting factors. The resulting number of test cases is lower than the all combinations strategy, but higher than the at least once approach.
This strategy generates 9 test cases:
| Test Case | p1 | p2 | p3 |
|---|---|---|---|
| 1 | a | 1 | T |
| 2 | a | 2 | T |
| 3 | a | 3 | F |
| 4 | b | 1 | F |
| 5 | b | 2 | T |
| 6 | b | 3 | F |
| 7 | c | 1 | T |
| 8 | c | 2 | F |
| 9 | c | 3 | T |
A variation of this strategy is to test all pairs of inputs but only for inputs that could influence each other.
Testing all pairs between p1 and p3 only while ensuring all p2 values are tested at least once:
| Test Case | p1 | p2 | p3 |
|---|---|---|---|
| 1 | a | 1 | T |
| 2 | a | 2 | F |
| 3 | b | 3 | T |
| 4 | b | VV/IV | F |
| 5 | c | VV/IV | T |
| 6 | c | VV/IV | F |
The random strategy generates test cases using one of the other strategies and then picks a subset randomly (presumably because the original set of test cases is too big).
There are other strategies that can be used too.
Heuristic: Each Valid Input at Least Once in a Positive Test Case
Consider the following scenario.
SUT: printLabel(String fruitName, int unitPrice)
Selected values for fruitName (invalid values are underlined):
| Values | Explanation |
|---|---|
| Apple | Label format is round |
| Banana | Label format is oval |
| Cherry | Label format is square |
| Dog | Not a valid fruit |
Selected values for unitPrice:
| Values | Explanation |
|---|---|
| 1 | Only one digit |
| 20 | Two digits |
| 0 | Invalid because 0 is not a valid price |
| -1 | Invalid because negative prices are not allowed |
Suppose these are the test cases being considered.
| Case | fruitName | unitPrice | Expected |
|---|---|---|---|
| 1 | Apple | 1 | Print label |
| 2 | Banana | 20 | Print label |
| 3 | Cherry | 0 | Error message “invalid price” |
| 4 | Dog | -1 | Error message “invalid fruit" |
It looks like the test cases were created using the at least once strategy. After running these tests, can you confirm that the square-format label printing is done correctly?
- Answer: No.
- Reason:
Cherry-- the only input that can produce a square-format label -- is in a negative test case which produces an error message instead of a label. If there is a bug in the code that prints labels in square-format, these tests cases will not trigger that bug.
In this case, a useful heuristic to apply is each valid input must appear at least once in a positive test case. Cherry is a valid test input and you must ensure that it appears at least once in a positive test case. Here are the updated test cases after applying that heuristic.
| Case | fruitName | unitPrice | Expected |
|---|---|---|---|
| 1 | Apple | 1 | Print round label |
| 2 | Banana | 20 | Print oval label |
| 2.1 | Cherry | VV | Print square label |
| 3 | VV | 0 | Error message “invalid price” |
| 4 | Dog | -1 | Error message “invalid fruit" |
VV/IV = Any Invalid or Valid Value VV = Any Valid Value
Heuristic: No More Than One Invalid Input In A Test Case
Consider the test cases designed in [Heuristic: each valid input at least once in a positive test case].
After running these test cases, can you be sure that the error message “invalid price” is shown for negative prices?
- Answer: No.
- Reason:
-1-- the only input that is a negative price -– is in a test case that produces the error message “invalid fruit”.
In this case, a useful heuristic to apply is no more than one invalid input in a test case. After applying that, you get the following test cases.
| Case | fruitName | unitPrice | Expected |
|---|---|---|---|
| 1 | Apple | 1 | Print round label |
| 2 | Banana | 20 | Print oval label |
| 2.1 | Cherry | VV | Print square label |
| 3 | VV | 0 | Error message “invalid price” |
| 4 | VV | -1 | Error message “invalid price" |
| 4.1 | Dog | VV | Error message “invalid fruit" |
VV/IV = Any Invalid or Valid Value VV = Any Valid Value
Testing Based on Use Cases
Use cases can be used for system testing and acceptance testing. For example, the main success scenario can be one test case while each variation (due to extensions) can form another test case. However, note that use cases do not specify the exact data entered into the system. Instead, it might say something like user enters his personal data into the system. Therefore, the tester has to choose data by considering equivalence partitions and boundary values. The combinations of these could result in one use case producing many test cases.
To increase the E&E of testing, high-priority use cases are given more attention. For example, a scripted approach can be used to test high-priority test cases, while an exploratory approach is used to test other areas of concern that could emerge during testing.
SECTION: PROJECT MANAGEMENT
What
Revision control is the process of managing multiple versions of a piece of information. In its simplest form, this is something that many people do by hand: every time you modify a file, save it under a new name that contains a number, each one higher than the number of the preceding version.
Manually managing multiple versions of even a single file is an error-prone task, though, so software tools to help automate this process have long been available. The earliest automated revision control tools were intended to help a single user to manage revisions of a single file. Over the past few decades, the scope of revision control tools has expanded greatly; they now manage multiple files, and help multiple people to work together. The best modern revision control tools have no problem coping with thousands of people working together on projects that consist of hundreds of thousands of files.
Revision control software will track the history and evolution of your project, so you don't have to. For every change, you'll have a log of who made it; why they made it; when they made it; and what the change was.
Revision control software makes it easier for you to collaborate when you're working with other people. For example, when people more or less simultaneously make potentially incompatible changes, the software will help you to identify and resolve those conflicts.
It can help you to recover from mistakes. If you make a change that later turns out to be an error, you can revert to an earlier version of one or more files. In fact, a really good revision control tool will even help you to efficiently figure out exactly when a problem was introduced.
It will help you to work simultaneously on, and manage the drift between, multiple versions of your project. Most of these reasons are equally valid, at least in theory, whether you're working on a project by yourself, or with a hundred other people.
-- [adapted from bryan-mercurial-guide]
RCS: Revision control software are the software tools that automate the process of Revision Control i.e. managing revisions of software artifacts.
Revision: A revision (some seem to use it interchangeably with version while others seem to distinguish the two -- here, let us treat them as the same, for simplicity) is a state of a piece of information at a specific time that is a result of some changes to it e.g., if you modify the code and save the file, you have a new revision (or a version) of that file.
Revision control software are also known as Version Control Software (VCS), and by a few other names.
Repositories
Repository (repo for short): The database of the history of a directory being tracked by an RCS software (e.g. Git).
The repository is the database where the meta-data about the revision history are stored. Suppose you want to apply revision control on files in a directory called ProjectFoo. In that case, you need to set up a repo (short for repository) in the ProjectFoo directory, which is referred to as the working directory of the repo. For example, Git uses a hidden folder named .git inside the working directory.
You can have multiple repos in your computer, each repo revision-controlling files of a different working directory, for examples, files of different projects.
Saving History
Tracking and ignoring
In a repo, you can specify which files to track and which files to ignore. Some files such as temporary log files created during the build/test process should not be revision-controlled.
Staging and committing
Committing saves a snapshot of the current state of the tracked files in the revision control history. Such a snapshot is also called a commit (i.e. the noun).
When ready to commit, you first stage the specific changes you want to commit. This intermediate step allows you to commit only some changes while saving other changes for a later commit.
Using History
RCS tools store the history of the working directory as a series of commits. This means you should commit after each change that you want the RCS to 'remember'.
Each commit in a repo is a recorded point in the history of the project that is uniquely identified by an auto-generated hash e.g. a16043703f28e5b3dab95915f5c5e5bf4fdc5fc1.
You can tag a specific commit with a more easily identifiable name e.g. v1.0.2.
To see what changed between two points of the history, you can ask the RCS tool to diff the two commits in concern.
To restore the state of the working directory at a point in the past, you can checkout the commit in concern. i.e., you can traverse the history of the working directory simply by checking out the commits you are interested in.
Remote Repositories
Remote repositories are repos that are hosted on remote computers and allow remote access. They are especially useful for sharing the revision history of a codebase among team members of a multi-person project. They can also serve as a remote backup of your codebase.
It is possible to set up your own remote repo on a server, but the easier option is to use a remote repo hosting service such as GitHub or BitBucket.
You can clone a repo to create a copy of that repo in another location on your computer. The copy will even have the revision history of the original repo i.e., identical to the original repo. For example, you can clone a remote repo onto your computer to create a local copy of the remote repo.
When you clone from a repo, the original repo is commonly referred to as the upstream repo. A repo can have multiple upstream repos. For example, let's say a repo repo1 was cloned as repo2 which was then cloned as repo3. In this case, repo1 and repo2 are upstream repos of repo3.
You can pull from one repo to another, to receive new commits in the second repo, if the repos have a shared history. Let's say some new commits were added to the after you cloned it and you would like to copy over those new commits to your own clone i.e., sync your clone with the upstream repo. In that case, you pull from the upstream repo to your clone.
You can push new commits in one repo to another repo which will copy the new commits onto the destination repo. Note that pushing to a repo requires you to have write-access to it. Furthermore, you can push between repos only if those repos have a shared history among them (i.e., one was created by copying the other at some point in the past).
Cloning, pushing, and pulling can be done between two local repos too, although it is more common for them to involve a remote repo.
A repo can work with any number of other repositories as long as they have a shared history e.g., repo1 can pull from (or push to) repo2 and repo3 if they have a shared history between them.
A fork is a remote copy of a remote repo. As you know, cloning creates a local copy of a repo. In contrast, forking creates a remote copy of a Git repo hosted on GitHub. This is particularly useful if you want to play around with a GitHub repo but you don't have write permissions to it; you can simply fork the repo and do whatever you want with the fork as you are the owner of the fork.
A pull request (PR for short) is a mechanism for contributing code to a remote repo, i.e., "I'm requesting you to pull my proposed changes to your repo". For this to work, the two repos must have a shared history. The most common case is sending PRs from a fork to its repo.
Here is a scenario that includes all the concepts introduced above (click inside the slide to advance the animation):
Branching
Branching is the process of evolving multiple versions of the software in parallel. For example, one team member can create a new branch and add an experimental feature to it while the rest of the team keeps working on another branch. Branches can be given names e.g. master, release, dev.
A branch can be merged into another branch. Merging usually results in a new commit that represents the changes done in the branch being merged.
 Branching and merging
 Merge conflicts happen when you try to merge two branches that had changed the same part of the code and the RCS cannot decide which changes to keep. In those cases, you have to ‘resolve’ the conflicts manually.
DRCS vs CRCS
RCS can be done in two ways: the centralized way and the distributed way.
Centralized RCS (CRCS for short) uses a central remote repo that is shared by the team. Team members download (‘pull’) and upload (‘push’) changes between their own local repositories and the central repository. Older RCS tools such as CVS and SVN support only this model. Note that these older RCS do not support the notion of a local repo either. Instead, they force users to do all the versioning with the remote repo.
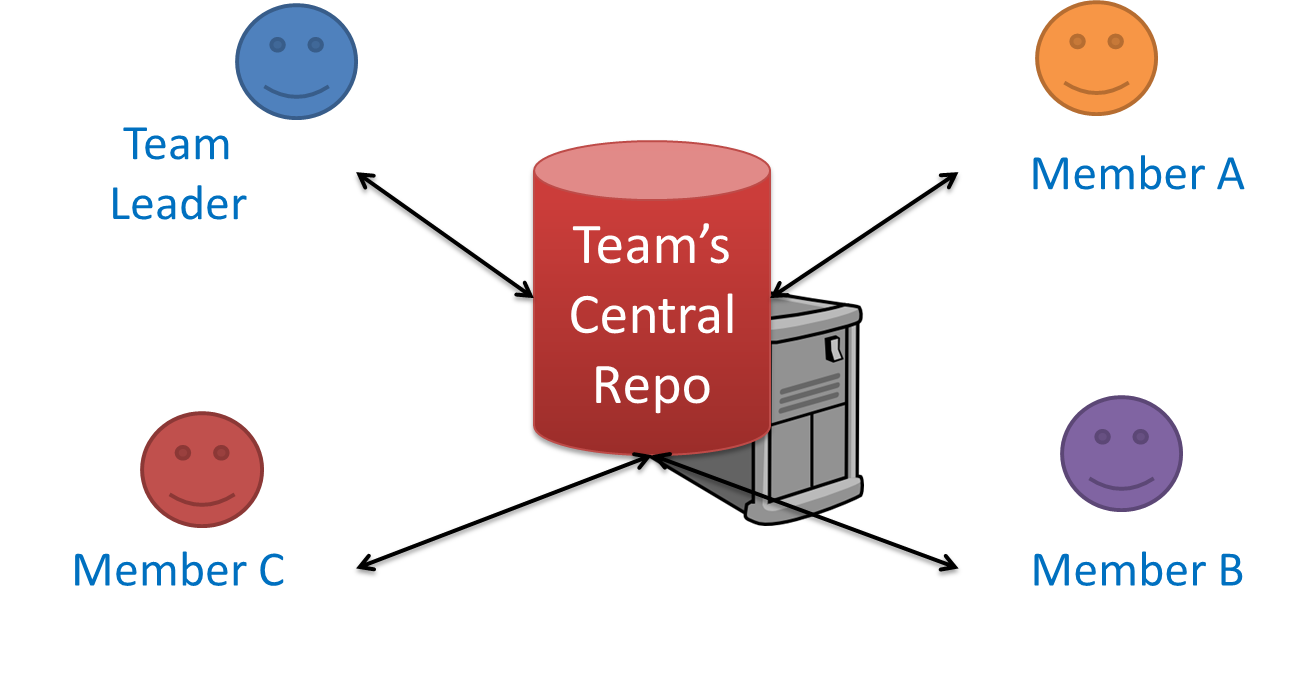
The centralized RCS approach without any local repos (e.g., CVS, SVN)
Distributed RCS (DRCS for short, also known as Decentralized RCS) allows multiple remote repos and pulling and pushing can be done among them in arbitrary ways. The workflow can vary differently from team to team. For example, every team member can have his/her own remote repository in addition to their own local repository, as shown in the diagram below. Git and Mercurial are some prominent RCS tools that support the distributed approach.
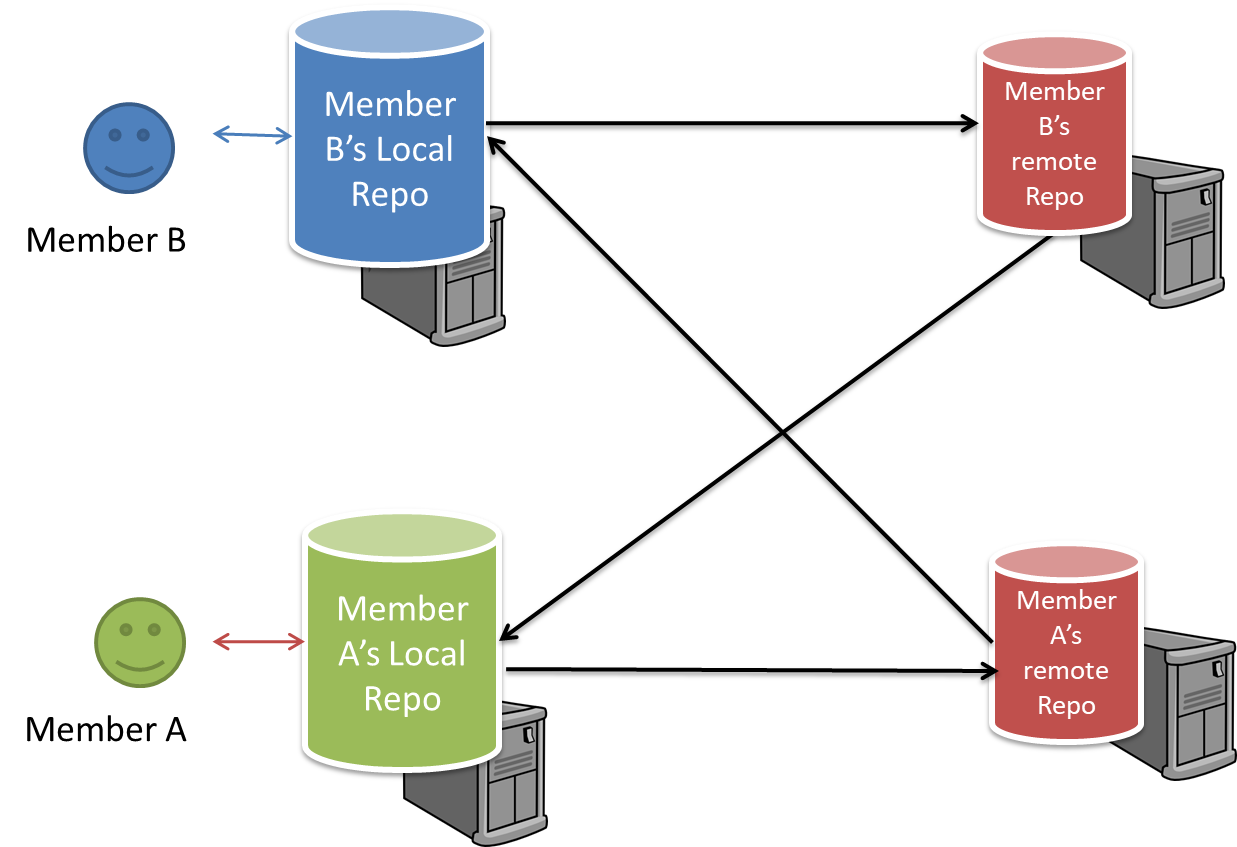
The decentralized RCS approach
Forking Flow

In the forking workflow, the 'official' version of the software is kept in a remote repo designated as the 'main repo'. All team members fork the main repo and create pull requests from their fork to the main repo.
To illustrate how the workflow goes, let’s assume Jean wants to fix a bug in the code. Here are the steps:
- Jean creates a separate branch in her local repo and fixes the bug in that branch.
Common mistake: Doing the proposed changes in themasterbranch -- if Jean does that, she will not be able to have more than one PR open at any time because any changes to themasterbranch will be reflected in all open PRs. - Jean pushes the branch to her fork.
- Jean creates a pull request from that branch in her fork to the main repo.
- Other members review Jean’s pull request.
- If reviewers suggested any changes, Jean updates the PR accordingly.
- When reviewers are satisfied with the PR, one of the members (usually the team lead or a designated 'maintainer' of the main repo) merges the PR, which brings Jean’s code to the main repo.
- Other members, realizing there is new code in the upstream repo, sync their forks with the new upstream repo (i.e. the main repo). This is done by pulling the new code to their own local repo and pushing the updated code to their own fork.
Possible mistake: Creating another 'reverse' PR from the team repo to the team member's fork to sync the member's fork with the merged code. PRs are meant to go from downstream repos to upstream repos, not in the other direction.
One main benefit of this workflow is that it does not require most contributors to have write permissions to the main repository. Only those who are merging PRs need write permissions. The main drawback of this workflow is the extra overhead of sending everything through forks.
Work Breakdown Structure
A Work Breakdown Structure (WBS) depicts information about tasks and their details in terms of subtasks. When managing projects, it is useful to divide the total work into smaller, well-defined units. Relatively complex tasks can be further split into subtasks. In complex projects, a WBS can also include prerequisite tasks and effort estimates for each task.
The high level tasks for a single iteration of a small project could look like the following:
| Task ID | Task | Estimated Effort | Prerequisite Task |
|---|---|---|---|
| A | Analysis | 1 man day | - |
| B | Design | 2 man day | A |
| C | Implementation | 4.5 man day | B |
| D | Testing | 1 man day | C |
| E | Planning for next version | 1 man day | D |
The effort is traditionally measured in man hour/day/month i.e. work that can be done by one person in one hour/day/month. The Task ID is a label for easy reference to a task. Simple labeling is suitable for a small project, while a more informative labeling system can be adopted for bigger projects.
An example WBS for a game development project.
| Task ID | Task | Estimated Effort | Prerequisite Task |
|---|---|---|---|
| A | High level design | 1 man day | - |
| B |
Detail design
|
2 man day
| A |
| C |
Implementation
|
4.5 man day
|
|
| D | System Testing | 1 man day | C |
| E | Planning for next version | 1 man day | D |
All tasks should be well-defined. In particular, it should be clear as to when the task will be considered done.
Some examples of ill-defined tasks and their better-defined counterparts:
| Bad | Better |
|---|---|
| more coding | implement component X |
| do research on UI testing | find a suitable tool for testing the UI |
Milestones
A milestone is the end of a stage which indicates significant progress. You should take into account dependencies and priorities when deciding on the features to be delivered at a certain milestone.
Each intermediate product release is a milestone.
In some projects, it is not practical to have a very detailed plan for the whole project due to the uncertainty and unavailability of required information. In such cases, you can use a high-level plan for the whole project and a detailed plan for the next few milestones.
Milestones for the Minesweeper project, iteration 1
| Day | Milestones |
|---|---|
| Day 1 | Architecture skeleton completed |
| Day 3 | ‘new game’ feature implemented |
| Day 4 | ‘new game’ feature tested |
Buffers
A buffer is time set aside to absorb any unforeseen delays. It is very important to include buffers in a software project schedule because effort/time estimations for software development are notoriously hard. However, do not inflate task estimates to create hidden buffers; have explicit buffers instead. Reason: With explicit buffers, it is easier to detect incorrect effort estimates which can serve as feedback to improve future effort estimates.

Issue Trackers
Keeping track of project tasks (who is doing what, which tasks are ongoing, which tasks are done etc.) is an essential part of project management. In small projects, it may be possible to keep track of tasks using simple tools such as online spreadsheets or general-purpose/light-weight task tracking tools such as Trello. Bigger projects need more sophisticated task tracking tools.
Issue trackers (sometimes called bug trackers) are commonly used to track task assignment and progress. Most online project management software such as GitHub, SourceForge, and BitBucket come with an integrated issue tracker.
A screenshot from the Jira Issue tracker software (Jira is part of the BitBucket project management tool suite):
Team Structures
Given below are three commonly used team structures in software development. Irrespective of the team structure, it is a good practice to assign roles and responsibilities to different team members so that someone is clearly in charge of each aspect of the project. In comparison, the ‘everybody is responsible for everything’ approach can result in more chaos and hence slower progress.

Egoless team
In this structure, every team member is equal in terms of responsibility and accountability. When any decision is required, consensus must be reached. This team structure is also known as a democratic team structure. This team structure usually finds a good solution to a relatively hard problem as all team members contribute ideas.
However, the democratic nature of the team structure bears a higher risk of falling apart due to the absence of an authority figure to manage the team and resolve conflicts.
Chief programmer team
Frederick Brooks proposed that software engineers learn from the medical surgical team in an operating room. In such a team, there is always a chief surgeon, assisted by experts in other areas. Similarly, in a chief programmer team structure, there is a single authoritative figure, the chief programmer. Major decisions, e.g. system architecture, are made solely by him/her and obeyed by all other team members. The chief programmer directs and coordinates the effort of other team members. When necessary, the chief will be assisted by domain specialists e.g. business specialists, database experts, network technology experts, etc. This allows individual group members to concentrate solely on the areas in which they have sound knowledge and expertise.
The success of such a team structure relies heavily on the chief programmer. Not only must he/she be a superb technical hand, he/she also needs good managerial skills. Under a suitably qualified leader, such a team structure is known to produce successful work.
Strict hierarchy team
At the opposite extreme of an egoless team, a strict hierarchy team has a strictly defined organization among the team members, reminiscent of the military or a bureaucratic government. Each team member only works on his/her assigned tasks and reports to a single “boss”.
In a large, resource-intensive, complex project, this could be a good team structure to reduce communication overhead.
What
Software development goes through different stages such as requirements, analysis, design, implementation and testing. These stages are collectively known as the software development life cycle (SDLC). There are several approaches, known as software development life cycle models (also called software process models), that describe different ways to go through the SDLC. Each process model prescribes a "roadmap" for the software developers to manage the development effort. The roadmap describes the aims of the development stage(s), the artifacts or outcome of each stage, as well as the workflow i.e. the relationship between stages.
Sequential Models
The sequential model, also called the waterfall model, models software development as a linear process, in which the project is seen as progressing steadily in one direction through the development stages. The name waterfall stems from how the model is drawn to look like a waterfall (see below).

When one stage of the process is completed, it should produce some artifacts to be used in the next stage. For example, upon completion of the requirements stage, a comprehensive list of requirements is produced that will see no further modifications. A strict application of the sequential model would require each stage to be completed before starting the next.
This could be a useful model when the problem statement is well-understood and stable. In such cases, using the sequential model should result in a timely and systematic development effort, provided that all goes well. As each stage has a well-defined outcome, the progress of the project can be tracked with relative ease.
The major problem with this model is that the requirements of a real-world project are rarely well-understood at the beginning and keep changing over time. One reason for this is that users are generally not aware of how a software application can be used without prior experience in using a similar application.
Iterative Models
The iterative model (sometimes called iterative and incremental) advocates having several iterations of SDLC. Each of the iterations could potentially go through all the development stages, from requirements gathering to testing & deployment. Roughly, it appears to be similar to several cycles of the sequential model.

In this model, each of the iterations produces a new version of the product. Feedback on the new version can then be fed to the next iteration. Taking the Minesweeper game as an example, the iterative model will deliver a fully playable version from the early iterations. However, the first iteration will have primitive functionality, for example, a clumsy text based UI, fixed board size, limited randomization, etc. These functionalities will then be improved in later releases.
The iterative model can take a breadth-first or a depth-first approach to iteration planning.
- breadth-first: an iteration evolves all major components in parallel e.g., add a new feature fully, or enhance an existing feature.
- depth-first: an iteration focuses on fleshing out only some components e.g., update the backend to support a new feature that will be added in a future iteration.
Most projects use a mixture of breadth-first and depth-first iterations i.e., an iteration can contain some breadth-first work as well as some depth-first work.
Agile Models
In 2001, a group of prominent software engineering practitioners met and brainstormed for an alternative to documentation-driven, heavyweight software development processes that were used in most large projects at the time. This resulted in something called the agile manifesto (a vision statement of what they were looking to do).
You are uncovering better ways of developing software by doing it and helping others do it.
Through this work you have come to value:
- Individuals and interactions over processes and tools
- Working software over comprehensive documentation
- Customer collaboration over contract negotiation
- Responding to change over following a plan
That is, while there is value in the items on the right, you value the items on the left more.
-- Extract from the Agile Manifesto
Subsequently, some of the signatories of the manifesto went on to create process models that try to follow it. These processes are collectively called agile processes. Some of the key features of agile approaches are:
- Requirements are prioritized based on the needs of the user, are clarified regularly (at times almost on a daily basis) with the entire project team, and are factored into the development schedule as appropriate.
- Instead of doing a very elaborate and detailed design and a project plan for the whole project, the team works based on a rough project plan and a high level design that evolves as the project goes on.
- There is a strong emphasis on complete transparency and responsibility sharing among the team members. The team is responsible together for the delivery of the product. Team members are accountable, and regularly and openly share progress with each other and with the user.
There are a number of agile processes in the development world today. eXtreme Programming (XP) and Scrum are two of the well-known ones.
XP
The following description was adapted from the XP home page, emphasis added:
Extreme Programming (XP) stresses customer satisfaction. Instead of delivering everything you could possibly want on some date far in the future, this process delivers the software you need as you need it.
XP aims to empower developers to confidently respond to changing customer requirements, even late in the life cycle.
XP emphasizes teamwork. Managers, customers, and developers are all equal partners in a collaborative team. XP implements a simple, yet effective environment enabling teams to become highly productive. The team self-organizes around the problem to solve it as efficiently as possible.
XP aims to improve a software project in five essential ways: communication, simplicity, feedback, respect, and courage. Extreme Programmers constantly communicate with their customers and fellow programmers. They keep their design simple and clean. They get feedback by testing their software starting on day one. Every small success deepens their respect for the unique contributions of each and every team member. With this foundation, Extreme Programmers are able to courageously respond to changing requirements and technology.
XP has a set of simple rules. XP is a lot like a jig saw puzzle with many small pieces. Individually the pieces make no sense, but when combined together a complete picture can be seen. This flow chart shows how Extreme Programming's rules work together.

Pair programming, CRC cards, project velocity, and standup meetings are some interesting topics related to XP. Refer to extremeprogramming.org to find out more about XP.
Scrum
This description of Scrum was adapted from Wikipedia [retrieved on 18/10/2011], emphasis added:
Scrum is a process skeleton that contains sets of practices and predefined roles. The main roles in Scrum are:
- The Scrum Master, who maintains the processes (typically in lieu of a project manager)
- The Product Owner, who represents the stakeholders and the business
- The Team, a cross-functional group who do the actual analysis, design, implementation, testing, etc.
A Scrum project is divided into iterations called Sprints. A sprint is the basic unit of development in Scrum. Sprints tend to last between one week and one month, and are a timeboxed (i.e. restricted to a specific duration) effort of a constant length.
Each sprint is preceded by a planning meeting, where the tasks for the sprint are identified and an estimated commitment for the sprint goal is made, and followed by a review or retrospective meeting, where the progress is reviewed and lessons for the next sprint are identified.
During each sprint, the team creates a potentially deliverable product increment (for example, working and tested software). The set of features that go into a sprint come from the product backlog, which is a prioritized set of high level requirements of work to be done. Which backlog items go into the sprint is determined during the sprint planning meeting. During this meeting, the Product Owner informs the team of the items in the product backlog that he or she wants completed. The team then determines how much of this they can commit to complete during the next sprint, and records this in the sprint backlog. During a sprint, no one is allowed to change the sprint backlog, which means that the requirements are frozen for that sprint. Development is timeboxed such that the sprint must end on time; if requirements are not completed for any reason they are left out and returned to the product backlog. After a sprint is completed, the team demonstrates the use of the software.
Scrum enables the creation of self-organizing teams by encouraging co-location of all team members, and verbal communication between all team members and disciplines in the project.
A key principle of Scrum is its recognition that during a project the customers can change their minds about what they want and need (often called requirements churn), and that unpredicted challenges cannot be easily addressed in a traditional predictive or planned manner. As such, Scrum adopts an empirical approach—accepting that the problem cannot be fully understood or defined, focusing instead on maximizing the team’s ability to deliver quickly and respond to emerging requirements.

Daily Scrum is another key scrum practice. The description below was adapted from https://www.mountaingoatsoftware.com (emphasis added):
In Scrum, on each day of a sprint, the team holds a daily scrum meeting called the "daily scrum.” Meetings are typically held in the same location and at the same time each day. Ideally, a daily scrum meeting is held in the morning, as it helps set the context for the coming day's work. These scrum meetings are strictly time-boxed to 15 minutes. This keeps the discussion brisk but relevant.
...
During the daily scrum, each team member answers the following three questions:
- What did you do yesterday?
- What will you do today?
- Are there any impediments in your way?
...
The daily scrum meeting is not used as a problem-solving or issue resolution meeting. Issues that are raised are taken offline and usually dealt with by the relevant subgroup immediately after the meeting.
SECTION: PRINCIPLES
Single Responsibility Principle
Single responsibility principle (SRP): A class should have one, and only one, reason to change. -- Robert C. Martin
If a class has only one responsibility, it needs to change only when there is a change to that responsibility.
Consider a TextUi class that does parsing of the user commands as well as interacting with the user. That class needs to change when the formatting of the UI changes as well as when the syntax of the user command changes. Hence, such a class does not follow the SRP.
Gather together the things that change for the same reasons. Separate those things that change for different reasons. ―- Agile Software Development, Principles, Patterns, and Practices by Robert C. Martin
Open-Closed Principle
The Open-Closed Principle aims to make a code entity easy to adapt and reuse without needing to modify the code entity itself.
Open-closed principle (OCP): A module should be open for extension but closed for modification. That is, modules should be written so that they can be extended, without requiring them to be modified. -- proposed by Bertrand Meyer
In object-oriented programming, OCP can be achieved in various ways. This often requires separating the specification (i.e. interface) of a module from its implementation.
In the design given below, the behavior of the CommandQueue class can be altered by adding more concrete Command subclasses. For example, by including a Delete class alongside List, Sort, and Reset, the CommandQueue can now perform delete commands without modifying its code at all. That is, its behavior was extended without having to modify its code. Hence, it is open to extensions, but closed to modification.
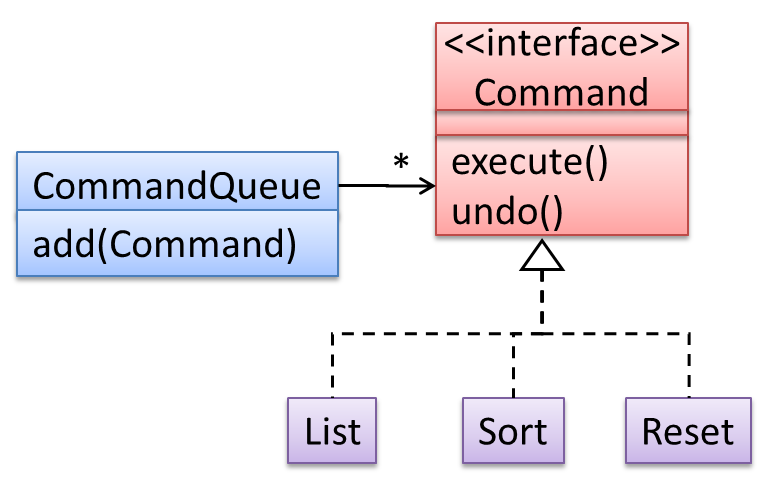
The behavior of a Java generic class can be altered by passing it a different class as a parameter. In the code below, the ArrayList class behaves as a container of Students in one instance and as a container of Admin objects in the other instance, without having to change its code. That is, the behavior of the ArrayList class is extended without modifying its code.
ArrayList students = new ArrayList<Student>();
ArrayList admins = new ArrayList<Admin>();
Liskov Substitution Principle
Liskov substitution principle (LSP): Derived classes must be substitutable for their base classes. -- proposed by Barbara Liskov
LSP sounds the same as substitutability but it goes beyond substitutability; LSP implies that a subclass should not be more restrictive than the behavior specified by the superclass. As you know, Java has language support for substitutability. However, if LSP is not followed, substituting a subclass object for a superclass object can break the functionality of the code.
Suppose the Payroll class depends on the adjustMySalary(int percent) method of the Staff class. Furthermore, the Staff class states that the adjustMySalary method will work for all positive percent values. Both the Admin and Academic classes override the adjustMySalary method.
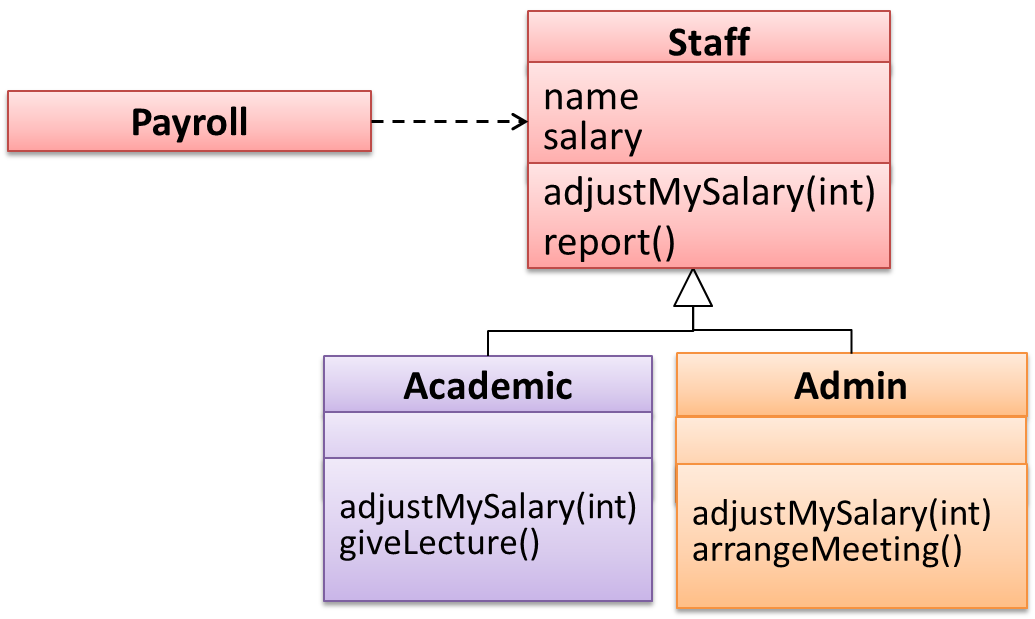
Now consider the following:
- The
Admin#adjustMySalarymethod works for both negative and positive percent values. - The
Academic#adjustMySalarymethod works for percent values1..100only.
In the above scenario,
- The
Adminclass follows LSP because it fulfillsPayroll’s expectation ofStaffobjects (i.e. it works for all positive values). SubstitutingAdminobjects forStaffobjects will not break thePayrollclass functionality. - The
Academicclass violates LSP because it will not work for percent values over100as expected by thePayrollclass. SubstitutingAcademicobjects forStaffobjects can potentially break thePayrollclass functionality.
Separation of Concerns Principle
Separation of concerns principle (SoC): To achieve better modularity, separate the code into distinct sections, such that each section addresses a separate concern. -- Proposed by Edsger W. Dijkstra
A concern in this context is a set of information that affects the code of a computer program.
Examples for concerns:
- A specific feature, such as the code related to the
add employeefeature - A specific aspect, such as the code related to
persistenceorsecurity - A specific entity, such as the code related to the
Employeeentity
Applying reduces functional overlaps among code sections and also limits the ripple effect when changes are introduced to a specific part of the system.
If the code related to persistence is separated from the code related to security, a change to how the data are persisted will not need changes to how the security is implemented.
This principle can be applied at the class level, as well as at higher levels.
The n-tier architecture utilizes this principle. Each layer in the architecture has a well-defined functionality that has no functional overlap with each other.
This principle should lead to higher cohesion and lower coupling.
SECTION: TOOLS
What
The basic UML notations used to represent a class:

A Table class shown in UML notation:
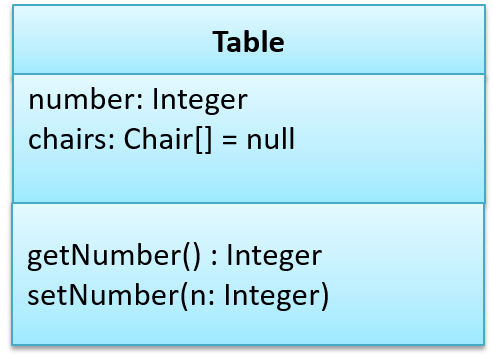
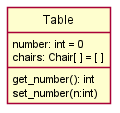
The 'Operations' compartment and/or the 'Attributes' compartment may be omitted if such details are not important for the task at hand. Similarly, some attributes/operations can be omitted if not relevant. 'Attributes' always appear above the 'Operations' compartment. All operations should be in one compartment rather than each operation in a separate compartment. Same goes for attributes.

The visibility of attributes and operations is used to indicate the level of access allowed for each attribute or operation. The types of visibility and their exact meanings depend on the programming language used. Here are some common visibilities and how they are indicated in a class diagram:
+: public-: private#: protected~: package private
Table class with visibilities shown:
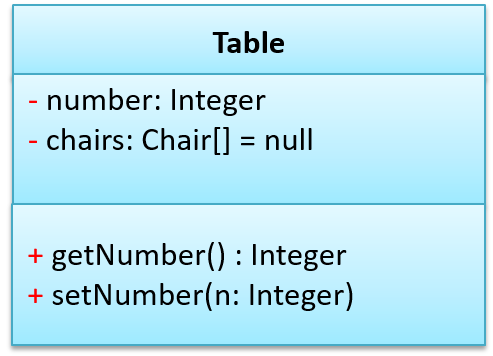
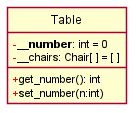
Generic classes can be shown as given below. The notation format is shown on the left, followed by two examples.

What
You should use a solid line to show an association between two classes.

This example shows an association between the Admin class and the Student class:

Navigability
Use arrowheads to indicate the navigability of an association.
In this example, the navigability is unidirectional, and is from the Logic class to the Minefield class. That means if a Logic object L is associated with a Minefield object M, L has a reference to M but M doesn't have a reference to L.
class Logic {
    Minefield minefield;
    // ...
}

class Minefield {
    //...
}
class Logic:

  def __init__(self):
    self.minefield = None

  # ...


class Minefield:
  # ...
Here is an example of a bidirectional navigability; i.e., if a Dog object d is associated with a Man object m, d has a reference to m and m has a reference to d.
class Dog {
    Man man;
    // ...
}

class Man {
    Dog dog;
    // ...
}
class Dog:

  def __init__(self):
    self.man = None

  # ...


class Man:
  def __init__(self):
    self.dog = None

  # ...
Navigability can be shown in class diagrams as well as object diagrams.
According to this object diagram, the given Logic object is associated with and aware of two MineField objects.

Roles
Association Role labels are used to indicate the role played by the classes in the association.

This association represents a marriage between a Man object and a Woman object. The respective roles played by objects of these two classes are husband and wife.

Note how the variable names match closely with the association roles.
class Man {
    Woman wife;
}

class Woman {
    Man husband;
}
class Man:
  def __init__(self):
    self.wife = None # a Woman object

class Woman:
   def __init__(self):
     self.husband = None # a Man object
The role of Student objects in this association is charges (i.e. Admin is in charge of students)

class Admin {
    List<Student> charges;
}
class Admin:
  def __init__(self):
    self.charges = [] # list of Student objects
Labels
Association labels describe the meaning of the association. The arrow head indicates the direction in which the label is to be read.

In this example, the same association is described using two different labels.

- Diagram on the left:
Adminclass is associated withStudentclass because anAdminobject uses aStudentobject. - Diagram on the right:
Adminclass is associated withStudentclass because aStudentobject is used by anAdminobject.
Multiplicity
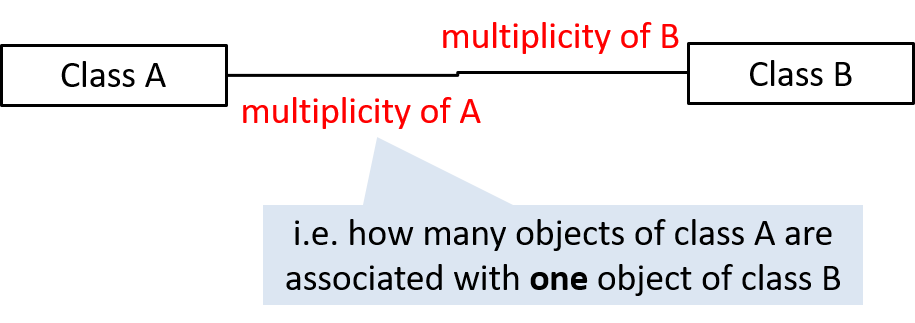
Commonly used multiplicities:
0..1: optional, can be linked to 0 or 1 objects.1: compulsory, must be linked to one object at all times.*: can be linked to 0 or more objects.n..m: the number of linked objects must be withinntominclusive.
In the diagram below, an Admin object administers (is in charge of) any number of students but a Student object must always be under the charge of exactly one Admin object.

In the diagram below,
- Each student must be supervised by exactly one professor. i.e. There cannot be a student who doesn't have a supervisor or has multiple supervisors.
- A professor cannot supervise more than 5 students but can have no students to supervise.
- An admin can handle any number of professors and any number of students, including none.
- A professor/student can be handled by any number of admins, including none.

What
UML uses a dashed arrow to show dependencies.

Two examples of dependencies:

Dependencies vs associations:
- An association is a relationship resulting from one object keeping a reference to another object (i.e., storing an object in an instance variable). While such a relationship forms a dependency, we need not show that as a dependency arrow in the class diagram if the association is already indicated in the diagram. That is, showing a dependency arrow does not add any value to the diagram.
Similarly, an inheritance results in a dependency from the child class to the parent class but we don't show it as a dependency arrow either, for the same reason as above. - Use a dependency arrow to indicate a dependency only if that dependency is not already captured by the diagram in another way (for instance, as an association or an inheritance) e.g., class
Fooaccessing a constant inBarbut there is no association/inheritance fromFootoBar.
What
An association can be shown as an attribute instead of a line.
Association multiplicities and the default value can be shown as part of the attribute using the following notation. Both are optional.
name: type [multiplicity] = default value
The diagram below depicts a multi-player Square Game being played on a board comprising of 100 squares. Each of the squares may be occupied with any number of pieces, each belonging to a certain player.
A Piece may or may not be on a Square. Note how that association can be replaced by an isOn attribute of the Piece class. The isOn attribute can either be null or hold a reference to a Square object, matching the 0..1 multiplicity of the association it replaces. The default value is null.
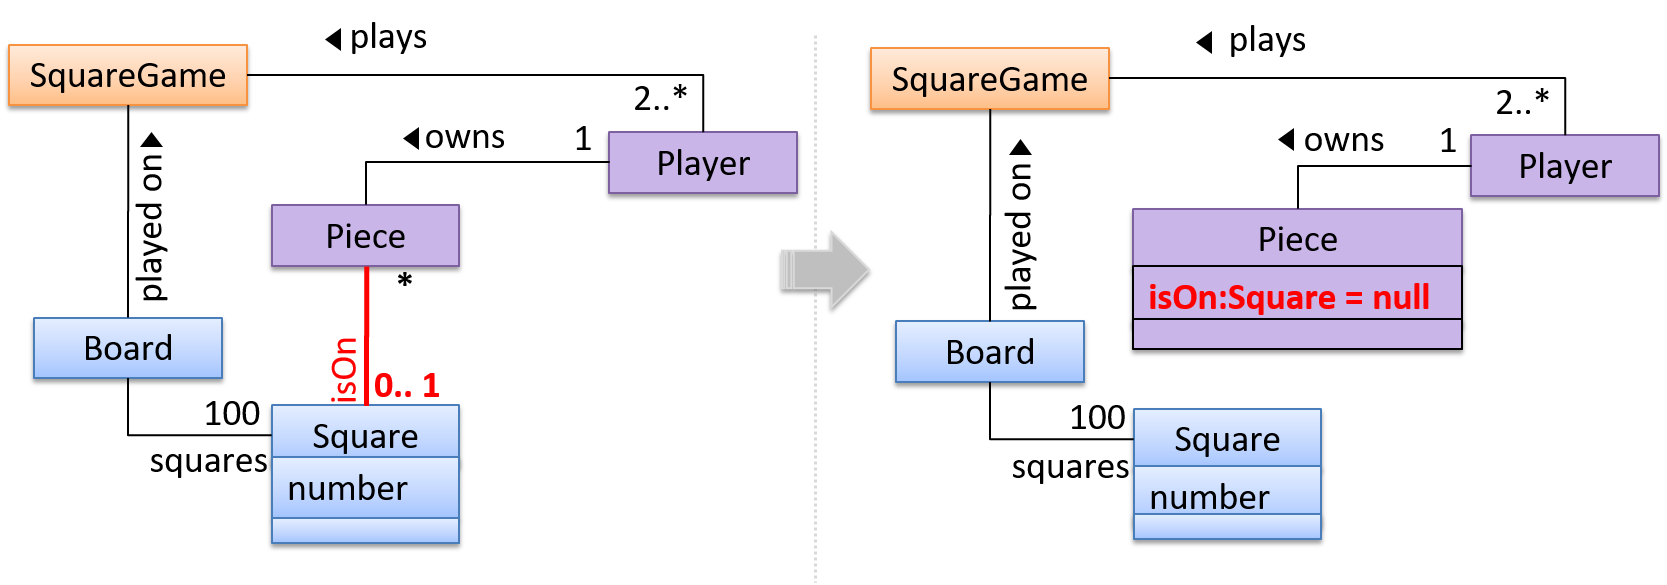
The association that a Board has 100 Squares can be shown in either of these two ways:

Show each association as either an attribute or a line but not both. A line is preferred as it is easier to spot.
What
UML uses a hollow diamond to indicate an aggregation.
Notation:
Example:
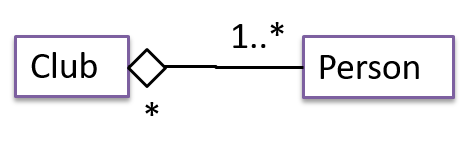
Aggregation vs Composition
The distinction between composition (◆) and aggregation (◇) is rather blurred. Martin Fowler’s famous book UML Distilled advocates omitting the aggregation symbol altogether because using it adds more confusion than clarity.
What
An interface is shown similar to a class with an additional keyword <<interface>>. When a class implements an interface, it is shown similar to class inheritance except a dashed line is used instead of a solid line.
The AcademicStaff and the AdminStaff classes implement the SalariedStaff interface.

Introduction
A UML sequence diagram captures the interactions between multiple objects for a given scenario.
Consider the code below.
class Machine {

    Unit producePrototype() {
        Unit prototype = new Unit();
        for (int i = 0; i < 5; i++) {
            prototype.stressTest();
        }
        return prototype;
    }
}

class Unit {

    public void stressTest() {

    }
}
Here is the sequence diagram to model the interactions for the method call producePrototype() on a Machine object.
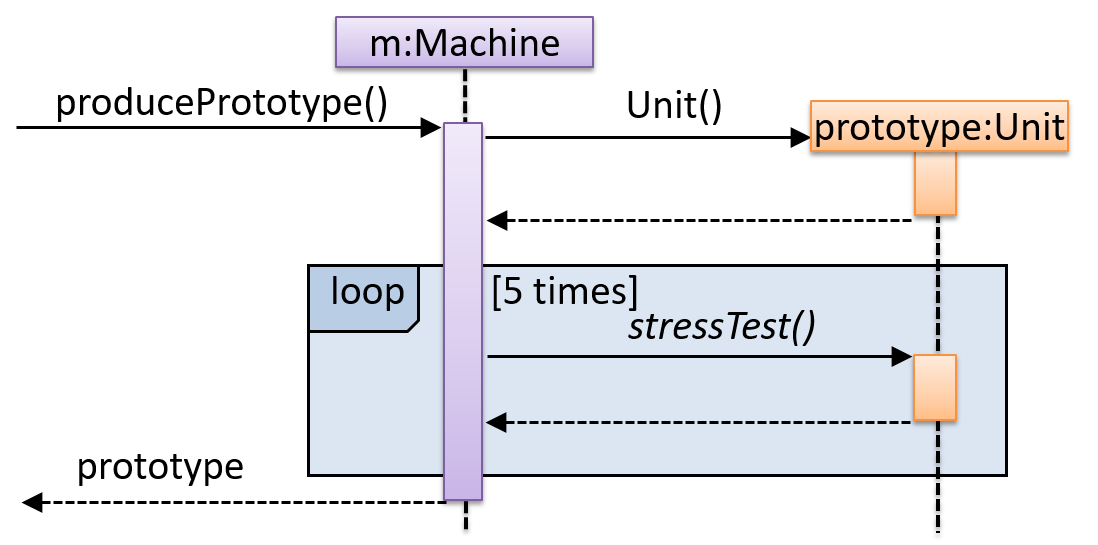
Basic
Notation:

This sequence diagram shows some interactions between a human user and the Text UI of a Minesweeper game.
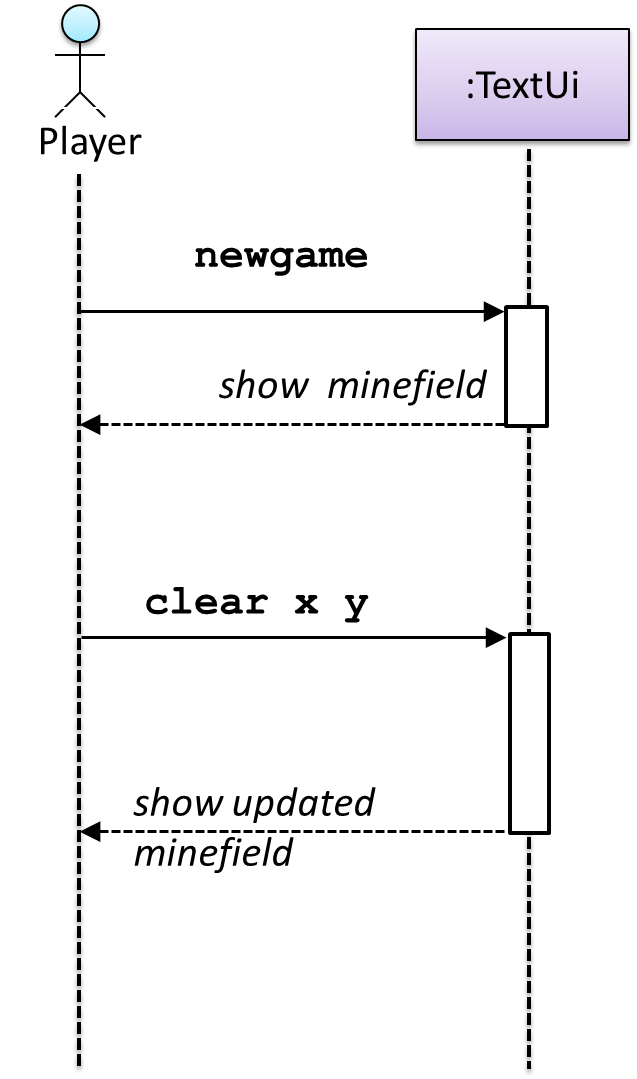
The player runs the newgame action on the TextUi object which results in the TextUi showing the minefield to the player. Then, the player runs the clear x y command; in response, the TextUi object shows the updated minefield.
The :TextUi in the above example denotes an unnamed instance of the class TextUi. If there were two instances of TextUi in the diagram, they can be distinguished by naming them e.g. TextUi1:TextUi and TextUi2:TextUi.
Arrows representing method calls should be solid arrows while those representing method returns should be dashed arrows.
Note that unlike in object diagrams, the class/object name is not underlined in sequence diagrams.
[Common notation error] Activation bar too long: The activation bar of a method cannot start before the method call arrives and a method cannot remain active after the method has returned. In the two sequence diagrams below, the one on the left commits this error because the activation bar starts before the method Foo#xyz() is called and remains active after the method returns.

[Common notation error] Broken activation bar: The activation bar should remain unbroken from the point the method is called until the method returns. In the two sequence diagrams below, the one on the left commits this error because the activation bar for the method Foo#abc() is not contiguous, but appears as two pieces instead.

Object Creation
Notation:

- The arrow that represents the constructor arrives at the side of the box representing the instance.
- The activation bar represents the period the constructor is active.
The Logic object creates a Minefield object.
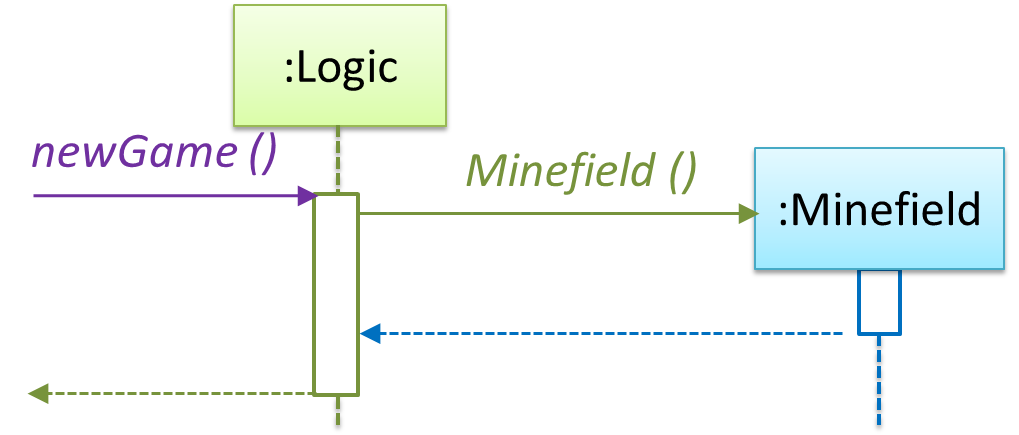
Object Deletion
UML uses an X at the end of the lifeline of an object to show its deletion.
Although object deletion is not that important in languages such as Java that support automatic memory management, you can still show object deletion in UML diagrams to indicate the point at which the object ceases to be used.
Notation:

Note how the below diagram shows the deletion of the Minefield object.

Loops
Notation:

The Player calls the mark x,y command or clear x y command repeatedly until the game is won or lost.

Self Invocation
UML can show a method of an object calling another of its own methods.
Notation:

The markCellAt(...) method of a Logic object is calling its own updateState(...) method.

In this variation, the Book#write() method is calling the Chapter#getText() method which in turn does a call back by calling the getAuthor() method of the calling object.
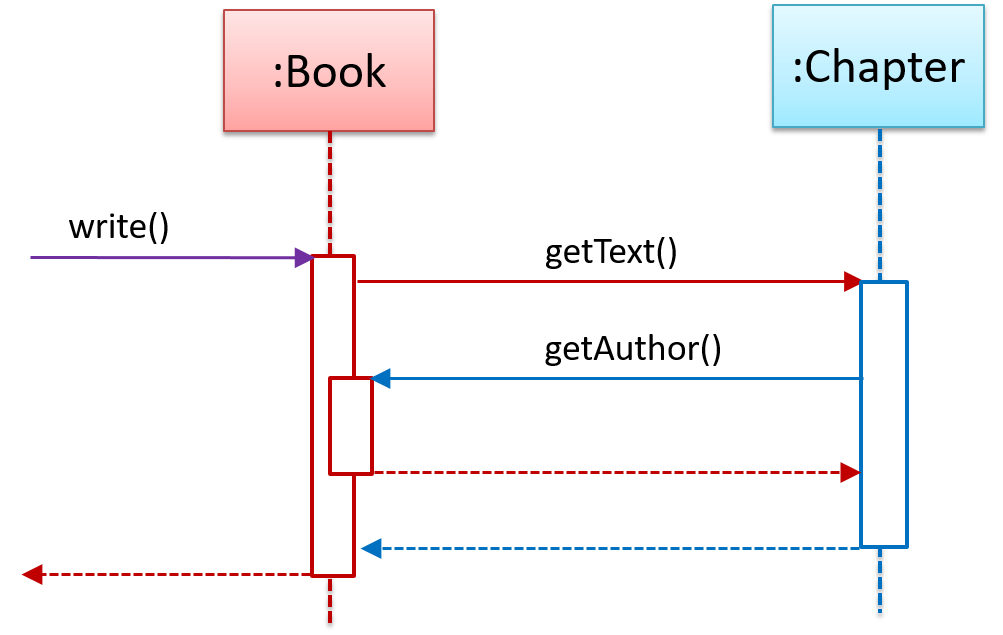
Alternative Paths
UML uses alt frames to indicate alternative paths.
Notation:

Minefield calls the Cell#setMine method if the cell is supposed to be a mined cell, and calls the Cell:setMineCount(...) method otherwise.
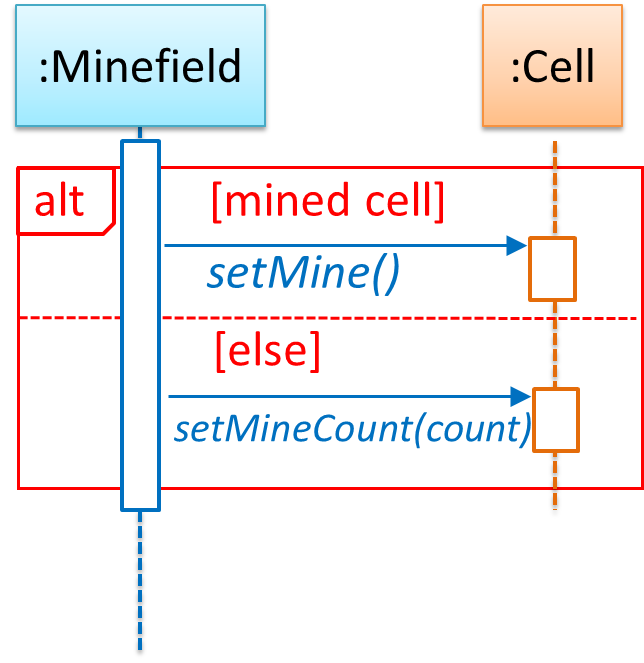
No more than one alternative partitions be executed in an alt frame. That is, it is acceptable for none of the alternative partitions to be executed but it is not acceptable for multiple partitions to be executed.
Optional Paths
UML uses opt frames to indicate optional paths.
Notation:

Logic#markCellAt(...) calls Timer#start() only if it is the first move of the player.
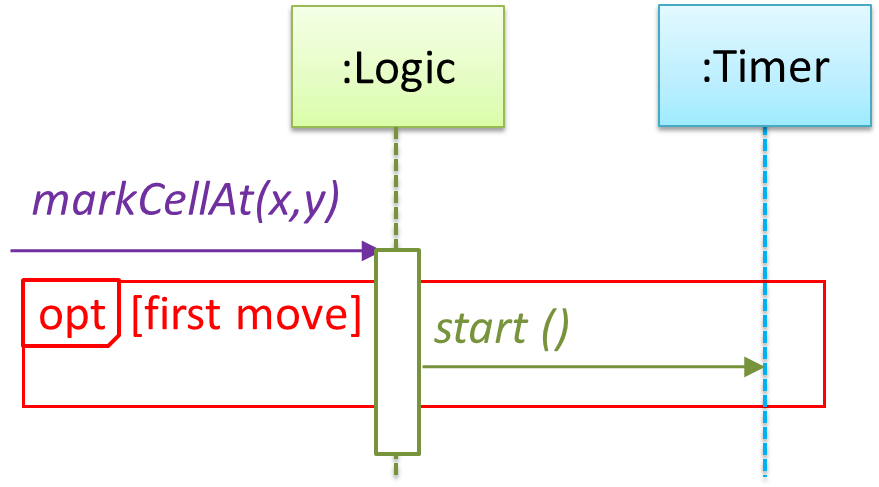
Parallel Paths
UML uses par frames to indicate parallel paths.
Notation:

Logic is calling methods CloudServer#poll() and LocalServer#poll() in parallel.
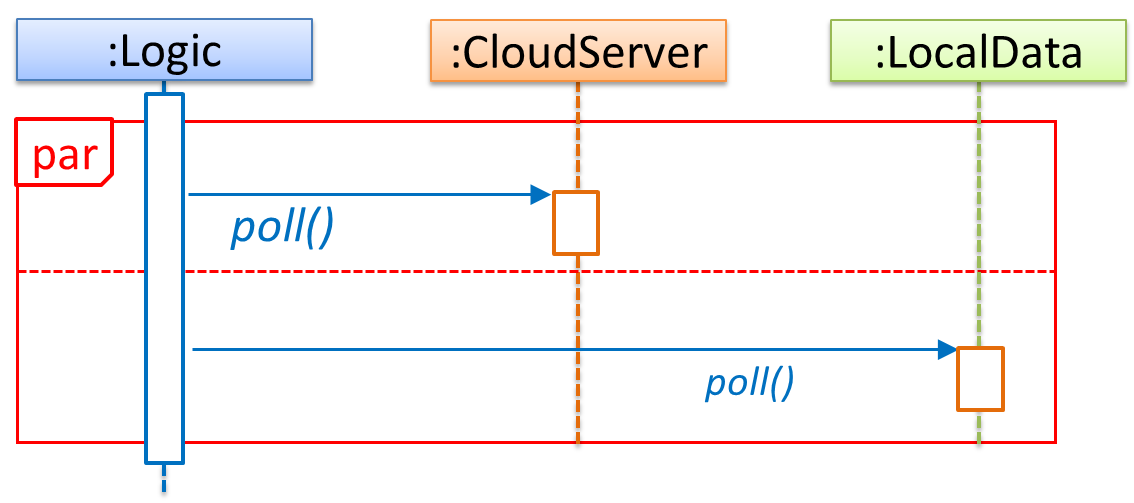
If you show parallel paths in a sequence diagram, the corresponding Java implementation is likely to be multi-threaded because a normal Java program cannot do multiple things at the same time.
Calls to Static Methods
Method calls to static (i.e., class-level) methods are received by the class itself, not an instance of that class. You can use <<class>> to show that a participant is the class itself.
In this example, m calls the static method Person.getMaxAge() and also the setAge() method of a Person object p.
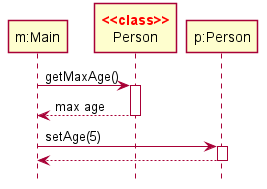
Here is the Person class, for reference:

Minimal Notation
To reduce clutter, optional elements (e.g, activation bars, return arrows) may be omitted if the omission does not result in ambiguities or loss of . Informal operation descriptions such as those given in the example below can be used, if more precise details are not required for the task at hand.
A minimal sequence diagram
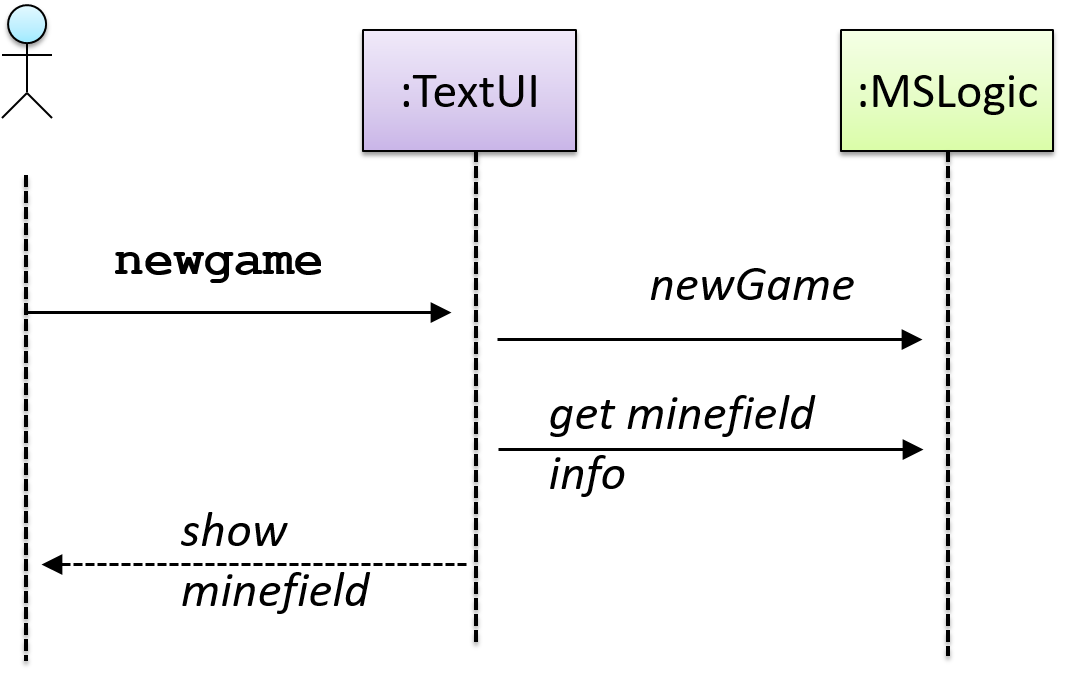
Introduction
An object diagram shows an object structure at a given point of time.
An example object diagram:

Objects
Notation:

Notes:
- The class name and object name e.g.
car1:Carare underlined. objectName:ClassNameis meant to say 'an instance ofClassNameidentified asobjectName'.- Unlike classes, there is no compartment for methods.
- Attributes compartment can be omitted if it is not relevant to the task at hand.
- Object name can be omitted too e.g.
:Carwhich is meant to say 'an unnamed instance of a Car object'.
Some example objects:

Object vs Class Diagrams
Compared to the notation for class diagrams, object diagrams differ in the following ways:
- Show objects instead of classes:
- Instance name may be shown
- There is a
:before the class name - Instance and class names are underlined
- Methods are omitted
- Multiplicities are omitted. Reason: an association line in an object diagram represents a connection to exactly one object (i.e., the multiplicity is always 1).
Furthermore, multiple object diagrams can correspond to a single class diagram.
Both object diagrams are derived from the same class diagram shown earlier. In other words, each of these object diagrams shows ‘an instance of’ the same class diagram.
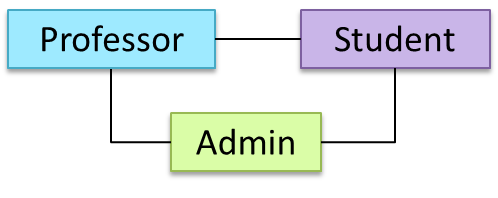

When the class diagram has an inheritance relationship, the object diagram should show either an object of the parent class or the child class, but not both.
Suppose Employee is a child class of the Person class. The class diagram will be as follows:

Now, how do you show an Employee object named jake?
 This is not correct, as there should be only one object.
 This is OK.
 This is OK, as
 jakeis aPersontoo. That is, we can show the parent class instead of the child class if the child class doesn't matter to the purpose of the diagram (i.e., the reader of this diagram will not need to know thatjakeis in fact anEmployee).
Association labels/roles can be omitted unless they add value (e.g., showing them is useful if there are multiple associations between the two classes in concern -- otherwise you wouldn't know which association the object diagram is showing)
Consider this class diagram and the object diagram:
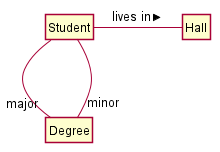
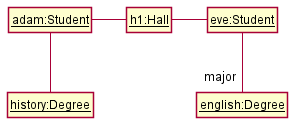
We can clearly see that both Adam and Eve lives in hall h1 (i.e., OK to omit the association label lives in) but we can't see if History is Adam's major or his minor (i.e., the diagram should have included either an association label or a role there). In contrast, we can see Eve is an English major.
init: Getting started
Let's take your first few steps in your Git (with GitHub) journey.
0. Take a peek at the full picture(?). Optionally, if you are the sort who prefers to have some sense of the full picture before you get into the nitty-gritty details, watch the video in the panel below:
1. The first step is to install SourceTree, which is Git + a GUI for Git. If you prefer to use Git via the command line (i.e., without a GUI), you can install Git instead.
2. Next, initialize a repository. Let us assume you want to version control content in a specific directory. In that case, you need to initialize a Git repository in that directory. Here are the steps:
Create a directory for the repo (e.g., a directory named things).
Windows: Click File → Clone/New…. Click on Create button.
Mac: New... → Create New Repository.
Enter the location of the directory (Windows version shown below) and click Create.
Go to the things folder and observe how a hidden folder .git has been created.
Windows: you might have to configure Windows Explorer to show hidden files.
Open a Git Bash Terminal.
If you installed SourceTree, you can click the Terminal button to open a GitBash terminal.
Navigate to the things directory.
Use the command git init which should initialize the repo.
$ git init
Initialized empty Git repository in c:/repos/things/.git/
You can use the command ls -a to view all files, which should show the .git directory that was created by the previous command.
$ ls -a
.  ..  .git
You can also use the git status command to check the status of the newly-created repo. It should respond with something like the following:
git status
# On branch master
#
# Initial commit
#
nothing to commit (create/copy files and use "git add" to track)
As you see above, this textbook explains how to use Git via SourceTree (a GUI client) as well as via the Git CLI. If you are new to Git, we recommend you learn both the GUI method and the CLI method -- The GUI method will help you visualize the result better while the CLI method is more universal (i.e., you will not be tied to any GUI) and more flexible/powerful.
If you are new to Git, we caution you against using Git or GitHub features that come with the IDE as it is better to learn Git independent of any other tool. Similarly, using clients provided by GitHub (e.g., GitHub Desktop GUI client) will make it harder for you to separate Git features from GitHub features.
commit: Saving changes to history
After initializing a repository, Git can help you with revision controlling files inside the working directory. However, it is not automatic. It is up to you to tell Git which of your changes (aka revisions) should be committed to its memory for later use. Saving changes into Git's memory in that way is often called committing and a change saved to the revision history is called a commit.
Working directory: the root directory revision-controlled by Git (e.g., the directory in which the repo was initialized).
Commit (noun): a change (aka a revision) saved in the Git revision history.
(verb): the act of creating a commit i.e., saving a change in the working directory into the Git revision history.
Here are the steps you can follow to learn how to work with Git commits:
1. Do some changes to the content inside the working directory e.g., create a file named fruits.txt in the things directory and add some dummy text to it.
2. Observe how the file is detected by Git.
The file is shown as ‘unstaged’.

You can use the git status command to check the status of the working directory.
git status
# On branch master
#
# Initial commit
#
# Untracked files:
#   (use "git add <file>..." to include in what will be committed)
#
#   a.txt
nothing added to commit but untracked files present (use "git add" to track)
3. Stage the changes to commit: Although Git has detected the file in the working directory, it will not do anything with the file unless you tell it to. Suppose you want to commit the current changes to the file. First, you should stage the file.
Stage (verb): Instructing Git to prepare a file for committing.
Select the fruits.txt and click on the Stage Selected button.

fruits.txt should appear in the Staged files panel now.
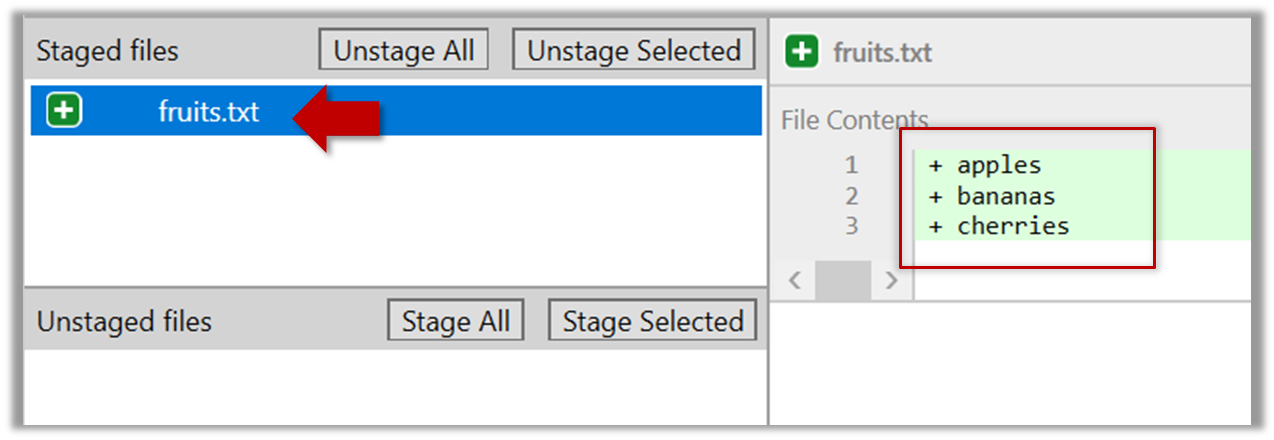
You can use the stage or the add command (they are synonyms, add is the more popular choice) to stage files.
git add fruits.txt
git status
# On branch master
#
# Initial commit
#
# Changes to be committed:
#   (use "git rm --cached <file>..." to unstage)
#
#       new file:   fruits.txt
#
4. Commit the staged version of fruits.txt.
Click the Commit button, enter a commit message e.g. add fruits.txt into the text box, and click Commit.
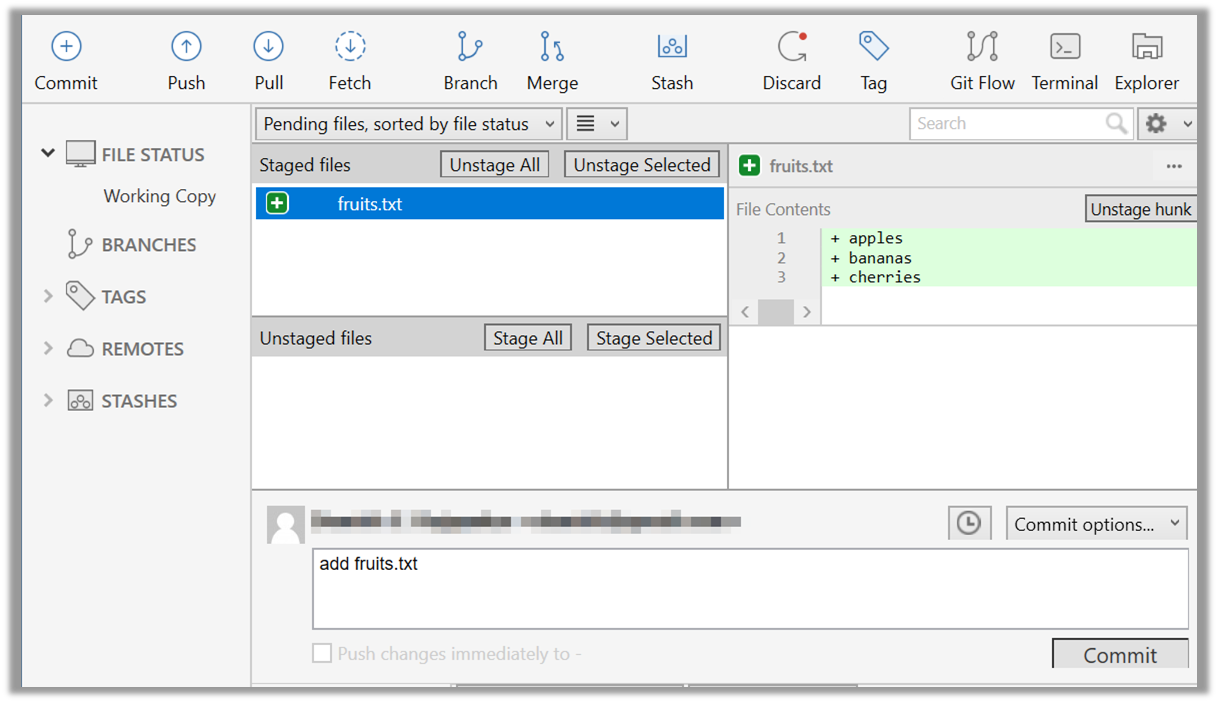
Use the commit command to commit. The -m switch is used to specify the commit message.
git commit -m "Add fruits.txt"
You can use the log command to see the commit history.
git log
commit 8fd30a6910efb28bb258cd01be93e481caeab846
Author: … < … @... >
Date:   Wed Jul 5 16:06:28 2017 +0800

  Add fruits.txt
Note the existence of something called the master branch. Git allows you to have multiple branches (i.e. it is a way to evolve the content in parallel) and Git auto-creates a branch named master on which the commits go on by default.
5. Do a few more commits.
Make some changes to
fruits.txt(e.g. add some text and delete some text). Stage the changes, and commit the changes using the same steps you followed before. You should end up with something like this.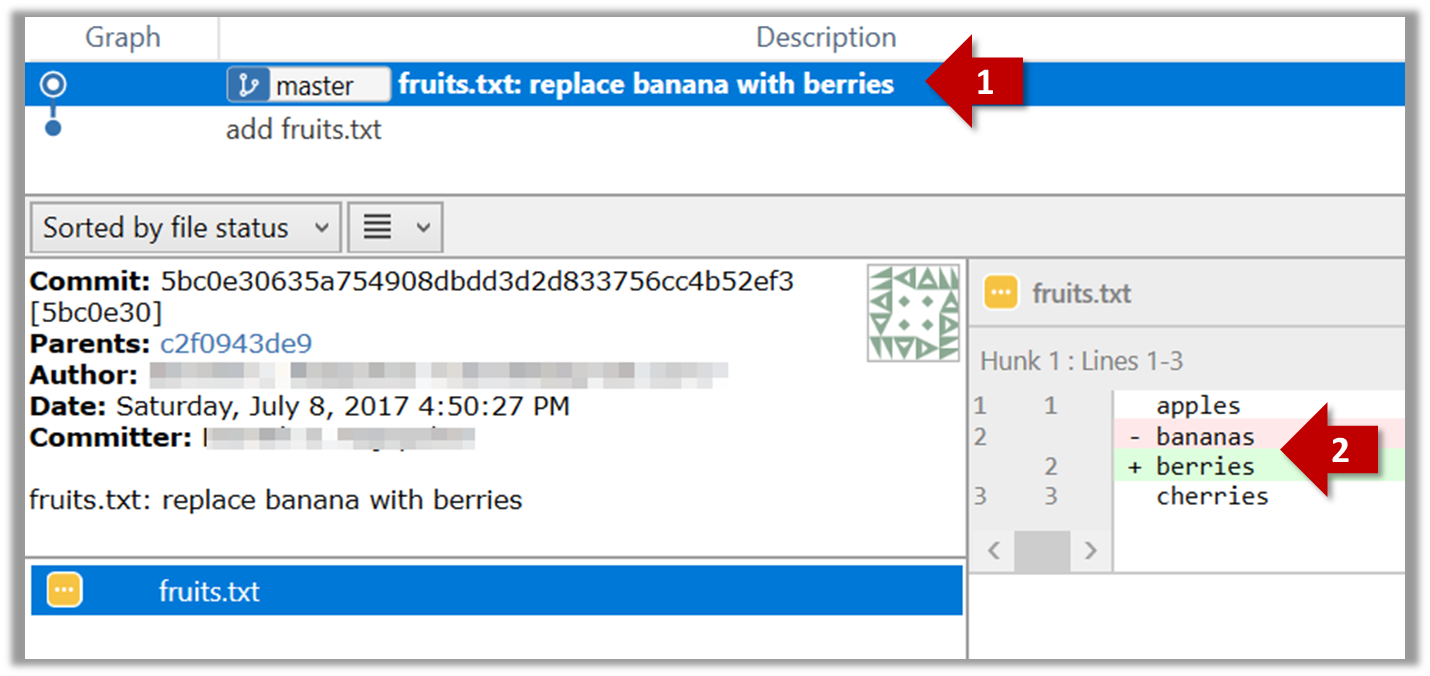
Next, add two more files
colors.txtandshapes.txtto the same working directory. Add a third commit to record the current state of the working directory.
6. See the revision graph: Note how commits form a path-like structure aka the revision tree/graph. In the revision graph, each commit is shown as linked to its 'parent' commit (i.e., the commit before it).
To see the revision graph, click on the History item on the menu on the right edge of SourceTree.
The gitk command opens a rudimentary graphical view of the revision graph.
Omitting files from revision control
Often, there are files inside the Git working folder that you don't want to revision-control e.g., temporary log files. Follow the steps below to learn how to configure Git to ignore such files.
1. Add a file into your repo's working folder that you supposedly don't want to revision-control e.g., a file named temp.txt. Observe how Git has detected the new file.
2. Tell Git to ignore that file:
The file should be currently listed under Unstaged files. Right-click it and choose Ignore…. Choose Ignore exact filename(s) and click OK.
Observe that a file named .gitignore has been created in the working directory root and has the following line in it.
temp.txt
Create a file named .gitignore in the working directory root and add the following line in it.
temp.txt
The .gitignore file
The .gitignore file tells Git which files to ignore when tracking revision history. That file itself can be either revision controlled or ignored.
To version control it (the more common choice – which allows you to track how the
.gitignorefile changes over time), simply commit it as you would commit any other file.To ignore it, follow the same steps you followed above when you set Git to ignore the
temp.txtfile.It supports file patterns e.g., adding
temp/*.tmpto the.gitignorefile prevents Git from tracking any.tmpfiles in thetempdirectory.
More information about the .gitignore file: git-scm.com/docs/gitignore
Files recommended to be omitted from version control
- Binary files generated when building your project e.g.,
*.class,*.jar,*.exe(reasons: 1. no need to version control these files as they can be generated again from the source code 2. Revision control systems are optimized for tracking text-based files, not binary files. - Temporary files e.g., log files generated while testing the product
- Local files i.e., files specific to your own computer e.g., local settings of your IDE
- Sensitive content i.e., files containing sensitive/personal information e.g., credential files, personal identification data (especially, if there is a possibility of those files getting leaked via the revision control system).
tag: Naming commits
Each Git commit is uniquely identified by a hash e.g., d670460b4b4aece5915caf5c68d12f560a9fe3e4. As you can imagine, using such an identifier is not very convenient for our day-to-day use. As a solution, Git allows adding a more human-readable tag to a commit e.g., v1.0-beta.
Here's how you can tag a commit in a local repo (e.g. in the samplerepo-things repo):
Right-click on the commit (in the graphical revision graph) you want to tag and choose Tag….
Specify the tag name e.g. v1.0 and click Add Tag.
The added tag will appear in the revision graph view.

To add a tag to the current commit as v1.0,
git tag –a v1.0
To view tags
git tag
To learn how to add a tag to a past commit, go to the ‘Git Basics – Tagging’ page of the git-scm book and refer the ‘Tagging Later’ section.
Remember to push tags to the repo. A normal push does not include tags.
# push a specific tag
git push origin v1.0b

# push all tags
git push origin --tags
After adding a tag to a commit, you can use the tag to refer to that commit, as an alternative to using the hash.
diff: Comparing revisions
Git can show you what changed in each commit.
To see which files changed in a commit, click on the commit. To see what changed in a specific file in that commit, click on the file name.

git show < part-of-commit-hash >
Example:
git show 251b4cf
commit 5bc0e30635a754908dbdd3d2d833756cc4b52ef3
Author: … < … >
Date:   Sat Jul 8 16:50:27 2017 +0800

    fruits.txt: replace banana with berries

diff --git a/fruits.txt b/fruits.txt
index 15b57f7..17f4528 100644
--- a/fruits.txt
+++ b/fruits.txt
@@ -1,3 +1,3 @@
 apples
-bananas
+berries
 cherries
Git can also show you the difference between two points in the history of the repo.
Select the two points you want to compare using Ctrl+Click. The differences between the two selected versions will show up in the bottom half of SourceTree, as shown in the screenshot below.
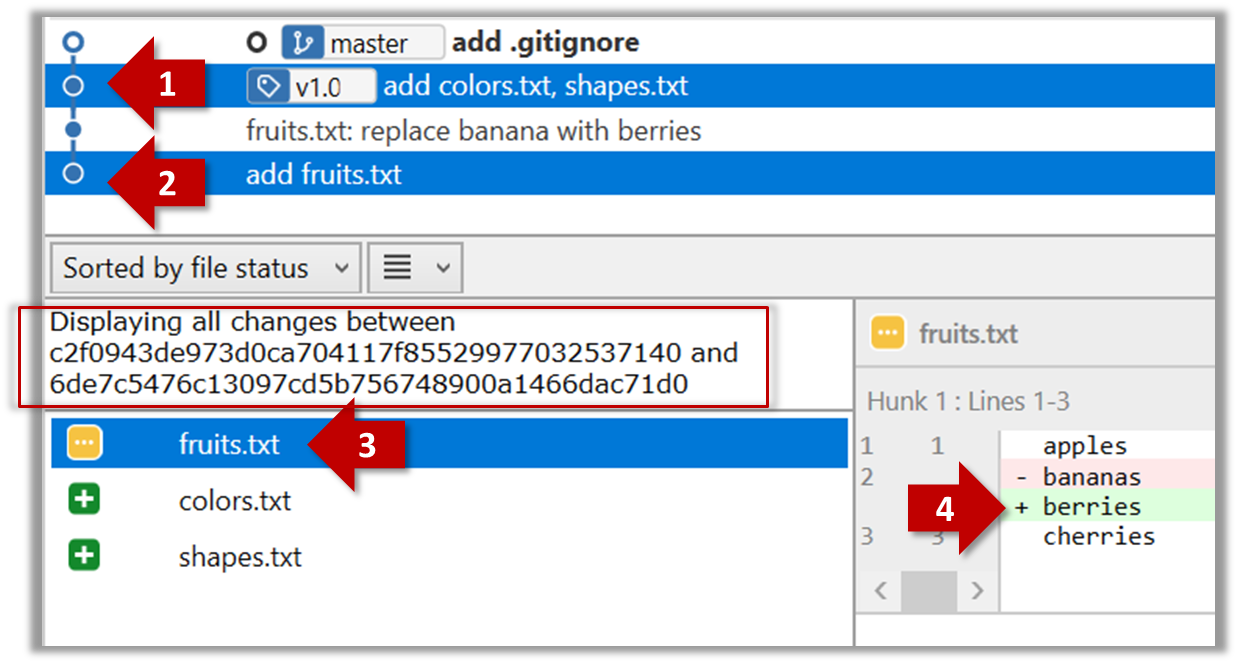
The same method can be used to compare the current state of the working directory (which might have uncommitted changes) to a point in the history.

The diff command can be used to view the differences between two points of the history.
git diff: shows the changes (uncommitted) since the last commit.git diff 0023cdd..fcd6199: shows the changes between the points indicated by commit hashes.
Note that when using a commit hash in a Git command, you can use only the first few characters (e.g., first 7-10 chars) as that's usually enough for Git to locate the commit.git diff v1.0..HEAD: shows changes that happened from the commit tagged asv1.0to the most recent commit.
checkout: Retrieving a specific revision
Git can load a specific version of the history to the working directory. Note that if you have uncommitted changes in the working directory, you need to stash them first to prevent them from being overwritten.
Double-click the commit you want to load to the working directory, or right-click on that commit and choose Checkout....
Click OK to the warning about ‘detached HEAD’ (similar to below).

The specified version is now loaded to the working folder, as indicated by the HEAD label. HEAD is a reference to the currently checked out commit.

If you checkout a commit that comes before the commit in which you added the .gitignore file, Git will now show ignored files as ‘unstaged modifications’ because at that stage Git hasn’t been told to ignore those files.
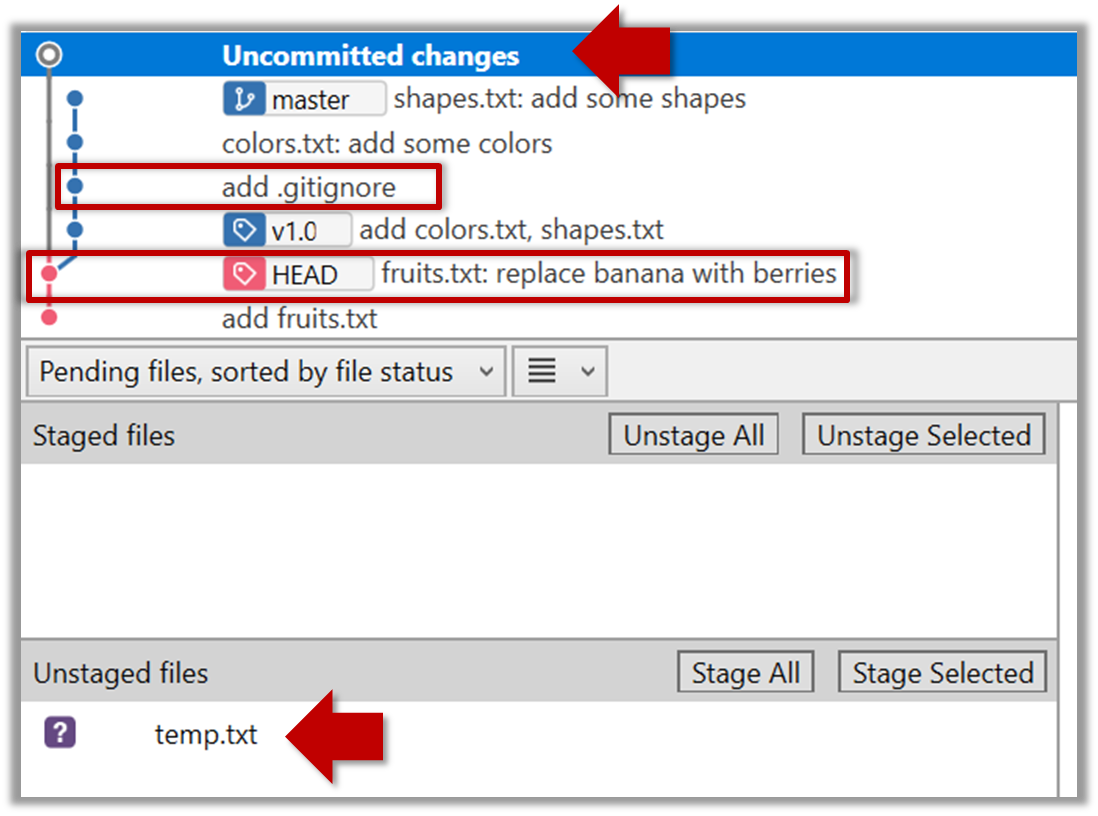
To go back to the latest commit, double-click it.
Use the checkout <commit-identifier> command to change the working directory to the state it was in at a specific past commit.
git checkout v1.0: loads the state as at commit taggedv1.0git checkout 0023cdd: loads the state as at commit with the hash0023cddgit checkout HEAD~2: loads the state that is 2 commits behind the most recent commit
For now, you can ignore the warning about ‘detached HEAD’.
stash: Shelving changes temporarily
You can use Git's stash feature to temporarily shelve (or stash) changes you've made to your working copy so that you can work on something else, and then come back and re-apply the stashed changes later on. -- adapted from Atlassian
Follow this article from SourceTree creators. Note that the GUI shown in the article is slightly outdated but you should be able to map it to the current GUI.
Follow this article from Atlassian.
clone: Copying a repo
Given below is an example scenario you can try yourself to learn Git cloning.
Suppose you want to clone the sample repo samplerepo-things to your computer.
Note that the URL of the GitHub project is different from the URL you need to clone a repo in that GitHub project. e.g.
GitHub project URL: https://github.com/se-edu/samplerepo-things
Git repo URL: https://github.com/se-edu/samplerepo-things.git (note the .git at the end)
File → Clone / New… and provide the URL of the repo and the destination directory.
You can use the clone command to clone a repo.
Follow the instructions given here.
pull, fetch: Downloading data from other repos
Here's a scenario you can try in order to learn how to pull commits from another repo to yours.
1. Clone a repo (e.g., the repo used in [Git & GitHub → Clone]) to be used for this activity.
2. Delete the last few commits to simulate cloning the repo a few commits ago.
Right-click the target commit (i.e. the commit that is 2 commits behind the tip) and choose Reset current branch to this commit.

Choose the Hard - … option and click OK.

This is what you will see.

Note the following (cross refer the screenshot above):
Arrow marked as a: The local repo is now at this commit, marked by the master label.
Arrow marked as b: The origin/master label shows what is the latest commit in the master branch in the remote repo.
Use the reset command to delete commits at the tip of the revision history.
git reset --hard HEAD~2
Now, your local repo state is exactly how it would be if you had cloned the repo 2 commits ago, as if somebody has added two more commits to the remote repo since you cloned it.
3. Pull from the other repo: To get those missing commits to your local repo (i.e. to sync your local repo with upstream repo) you can do a pull.
Click the Pull button in the main menu, choose origin and master in the next dialog, and click OK.

Now you should see something like this where master and origin/master are both pointing the same commit.

git pull origin
You can also do a fetch instead of a pull in which case the new commits will be downloaded to your repo but the working directory will remain at the current commit. To move the current state to the latest commit that was downloaded, you need to do a merge. A pull is a shortcut that does both those steps in one go.
Working with multiple remotes
When you clone a repo, Git automatically adds a remote repo named origin to your repo configuration. As you know, you can pull commits from that repo. As you know, a Git repo can work with remote repos other than the one it was cloned from.
To communicate with another remote repo, you can first add it as a remote of your repo. Here is an example scenario you can follow to learn how to pull from another repo:
Open the local repo in SourceTree. Suggested: Use your local clone of the
samplerepo-thingsrepo.Choose
Repository→Repository Settingsmenu option.Add a new remote to the repo with the following values.
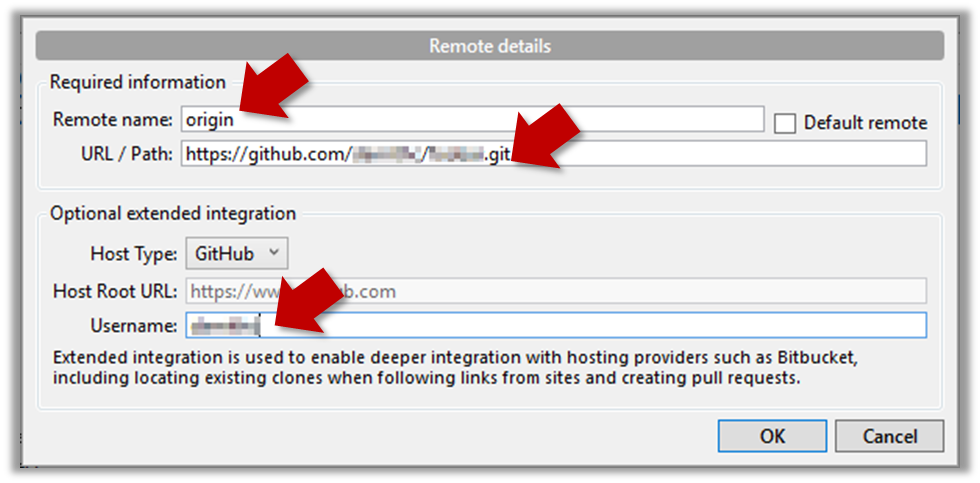
Remote name: the name you want to assign to the remote repo e.g.,upstream1URL/path: the URL of your repo (ending in.git) that. Suggested:https://github.com/se-edu/samplerepo-things-2.git(samplerepo-things-2is another repo that has a shared history withsamplerepo-things)Username: your GitHub username
Now, you can pull from the added repo as you did before but choose the remote name of the repo you want to pull from (instead of
origin):

If the
Remote branch to pulldropdown is empty, click theRefreshbutton on its right.If the pull from the
samplerepo-things-2was successful, you should have received one more commit into your local repo.
Navigate to the folder containing the local repo.
Set the new remote repo as a remote of the local repo.
command:git remote add {remote_name} {remote_repo_url}
e.g.,git remote add upstream1 https://github.com/johndoe/foobar.gitNow you can pull from the new remote.
e.g.,git pull upstream1 master
Fork: Creating a remote copy
Given below is a scenario you can try in order to learn how to fork a repo:.
0. Create a GitHub account if you don't have one yet.
1. Go to the GitHub repo you want to fork e.g., samplerepo-things
2. Click on the ![]() button on the top-right corner. In the next step, choose to fork to your own account or to another GitHub organization that you are an admin of.
button on the top-right corner. In the next step, choose to fork to your own account or to another GitHub organization that you are an admin of.
GitHub does not allow you to fork the same repo more than once to the same destination. If you want to re-fork, you need to delete the previous fork.
push: Uploading data to other repos
Given below is a scenario you can try in order to learn how to push commits to a remote repo hosted on GitHub:
1. Fork an existing GitHub repo (e.g., samplerepo-things) to your GitHub account.
2. Clone the fork (not the original) to your computer.
3. Commit some changes in your local repo.
4. Push the new commits to your fork on GitHub
Click the Push button on the main menu, ensure the settings are as follows in the next dialog, and click the Push button on the dialog.

Tags are not included in a normal push. Remember to tick Push all tags when pushing to the remote repo if you want them to be pushed to the repo.
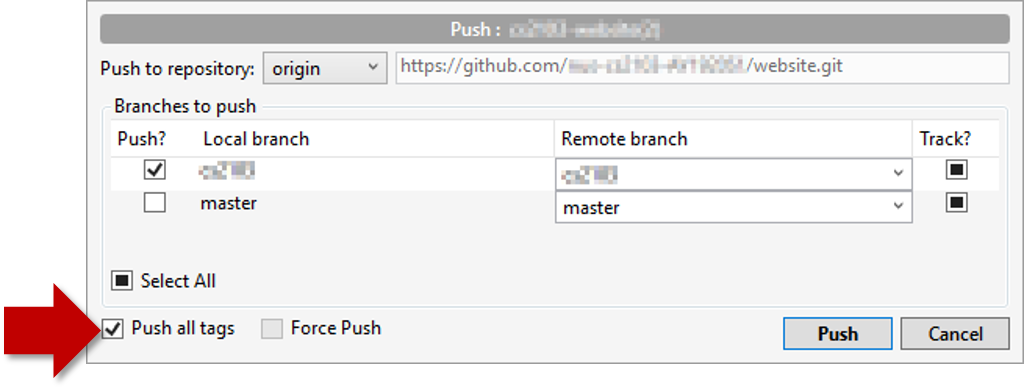
Use the command git push origin master. Enter your Github username and password when prompted.
Tags are not included in a normal push. To push a tag, use this command: git push origin <tag_name> e.g. git push origin v1.0
You can push to repos other than the one you cloned from, as long as the target repo and your repo have a shared history.
- Add the GitHub repo URL as a remote, if you haven't done so already.
- Push to the target repo.
Push your repo to the new remote the usual way, but select the name of target remote instead of origin and remember to select the Track checkbox.

Push to the new remote the usual way e.g., git push upstream1 master (assuming you gave the name upstream1 to the remote).
You can even push an entire local repository to GitHub, to form an entirely new remote repository. For example, you created a local repo and worked with it for a while but now you want to upload it onto GitHub (as a backup or to share it with others). The steps are given below.
1. Create an empty remote repo on GitHub.
Login to your GitHub account and choose to create a new Repo.
In the next screen, provide a name for your repo but keep the
Initialize this repo ...tick box unchecked.
Note the URL of the repo. It will be of the form
https://github.com/{your_user_name}/{repo_name}.git.
e.g.,https://github.com/johndoe/foobar.git(note the.gitat the end)

2. Add the GitHub repo URL as a remote of the local repo. You can give it the name origin (or any other name).
3. Push the repo to the remote.

Push each branch to the new remote the usual way but use the -u flag to inform Git that you wish to the branch.
e.g., git push -u origin master
branch: Doing multiple parallel changes
Git supports branching, which allows you to do multiple parallel changes to the content of a repository.
A Git branch is simply a named label pointing to a commit. The HEAD label indicates which branch you are on. Git creates a branch named master by default. When you add a commit, it goes into the branch you are currently on, and the branch label (together with the HEAD label) moves to the new commit.
Given below is an illustration of how branch labels move as branches evolve.

- There is only one branch (i.e.,
master) and there is only one commit on it. - A new commit has been added. The
masterand theHEADlabels have moved to the new commit. - A new branch
fix1has been added. The repo has switched to the new branch too (hence, theHEADlabel is attached to thefix1branch). - A new commit (
c) has been added. The current branch labelfix1moves to the new commit, together with theHEADlabel. - The repo has switched back to the
masterbranch.
- A new commit (
d) has been added. Themasterlabel has moved to that commit. - The repo has switched back to the
fix1branch and added a new commit (e) to it. - The repo has switched to the
masterbranch and thefix1branch has been merged into themasterbranch, creating a merge commitf. The repo is currently on themasterbranch.
Follow the steps below to learn how to work with branches. You can use any repo you have on your computer (e.g. a clone of the samplerepo-things) for this.
0. Observe that you are normally in the branch called master.
git status
on branch master
1. Start a branch named feature1 and switch to the new branch.
Click on the Branch button on the main menu. In the next dialog, enter the branch name and click Create Branch.

Note how the feature1 is indicated as the current branch.

You can use the branch command to create a new branch and the checkout command to switch to a specific branch.
git branch feature1
git checkout feature1
One-step shortcut to create a branch and switch to it at the same time:
git checkout –b feature1
2. Create some commits in the new branch. Just commit as per normal. Commits you add while on a certain branch will become part of that branch.
Note how the master label and the HEAD label moves to the new commit (The HEAD label of the local repo is represented as in SourceTree).
3. Switch to the master branch. Note how the changes you did in the feature1 branch are no longer in the working directory.
Double-click the master branch.

git checkout master
4. Add a commit to the master branch. Let’s imagine it’s a bug fix.
To keep things simple for the time being, this commit should not involve the same content that you changed in the feature1 branch. To be on the safe side, this commit can change an entirely different file.

5. Switch back to the feature1 branch (similar to step 3).
6. Merge the master branch to the feature1 branch, giving an end-result like the following. Also note how Git has created a merge commit.

Right-click on the master branch and choose merge master into the current branch. Click OK in the next dialog.
git merge master
The objective of that merge was to sync the feature1 branch with the master branch. Observe how the changes you did in the master branch (i.e. the imaginary bug fix) is now available even when you are in the feature1 branch.
Instead of merging master to feature1, an alternative is to rebase the feature1 branch. However, rebasing is an advanced feature that requires modifying past commits. If you modify past commits that have been pushed to a remote repository, you'll have to force-push the modified commit to the remote repo in order to update the commits in it.
7. Add another commit to the feature1 branch.
8. Switch to the master branch and add one more commit.
9. Merge feature1 to the master branch, giving and end-result like this:

Right-click on the feature1 branch and choose Merge....
git merge feature1
10. Create a new branch called add-countries, switch to it, and add some commits to it (similar to steps 1-2 above). You should have something like this now:

Avoid this common rookie mistake!
Always remember to switch back to the master branch before creating a new branch. If not, your new branch will be created on top of the current branch.
11. Go back to the master branch and merge the add-countries branch onto the master branch (similar to steps 8-9 above). While you might expect to see something like the following,

... you are likely to see something like this instead:

That is because Git does a fast forward merge if possible. Seeing that the master branch has not changed since you started the add-countries branch, Git has decided it is simpler to just put the commits of the add-countries branch in front of the master branch, without going into the trouble of creating an extra merge commit.
It is possible to force Git to create a merge commit even if fast forwarding is possible.
Tick the box shown below when you merge a branch:

Use the --no-ff switch (short for no fast forward):
git merge --no-ff add-countries
Pushing a branch to a remote repo
Here's how to push a branch to a remote repo:
Here's how to push a branch named add-intro to your own fork of a repo named samplerepo-pr-practice:
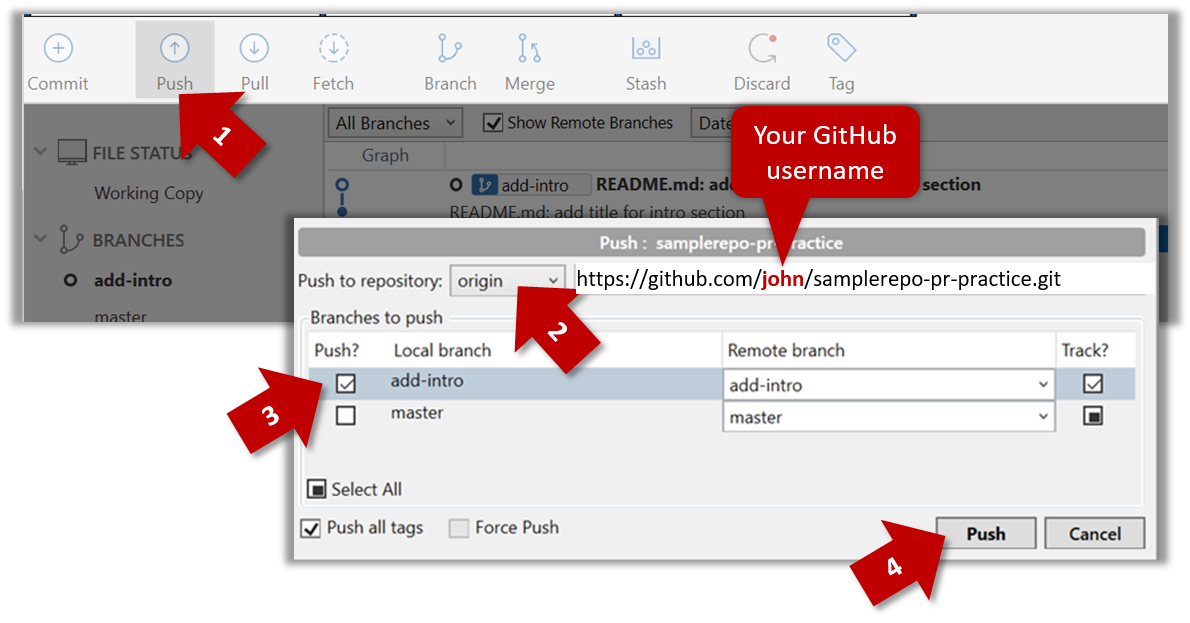
Normally: git push {remote repository} {branch}. Examples:
git push origin masterpushes themasterbranch to the repo namedorigin(i.e., the repo you cloned from)git push upstream-repo add-intropushes theadd-introbranch to the repo namedupstream-repo
If pushing a branch you created locally to the remote for the first time, add the -u flag to get the local branch to track the new upstream branch:
e.g., git push -u origin add-intro
See git-scm.com/docs/git-push for details of the push command.
Dealing with merge conflicts
Merge conflicts happen when you try to combine two incompatible versions (e.g., merging a branch to another but each branch changed the same part of the code in a different way).
Here are the steps to simulate a merge conflict and use it to learn how to resolve merge conflicts.
0. Create an empty repo or clone an existing repo, to be used for this activity.
1. Start a branch named fix1 in the repo. Create a commit that adds a line with some text to one of the files.
2. Switch back to master branch. Create a commit with a conflicting change i.e. it adds a line with some different text in the exact location the previous line was added.

3. Try to merge the fix1 branch onto the master branch. Git will pause mid-way during the merge and report a merge conflict. If you open the conflicted file, you will see something like this:
COLORS
------
blue
<<<<<< HEAD
black
=======
green
>>>>>> fix1
red
white
4. Observe how the conflicted part is marked between a line starting with <<<<<< and a line starting with >>>>>>, separated by another line starting with =======.
Highlighted below is the conflicting part that is coming from the master branch:
blue
<<<<<< HEAD
black
=======
green
>>>>>> fix1
red
This is the conflicting part that is coming from the fix1 branch:
blue
<<<<<< HEAD
black
=======
green
>>>>>> fix1
red
5. Resolve the conflict by editing the file. Let us assume you want to keep both lines in the merged version. You can modify the file to be like this:
COLORS
------
blue
black
green
red
white
6. Stage the changes, and commit.
Creating PRs
Suppose you want to propose some changes to a GitHub repo (e.g., samplerepo-pr-practice) as a pull request (PR). Here is a scenario you can try in order to learn how to create PRs:
1. Fork the repo onto your GitHub account.
2. Clone it onto your computer.
3. Commit your changes e.g., add a new file with some contents and commit it.
- Option A - Commit changes to the
masterbranch - Option B - Commit to a new branch e.g., create a branch named
add-intro(remember to switch to themasterbranch before creating a new branch) and add your commit to it.
4. Push the branch you updated (i.e., master branch or the new branch) to your fork, as explained here.
5. Initiate the PR creation:
Go to your fork.
Click on the Pull requests tab followed by the New pull request button. This will bring you to the 'Comparing changes' page.
Set the appropriate target repo and the branch that should receive your PR, using the
base repositoryandbasedropdowns. e.g.,
base repository: se-edu/samplerepo-pr-practice base: masterNormally, the default value shown in the dropdown is what you want but in case your fork has , the default may not be what you want.
Indicate which repo:branch contains your proposed code, using the
head repositoryandcomparedropdowns. e.g.,
head repository: myrepo/samplerepo-pr-practice compare: master
6. Verify the proposed code: Verify that the diff view in the page shows the exact change you intend to propose. If it doesn't, as necessary.
7. Submit the PR:
Click the Create pull request button.
Fill in the PR name and description e.g.,
Name:Add an introduction to the README.md
Description:Add some paragraph to the README.md to explain ... Also add a heading ...If you want to indicate that the PR you are about to create is 'still work in progress, not yet ready', click on the dropdown arrow in the Create pull request button and choose
Create draft pull requestoption.Click the Create pull request button to create the PR.
Go to the receiving repo to verify that your PR appears there in the
Pull requeststab.
The next step of the PR life cycle is the PR review. The members of the repo that received your PR can now review your proposed changes.
- If they like the changes, they can merge the changes to their repo, which also closes the PR automatically.
- If they don't like it at all, they can simply close the PR too i.e., they reject your proposed change.
- In most cases, they will add comments to the PR to suggest further changes. When that happens, GitHub will notify you.
You can update the PR along the way too. Suppose PR reviewers suggested a certain improvement to your proposed code. To update your PR as per the suggestion, you can simply modify the code in your local repo, commit the updated code to the same master branch, and push to your fork as you did earlier. The PR will auto-update accordingly.
Sending PRs using the master branch is less common than sending PRs using separate branches. For example, suppose you wanted to propose two bug fixes that are not related to each other. In that case, it is more appropriate to send two separate PRs so that each fix can be reviewed, refined, and merged independently. But if you send PRs using the master branch only, both fixes (and any other change you do in the master branch) will appear in the PRs you create from it.
To create another PR while the current PR is still under review, create a new branch (remember to switch back to the master branch first), add your new proposed change in that branch, and create a new PR following the steps given above.
It is possible to create PRs within the same repo e.g., you can create a PR from branch feature-x to the master branch, within the same repo. Doing so will allow the code to be reviewed by other developers (using PR review mechanism) before it is merged.
Reviewing PRs
The PR review stage is a dialog between the PR author and members of the repo that received the PR, in order to refine and eventually merge the PR.
Given below are some steps you can follow when reviewing a PR.
1. Locate the PR:
- Go to the GitHub page of the repo.
- Click on the Pull requests tab.
- Click on the PR you want to review.
2. Read the PR description. It might contain information relevant to reviewing the PR.
3. Click on the Files changed tab to see the diff view.
4. Add review comments:
- Hover over the line you want to comment on and click on the icon that appears on the left margin. That should create a text box for you to enter your comment.
- To give a comment related to multiple lines, click-and-drag the icon. The result will look like this:

- To give a comment related to multiple lines, click-and-drag the icon. The result will look like this:
- Enter your comment.
- This page @SE-EDU/guides has some best practices PR reviewers can follow.
- To suggest an in-line code change, click on this icon:
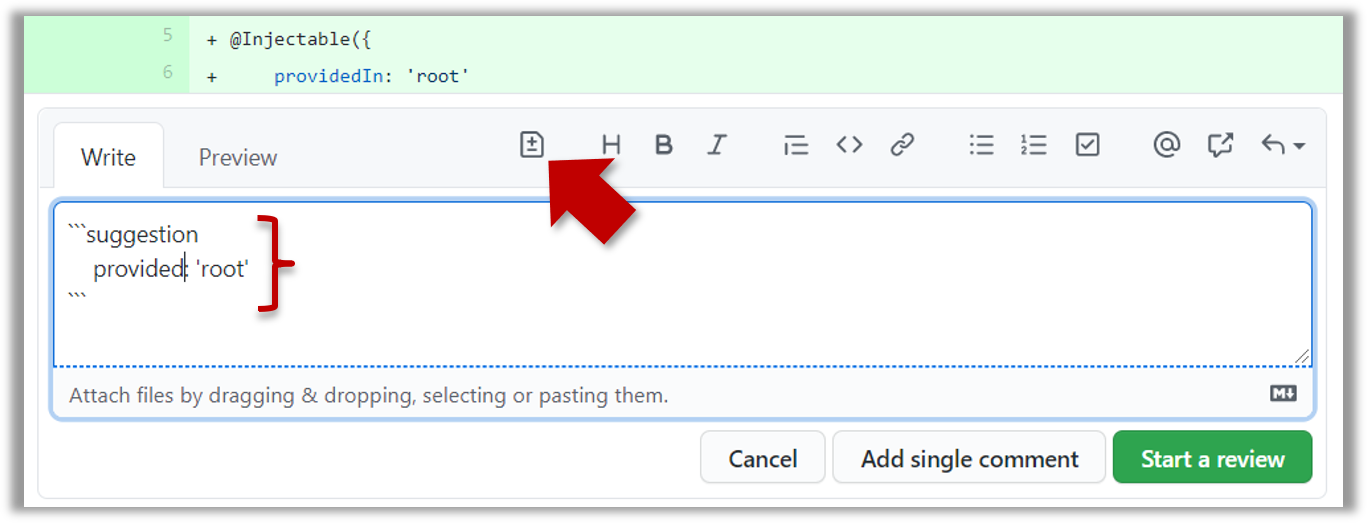
The comment will look like this to the viewers:
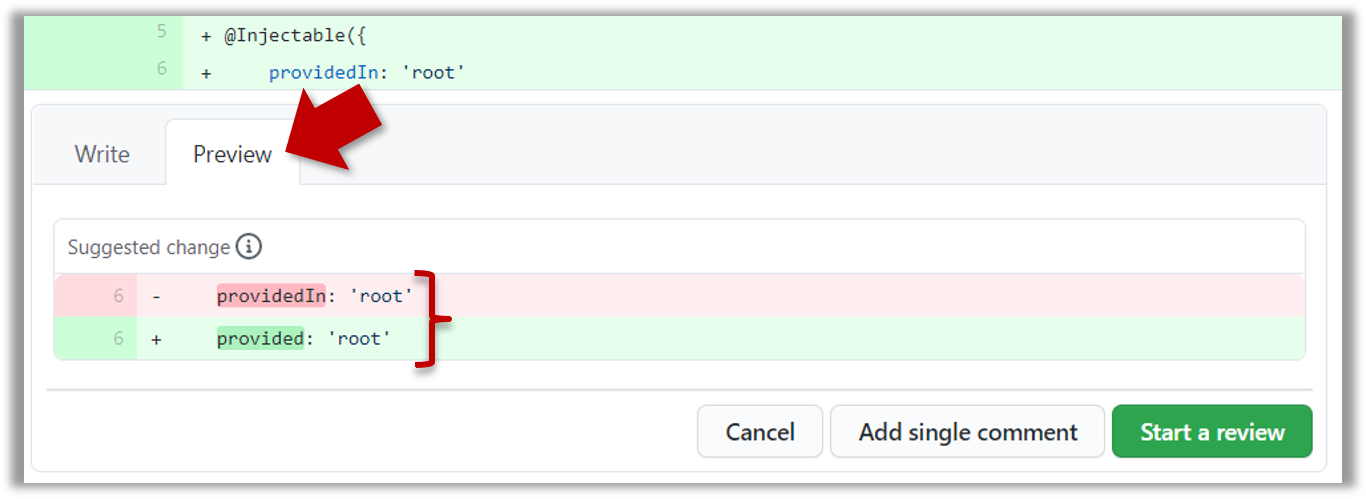
- After typing in the comment, click on the Start a review button (not the Add single comment button. This way, your comment is saved but not visible to others yet. It will be visible to others only when you have finished the entire review.
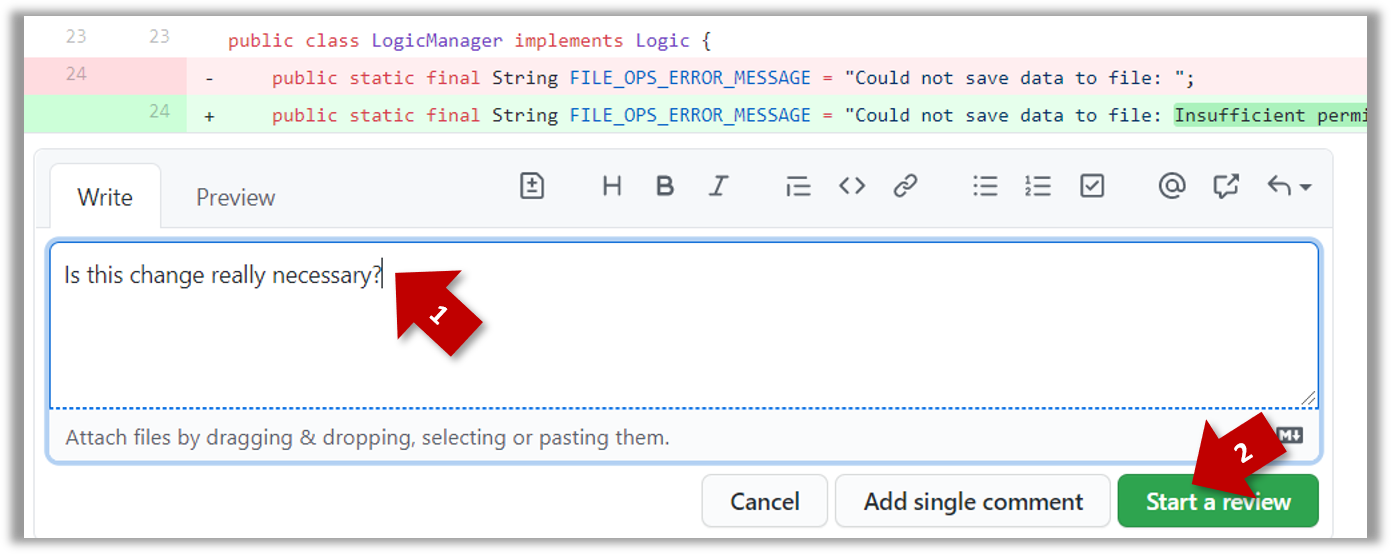
- Repeat the above steps to add more comments.
5. Submit the review:
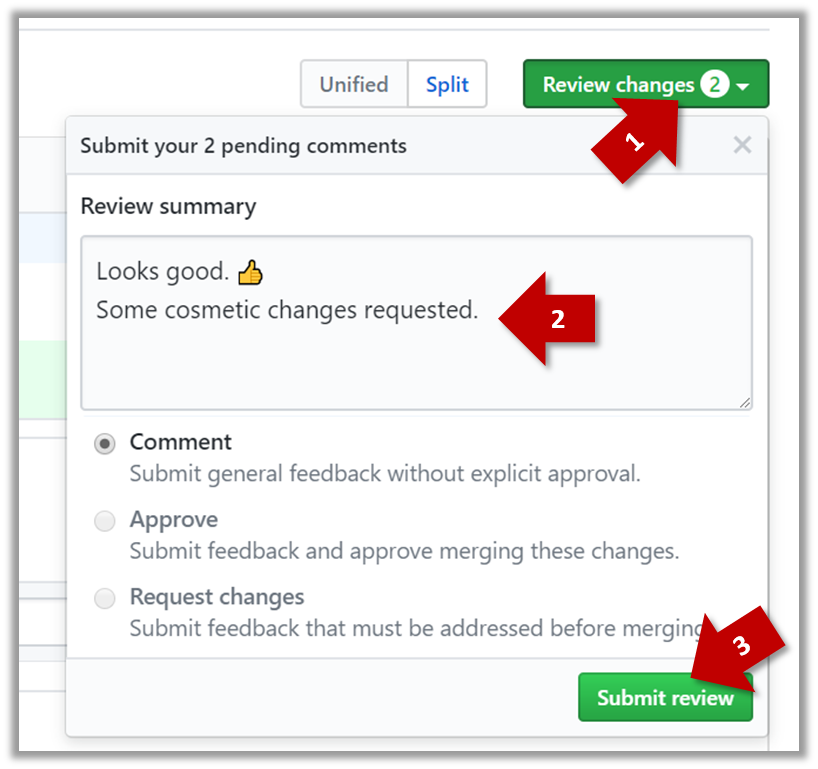
- When there are no more comments to add, click on the Review changes button (on the top right of the diff page).
- Type in an overall comment about the PR, if any. e.g.,
Overall, I found your code easy to read for the most part except a few places where the nesting was too deep. I noted a few minor coding standard violations too. Some of the classes are getting quite long. Consider splitting into smaller classes if that makes sense.LGTMis often used in such overall comments, to indicateLooks good to merge.
nitis another such term, used to indicate minor flaws e.g.,LGTM, almost. Just a few nits to fix.. - Choose
Approve,Comment, orRequest changesoption as appropriate and click on the Submit review button.
Merging PRs
Let's look at the steps involved in merging a PR, assuming the PR has been reviewed, refined, and approved for merging already.
Preparation: If you would like to try merging a PR yourself, you can create a dummy PR in the following manner.
- Fork any repo (e.g., samplerepo-pr-practice).
- Clone in to your computer.
- Create a new branch e.g., (
feature1) and add some commits to it. - Push the new branch to the fork.
- Create a PR from that branch to the
masterbranch in your fork. Yes, it is possible to create a PR within the same repo.
1. Locate the PR to be merged in your repo's GitHub page.
2. Click on the Conversation tab and scroll to the bottom. You'll see a panel containing the PR status summary.

3. If the PR is not merge-able in the current state, the Merge pull request will not be green. Here are the possible reasons and remedies:
- Problem: The PR code is out-of-date, indicated by the message This branch is out-of-date with the base branch. That means the repo's
masterbranch has been updated since the PR code was last updated.- If the PR author has allowed you to update the PR and you have sufficient permissions, GitHub will allow you to update the PR simply by clicking the Update branch on the right side of the 'out-of-date' error message. If that option is not available, post a message in the PR requesting the PR author to update the PR.
- Problem: There are merge conflicts, indicated by the message This branch has conflicts that must be resolved. That means the repo's
masterbranch has been updated since the PR code was last updated, in a way that the PR code conflicts with the currentmasterbranch. Those conflicts must be resolved before the PR can be merged.- If the conflicts are simple, GitHub might allow you to resolve them using the Web interface.
- If that option is not available, post a message in the PR requesting the PR author to update the PR.
3. Merge the PR by clicking on the Merge pull request button, followed by the Confirm merge button. You should see a Pull request successfully merged and closed message after the PR is merged.
- You can choose between three merging options by clicking on the down-arrow in the Merge pull request button. If you are new to Git and GitHub, the
Create merge commitoptions are recommended.
Next, sync your local repos (and forks). Merging a PR simply merges the code in the upstream remote repository in which it was merged. The PR author (and other members of the repo) needs to pull the merged code from the upstream repo to their local repos and push the new code to their respective forks to sync the fork with the upstream repo.
Forking Workflow
You can follow the steps in the simulation of a forking workflow given below to learn how to follow such a workflow.
This activity is best done as a team.
Step 1. One member: set up the team org and the team repo.
Create a GitHub organization for your team. The org name is up to you. We'll refer to this organization as team org from now on.
Add a team called
developersto your team org.Add team members to the
developersteam.Fork se-edu/samplerepo-workflow-practice to your team org. We'll refer to this as the team repo.
Add the forked repo to the
developersteam. Give write access.
Step 2. Each team member: create PRs via own fork.
Fork that repo from your team org to your own GitHub account.
Create a branch named
add-{your name}-info(e.g.add-johnTan-info) in the local repo.Add a file
yourName.mdinto themembersdirectory (e.g.,members/jonhTan.md) containing some info about you into that branch.Push that branch to your fork.
Create a PR from that branch to the
masterbranch of the team repo.
Step 3. For each PR: review, update, and merge.
[A team member (not the PR author)] Review the PR by adding comments (can be just dummy comments).
[PR author] Update the PR by pushing more commits to it, to simulate updating the PR based on review comments.
[Another team member] Approve and merge the PR using the GitHub interface.
[All members] Sync your local repo (and your fork) with upstream repo. In this case, your upstream repo is the repo in your team org.
- The basic mechanism for this has two steps (which you can do using Git CLI or any Git GUI):
(1) First, pull from the upstream repo -- this will update your clone with the latest code from the upstream repo.
(2) Then, push the updated branches to your fork. This will also update any PRs from your fork to the upstream repo. - Some alternatives mechanisms to achieve the same can be found in this GitHub help page.
If you are new to Git, we recommend that you use the above two-step mechanism instead, so that you get a better view of what's actually happening behind the scene.
- The basic mechanism for this has two steps (which you can do using Git CLI or any Git GUI):
Step 4. Create conflicting PRs.
[One member]: Update README: In the
masterbranch, remove John Doe and Jane Doe from theREADME.md, commit, and push to the main repo.[Each team member] Create a PR to add yourself under the
Team Memberssection in theREADME.md. Use a new branch for the PR e.g.,add-johnTan-name.
Step 5. Merge conflicting PRs one at a time. Before merging a PR, you’ll have to resolve conflicts.
[Optional] A member can inform the PR author (by posting a comment) that there is a conflict in the PR.
[PR author] Resolve the conflict locally:
- Pull the
masterbranch from the repo in your team org. - Merge the pulled
masterbranch to your PR branch. - Resolve the merge conflict that crops up during the merge.
- Push the updated PR branch to your fork.
- Pull the
[Another member or the PR author]: Merge the de-conflicted PR: When GitHub does not indicate a conflict anymore, you can go ahead and merge the PR.


